How to use Parental Controls in macOS to limit access to features and apps

Providing children and others access to your Mac can be an issue if left unmonitored, as giving free reign could cause the younger users to see inappropriate material or perform unwanted actions that could drastically affect the Mac's performance. AppleInsider explains how to use the Parental Controls already built into macOS to limit what can be done on accounts.
Many families will likely set up multiple accounts on a Mac for each person who will use it. This provides a number of things to younger users starting to use computers, including privacy for their own files as well as those of other users, and the ability for concerned adults to restrict what is accessible on each account.
The Parental Controls available to administrators are fairly straightforward, and can be applied to practically any account set up on a Mac. This also includes guest accounts, locking down the available access to only the most essential functions.
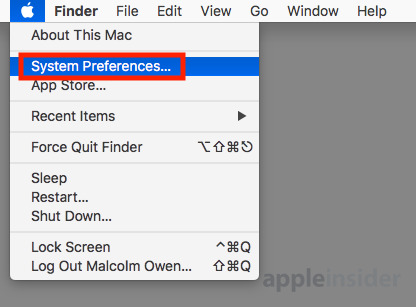
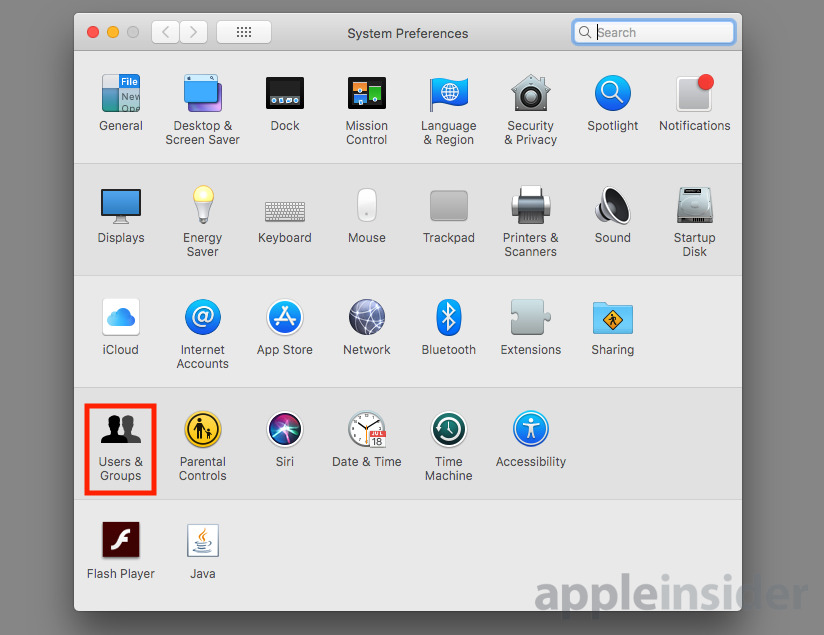
Select the Apple logo in the menu and select System Preferences. Navigate to Users & Groups, which is on the fourth row.
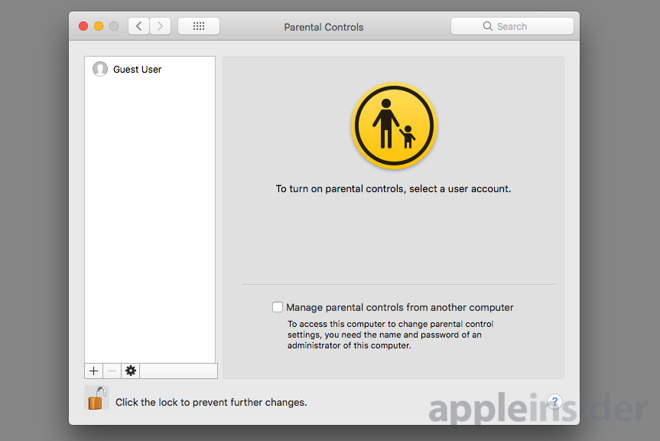
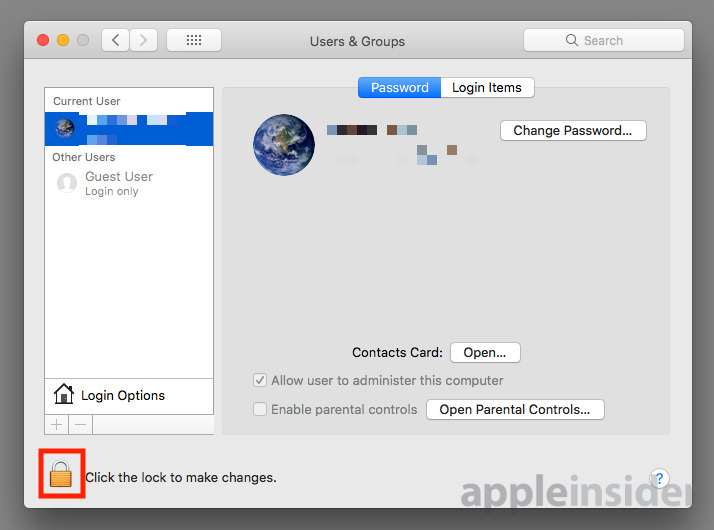
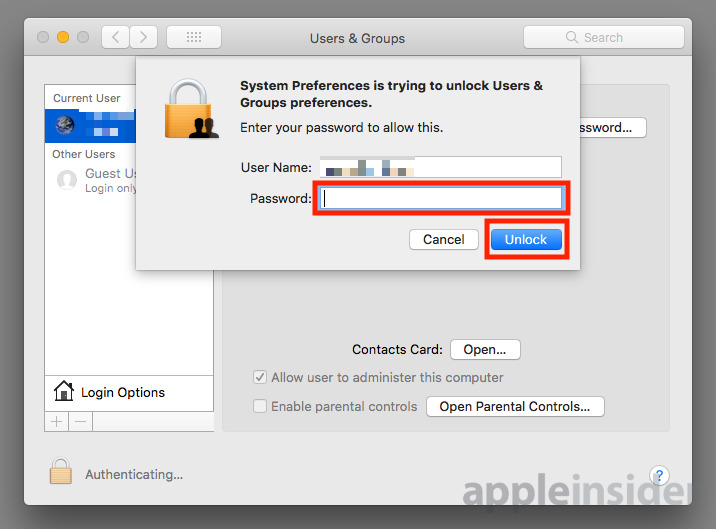
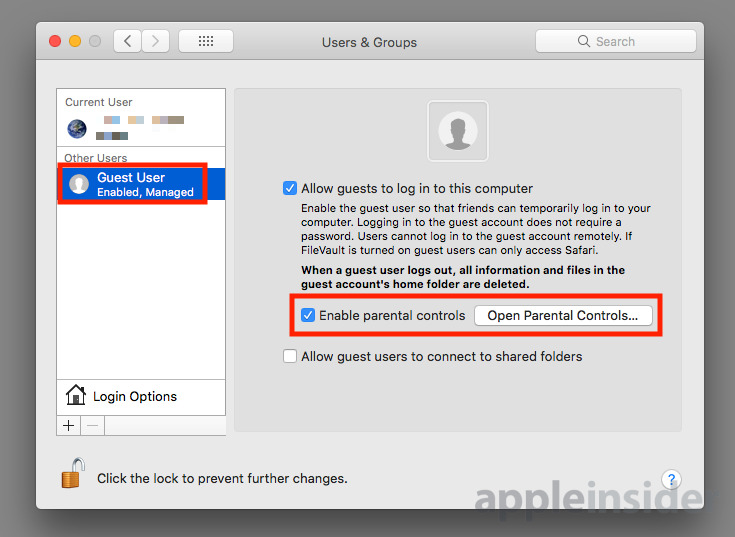
Click the lock in the bottom left and authenticate with an administrator account. Once changes are able to be made, click the account you want to restrict on the left-hand side, and tick the box marked Enable parental controls.
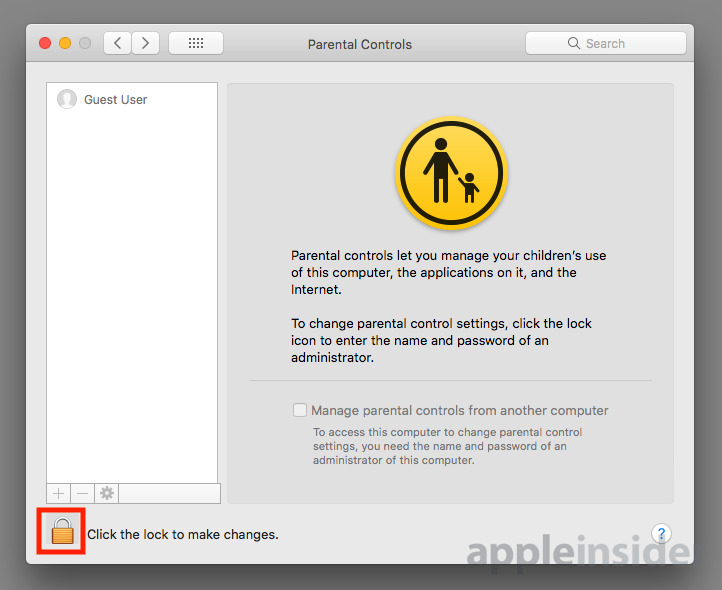
At this point, click the unlocked lock to prevent any changes on this screen.
To disable access, follow the same process, but untick the Enable parental controls box.
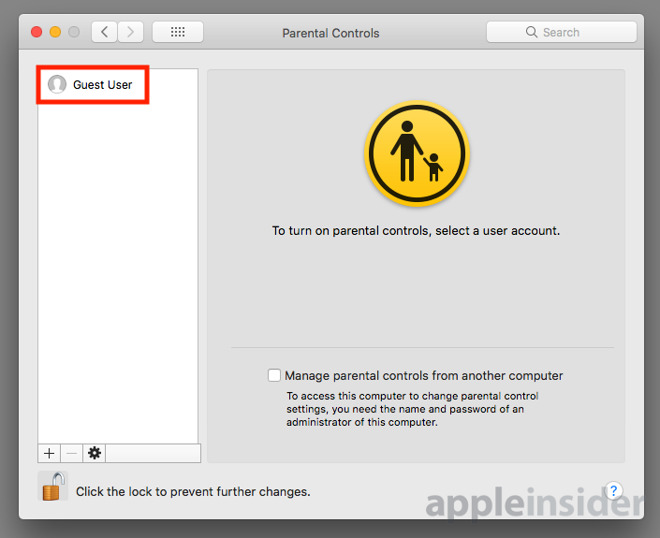
Click the lock in the bottom left and authenticate again to make the window usable.
Select the account you want to manage from the left column. This list is made up of accounts with the Parental Controls setting enabled.
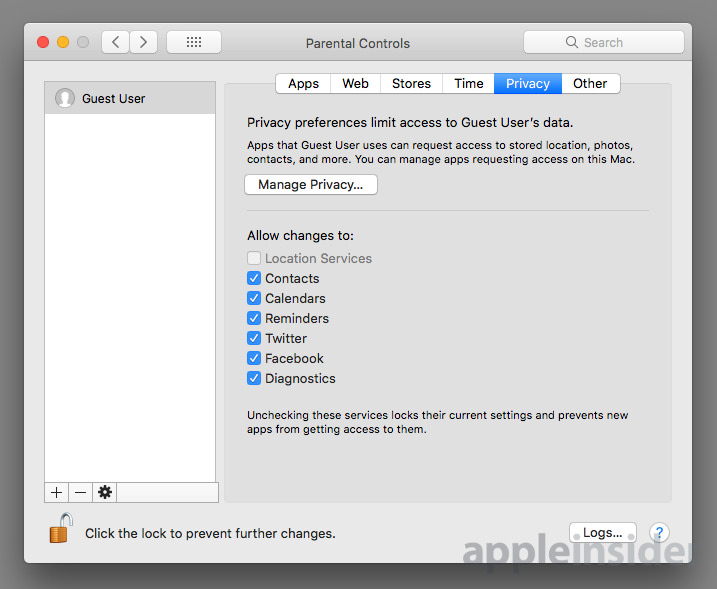
Five tabs will be available across the top side of the window, allowing for changes to be made to apps, web content, content stores, when the account can be used, privacy, and "Other" items. Click each of them in turn and make any necessary changes.
The Apps tab is straightforward, with the top two enabling or preventing the account from playing any multiplayer games with Game Center, and whether it is possible to use a built-in or connected camera in apps. The third option can limit what contacts the account can be used to send emails to in Mail, for example by keeping the users to only sending messages to other family members.
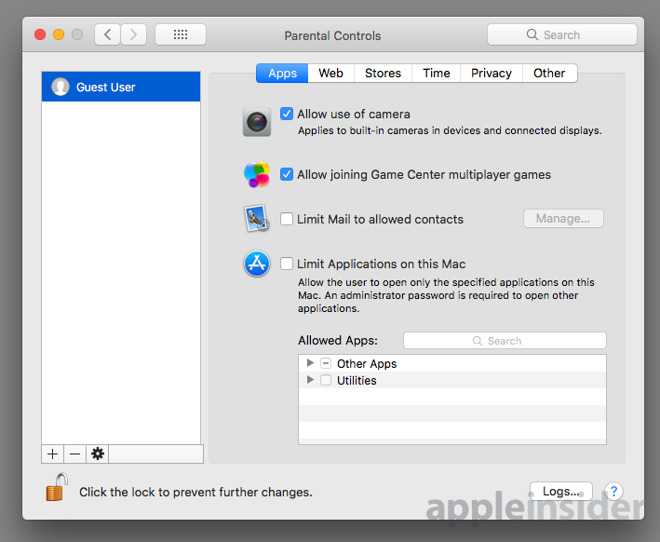
The Limit Applications on this Mac option can set what apps the account can access, which can be enabled through tickboxes in the space below. While other apps will be visible, they won't be accessible to the user unless an administrator grants permission by entering their password.
The Web tab is all about web browsing, and either allowing or denying access depending on the type of site. The default "Allow unrestricted access" option does not perform any restrictions to content at all, and may be best selecting in cases where alternative content restriction systems are in place, such as a proxy with content management software if the Mac is on a school's network.
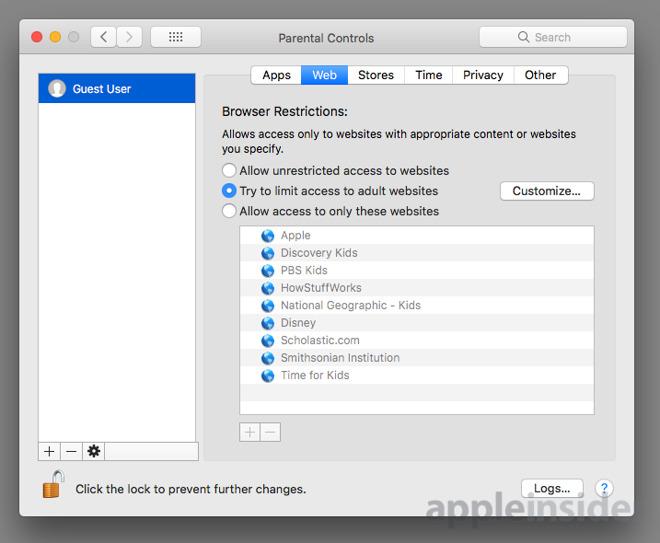
"Try to limit access to adult websites" will use macOS' built-in content filter to block inappropriate websites from view. If some unwanted content slips through, the Customize button will bring up an extra window to finesse the filtering, with options to add websites that can be ignored by the filter, as well as to block sites that are not permitted but manage to get past the filter.
The third option on this tab will limit users of the account only to a whitelisted collection of sites, which can be adjusted using the plus and minus arrows below the list. Attempts to view other sites will be blocked, with users instead offered the list of permitted sites, which are also accessible in Safari's bookmarks bar.
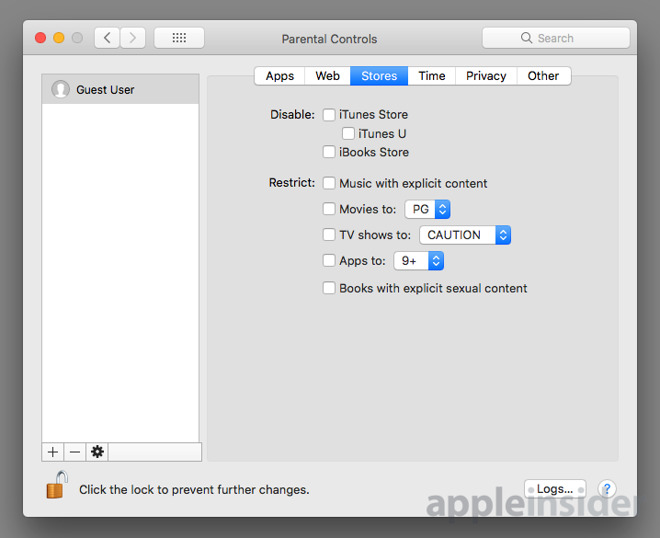
The Stores tab can be used to disable access to the iTunes Store, iTunes U, and iBooks Store, by ticking each store's box. If access is permitted, the types of content viewable can be restricted using the other settings lower down the screen.
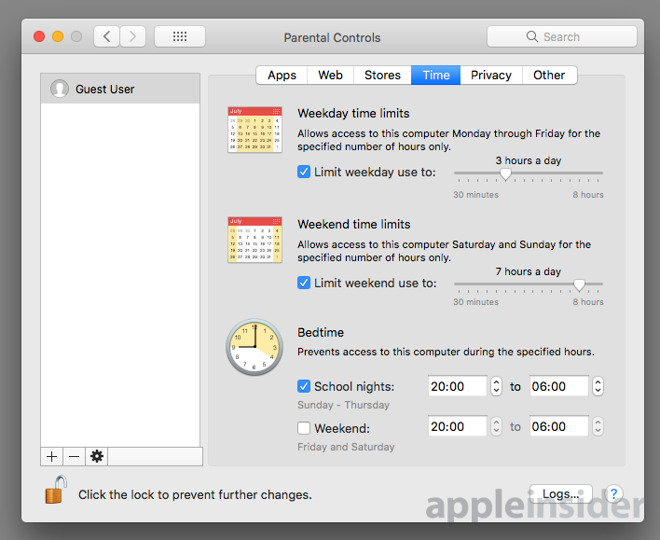
Moving down to Time, this can be used to limit the users to a certain amount of time in a day, with the ability to set different allocations for weekday and weekend usage. There is also the option to restrict when in the day the account can be accessed, which could help prevent younger users from staying awake too late at night and missing their school-night bedtime.
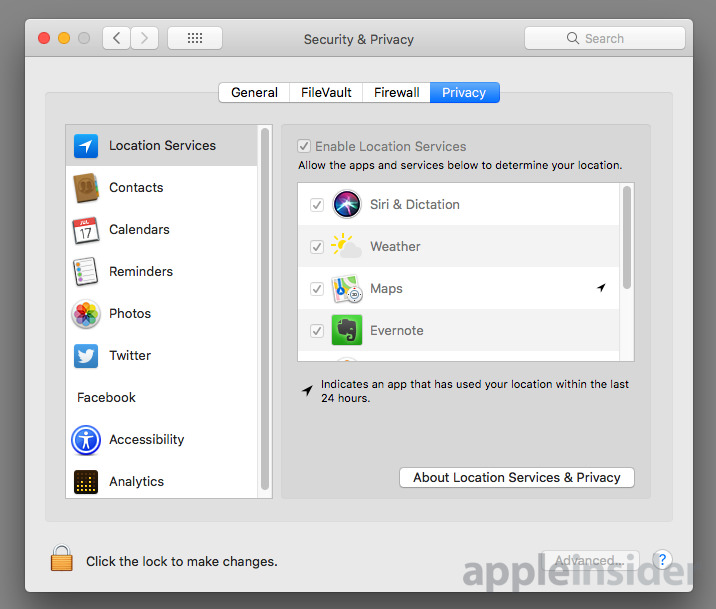
The Privacy section can restrict the data apps and services will be able to access for users of the account, such as location data and saved contacts. While a Manage Privacy button will take users to the full privacy-related settings, including on a per-app basis, the tab also has a list that can allow or prevent changes to the privacy settings by the account itself.
The last tab, Other, offers simple enable and disable options for items that do not fit in other areas. This includes turning off Siri and Dictation, altering printer and scanner settings, blocking burning of CDs and DVDs, restricting explicit language from view in Dictionary, and stopping the dock from being modified.
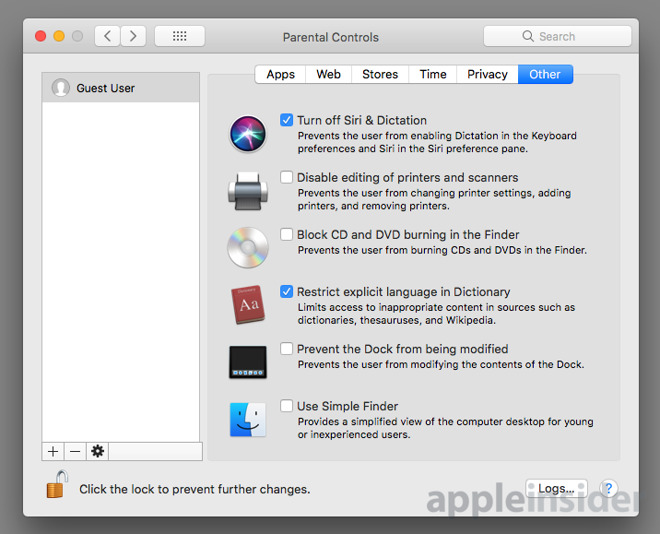
This tab also includes the option to set Simple Finder, a simplified view of the desktop that can be handy for inexperienced or younger users.
Once the settings are in place, click the lock in the bottom left to prevent further changes.
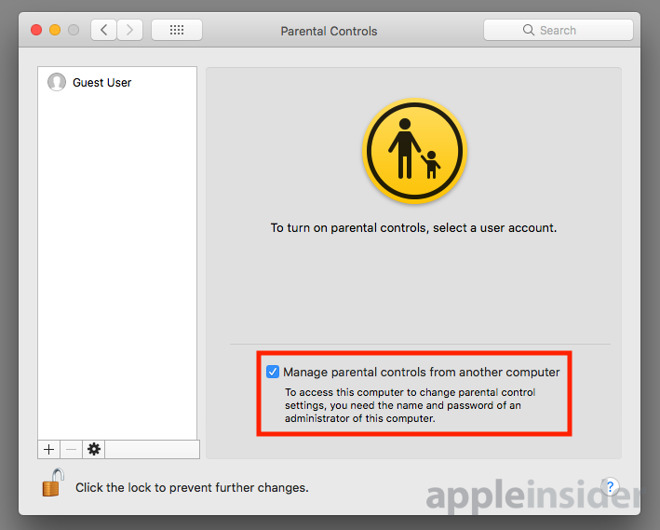
On the Mac that is being managed, navigate to the Parental Controls section of System Preferences. Click the lock to enable changes, authenticate, then click the tickbox on the main screen marked Manage parental controls from another computer followed by the lock again.
Once enabled, access Parental Controls the same way through the second Mac. When the screen comes up, select Manage parental controls on another Mac and click Continue.
Doing this will bring up the same settings options as it would for local management, but instead with managed users of the other Mac.
In the Parental Controls screen, select the restricted account from the list on the left, click the cog button at the bottom, and select Copy Settings for User. Select another user you want to apply the restrictions to from the list, click the cog again, and select Paste Settings to User.
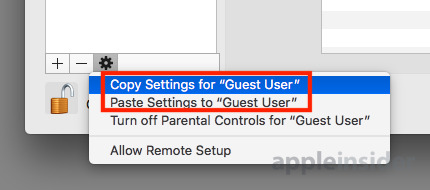
If most of the settings need to be copied to another user but with slight changes, go through the same copying process as above. After pasting, the settings for this second account will still be editable, allowing for restrictions to be increased or lowered just for that user, without affecting the original.
Many families will likely set up multiple accounts on a Mac for each person who will use it. This provides a number of things to younger users starting to use computers, including privacy for their own files as well as those of other users, and the ability for concerned adults to restrict what is accessible on each account.
The Parental Controls available to administrators are fairly straightforward, and can be applied to practically any account set up on a Mac. This also includes guest accounts, locking down the available access to only the most essential functions.
Enabling Parental Controls on an account
This guide is based on there being multiple accounts already set up on the Mac, and one administrator account used to manage others. For demonstration purposes, this will be performed on a guest user account, but the process is effectively the same regardless of the selected account.Select the Apple logo in the menu and select System Preferences. Navigate to Users & Groups, which is on the fourth row.
Click the lock in the bottom left and authenticate with an administrator account. Once changes are able to be made, click the account you want to restrict on the left-hand side, and tick the box marked Enable parental controls.
At this point, click the unlocked lock to prevent any changes on this screen.
To disable access, follow the same process, but untick the Enable parental controls box.
Restricting access
If you have followed the above instructions, click the Open Parental Controls button in the Users & Groups window for the account you are setting. Otherwise, enter System Preferences again and select the Parental Controls icon, just to the right of the Users & Groups icon on the fourth row.Click the lock in the bottom left and authenticate again to make the window usable.

Select the account you want to manage from the left column. This list is made up of accounts with the Parental Controls setting enabled.
Five tabs will be available across the top side of the window, allowing for changes to be made to apps, web content, content stores, when the account can be used, privacy, and "Other" items. Click each of them in turn and make any necessary changes.
The Apps tab is straightforward, with the top two enabling or preventing the account from playing any multiplayer games with Game Center, and whether it is possible to use a built-in or connected camera in apps. The third option can limit what contacts the account can be used to send emails to in Mail, for example by keeping the users to only sending messages to other family members.
The Limit Applications on this Mac option can set what apps the account can access, which can be enabled through tickboxes in the space below. While other apps will be visible, they won't be accessible to the user unless an administrator grants permission by entering their password.
The Web tab is all about web browsing, and either allowing or denying access depending on the type of site. The default "Allow unrestricted access" option does not perform any restrictions to content at all, and may be best selecting in cases where alternative content restriction systems are in place, such as a proxy with content management software if the Mac is on a school's network.
"Try to limit access to adult websites" will use macOS' built-in content filter to block inappropriate websites from view. If some unwanted content slips through, the Customize button will bring up an extra window to finesse the filtering, with options to add websites that can be ignored by the filter, as well as to block sites that are not permitted but manage to get past the filter.
The third option on this tab will limit users of the account only to a whitelisted collection of sites, which can be adjusted using the plus and minus arrows below the list. Attempts to view other sites will be blocked, with users instead offered the list of permitted sites, which are also accessible in Safari's bookmarks bar.
The Stores tab can be used to disable access to the iTunes Store, iTunes U, and iBooks Store, by ticking each store's box. If access is permitted, the types of content viewable can be restricted using the other settings lower down the screen.
Moving down to Time, this can be used to limit the users to a certain amount of time in a day, with the ability to set different allocations for weekday and weekend usage. There is also the option to restrict when in the day the account can be accessed, which could help prevent younger users from staying awake too late at night and missing their school-night bedtime.
The Privacy section can restrict the data apps and services will be able to access for users of the account, such as location data and saved contacts. While a Manage Privacy button will take users to the full privacy-related settings, including on a per-app basis, the tab also has a list that can allow or prevent changes to the privacy settings by the account itself.
The last tab, Other, offers simple enable and disable options for items that do not fit in other areas. This includes turning off Siri and Dictation, altering printer and scanner settings, blocking burning of CDs and DVDs, restricting explicit language from view in Dictionary, and stopping the dock from being modified.
This tab also includes the option to set Simple Finder, a simplified view of the desktop that can be handy for inexperienced or younger users.
Once the settings are in place, click the lock in the bottom left to prevent further changes.
Remote management
If there are two or more Macs on the network, it is possible for an administrator to change the parental control settings remotely.On the Mac that is being managed, navigate to the Parental Controls section of System Preferences. Click the lock to enable changes, authenticate, then click the tickbox on the main screen marked Manage parental controls from another computer followed by the lock again.
Once enabled, access Parental Controls the same way through the second Mac. When the screen comes up, select Manage parental controls on another Mac and click Continue.
Doing this will bring up the same settings options as it would for local management, but instead with managed users of the other Mac.
Duplicating settings across accounts
If you have multiple accounts you want to restrict in the same way, the settings can be duplicated quickly across more than one user. First, set up one user with the parental controls you wish to use.In the Parental Controls screen, select the restricted account from the list on the left, click the cog button at the bottom, and select Copy Settings for User. Select another user you want to apply the restrictions to from the list, click the cog again, and select Paste Settings to User.
If most of the settings need to be copied to another user but with slight changes, go through the same copying process as above. After pasting, the settings for this second account will still be editable, allowing for restrictions to be increased or lowered just for that user, without affecting the original.
Comments
Quick suggestion: How about a Tips article or video on securing to the max Safari. One of the main reasons I upgraded my 2009 MacBookPro to the MacBook, was b/c of Sierra and Safari.
I know the recent exploitations are from Facebook. But, how could we 'set' Safari with the most protection from tracking?
Thanks in advance and keep up the great work!
P.S. You may have already done this and I've missed it. I use Ghostery and AdblockPlus and am amazed at what they are blocking.
Best.
I’ll have to either update my ‘09 MP to 2012 or pray I can afford the NNMP when it eventually gets here (not likely). Or buy a used 2016 (it’s something).
But it thanks for the tips! I’ll come back after the upgreyyd!