How to use another computer's DVD drive across a network with macOS Remote Sharing

Mac desktop and MacBook owners are used to living without a CD or DVD drive, but there are occasions where access to one could be handy. AppleInsider explains how to remotely access the CD or DVD drive of another Mac or Windows PC from a Mac without the drive, across a network.
Over the years, computer users have moved away from using physical media for holding data, in favor of downloads, cloud storage, and external hard drives. Practically anything that a CD or a DVD can provide to a user can also be gained via an Internet connection and either streaming content or waiting for a download to complete.
Despite this, there is still a need to have access to an optical media drive from time to time, such as looking through data archives on a recordable DVD for old photographs, or installing software not available as a download. Given the relative lack of optical drives in Macs in general, this can be an issue for some users urgently needing to access the disc's contents.
One solution to the problem is to simply buy an external drive and connect it to the Mac via USB, but this option involves spending money. However, if you happen to have another computer with a suitable drive on the network, such as an older MacBook or a Windows PC, you can take advantage of its optical drive on a Mac without the necessary hardware, via Remote Sharing.
In the Sharing menu, click the tickbox next to DVD or CD Sharing, which should turn the status circle on the page for that function green. The same page also has a tickbox for Ask me before allowing others to use my DVD drive, which may be handy if this is being performed in a household or working environment with multiple users, but if you are the sole user of all the computers used in this task, turn it off.
It is probably also worth setting the Computer Name at the top to an appropriate name at this time. This name will appear on the DVD drive-less Mac later.
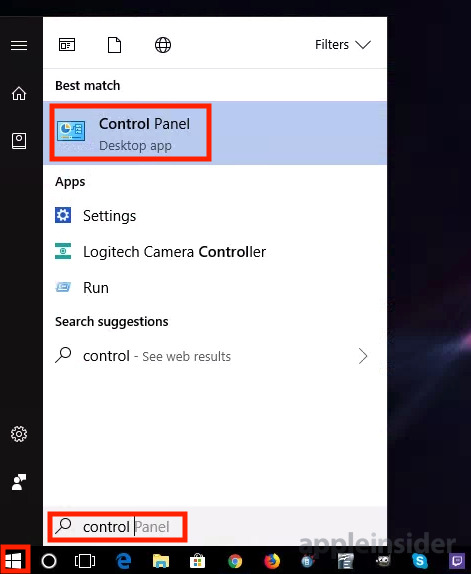
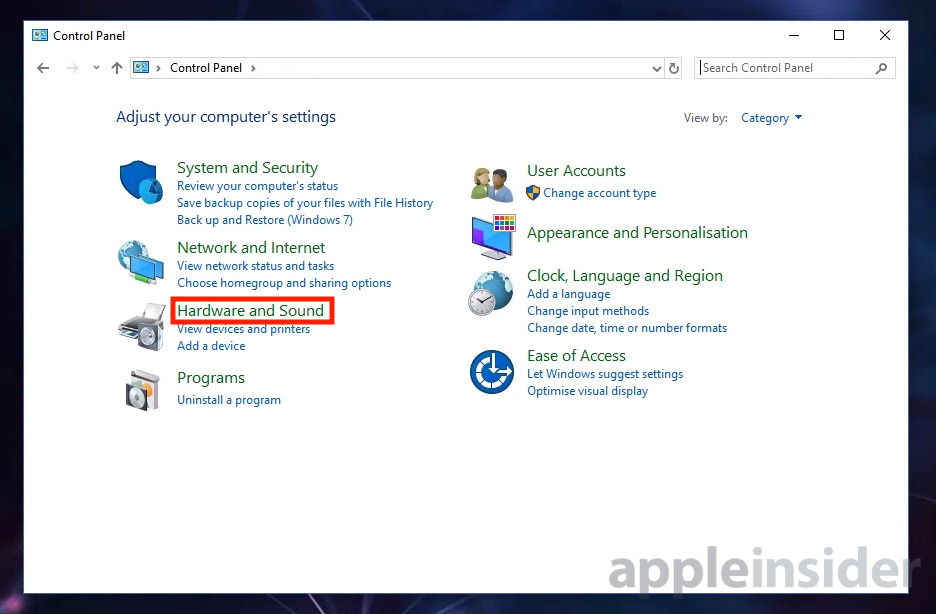
Open up Control Panel, which can be accessed quickly by clicking the Start button, typing in Control Panel, and clicking the appropriate search result. Users viewing the window with categories disabled can simply select DVD or CD Sharing Options straight away, while those viewing with Categories will have to select Hardware and Sound followed by DVD or CD Sharing Options.
In the window that appears, click the tickbox next to Enable DVD or CD Sharing if it isn't already ticked. Again, you may wish to uncheck the Ask me before allowing others to use my DVD drive option if you are the sole user.
Lastly, if there is a firewall installed on the Windows PC, check to make sure the programs ODSAgent and RemoteInstallMACOSX are allowed to pass through and are not blocked.
If the option to ask permission before usage is ticked, a warning box will appear on the local Mac advising of this while awaiting a response. At the same time, a box will appear on the remote desktop asking for permission to use the drive. Click Accept on this panel.
At this point, the drive's contents will be viewable, and can be used in the same way as a local optical drive.
Apple also warns that this sort of usage is not suited for a number of disc types and tasks, such as playing audio CDs, DVD or Blu-ray movies over a network, running copy-protected discs, and Windows installation discs. These are better suited to an external optical drive connected locally, or in some cases, creating a disc image on the remote host and transferring it over the network for local mounting.
Over the years, computer users have moved away from using physical media for holding data, in favor of downloads, cloud storage, and external hard drives. Practically anything that a CD or a DVD can provide to a user can also be gained via an Internet connection and either streaming content or waiting for a download to complete.
Despite this, there is still a need to have access to an optical media drive from time to time, such as looking through data archives on a recordable DVD for old photographs, or installing software not available as a download. Given the relative lack of optical drives in Macs in general, this can be an issue for some users urgently needing to access the disc's contents.
One solution to the problem is to simply buy an external drive and connect it to the Mac via USB, but this option involves spending money. However, if you happen to have another computer with a suitable drive on the network, such as an older MacBook or a Windows PC, you can take advantage of its optical drive on a Mac without the necessary hardware, via Remote Sharing.
Setup on Mac
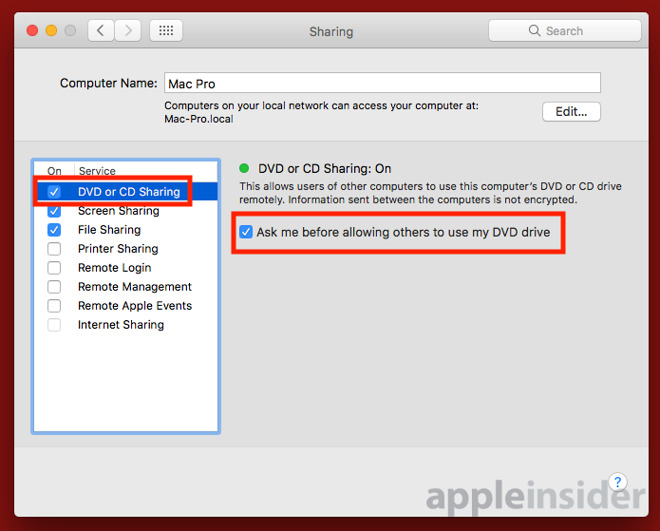
Log into the Mac with the optical drive, click the Apple logo in the menu bar and select System Preferences. Click Sharing, which will usually be on the right-hand side on the third row of System Preferences.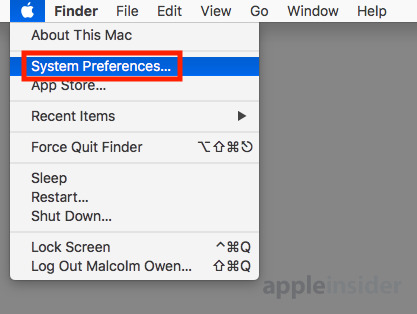
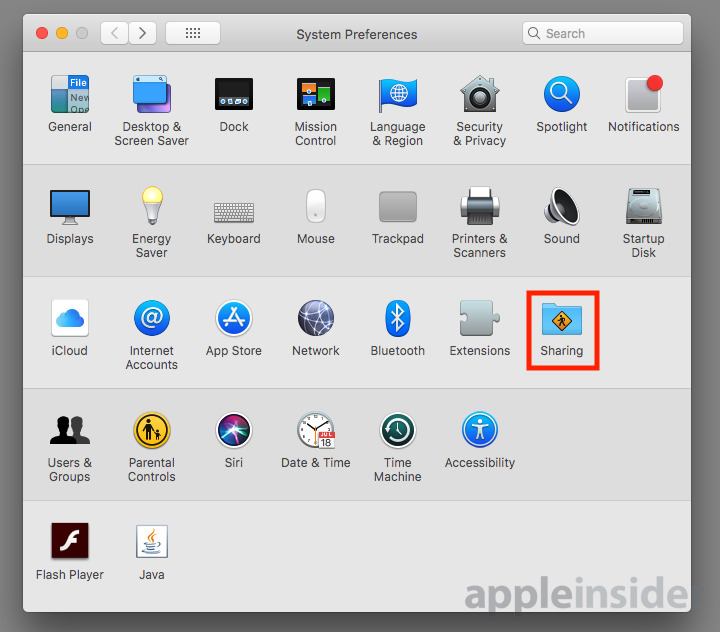
In the Sharing menu, click the tickbox next to DVD or CD Sharing, which should turn the status circle on the page for that function green. The same page also has a tickbox for Ask me before allowing others to use my DVD drive, which may be handy if this is being performed in a household or working environment with multiple users, but if you are the sole user of all the computers used in this task, turn it off.
It is probably also worth setting the Computer Name at the top to an appropriate name at this time. This name will appear on the DVD drive-less Mac later.
Setup on PC
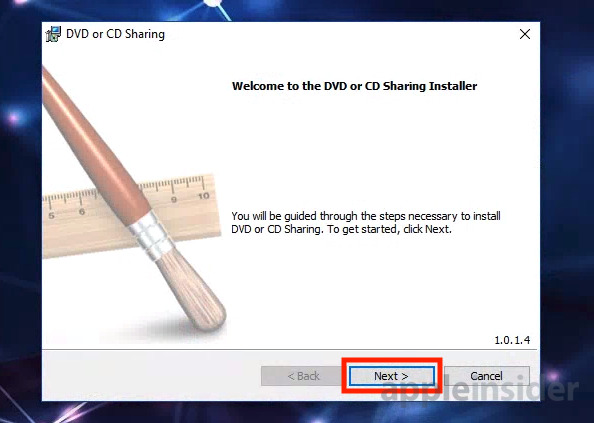
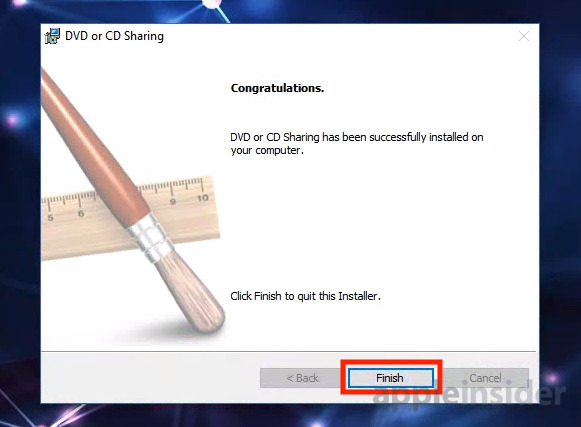
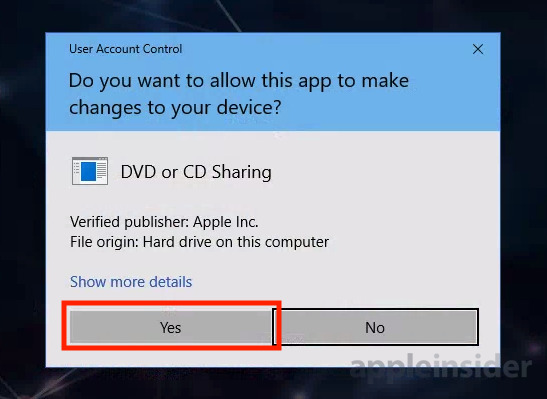
On the Windows PC with the DVD drive, download the DVD or CD Sharing software provided by Apple in its support pages, and start the installation process. The default installation will require the clicking of Next, Install, Yes to the User Account Control warning in Windows 10, then Finish.

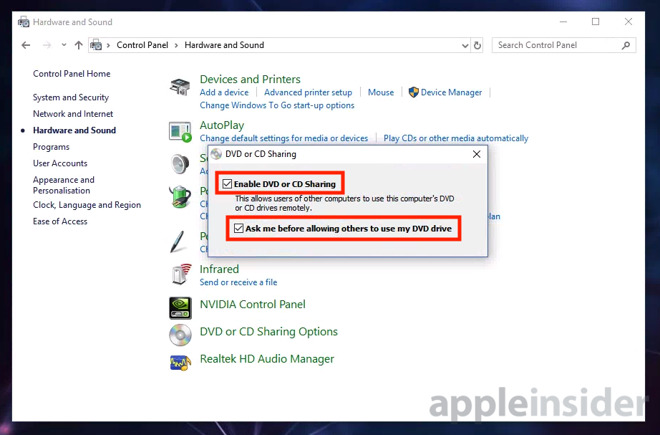
Open up Control Panel, which can be accessed quickly by clicking the Start button, typing in Control Panel, and clicking the appropriate search result. Users viewing the window with categories disabled can simply select DVD or CD Sharing Options straight away, while those viewing with Categories will have to select Hardware and Sound followed by DVD or CD Sharing Options.
In the window that appears, click the tickbox next to Enable DVD or CD Sharing if it isn't already ticked. Again, you may wish to uncheck the Ask me before allowing others to use my DVD drive option if you are the sole user.
Lastly, if there is a firewall installed on the Windows PC, check to make sure the programs ODSAgent and RemoteInstallMACOSX are allowed to pass through and are not blocked.
Using Remote Sharing
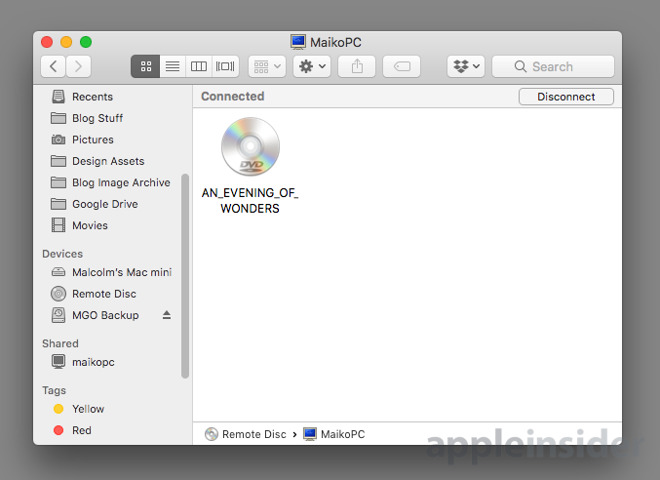
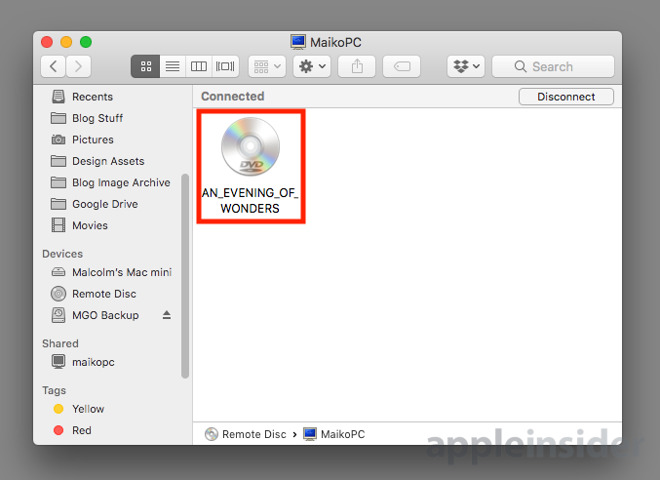
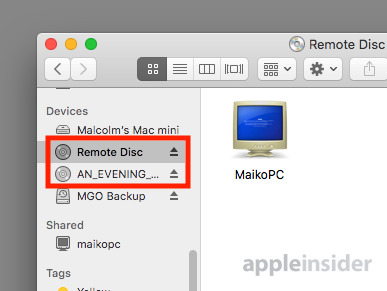
On the Mac without the optical drive, open the Finder and click Remote Disc. This will bring up a list of all Mac and PC computers on the network set up to share their optical drives. Click the computer with the drive you want to use, and click Connect or Ask to use to show the drive used on that specific system.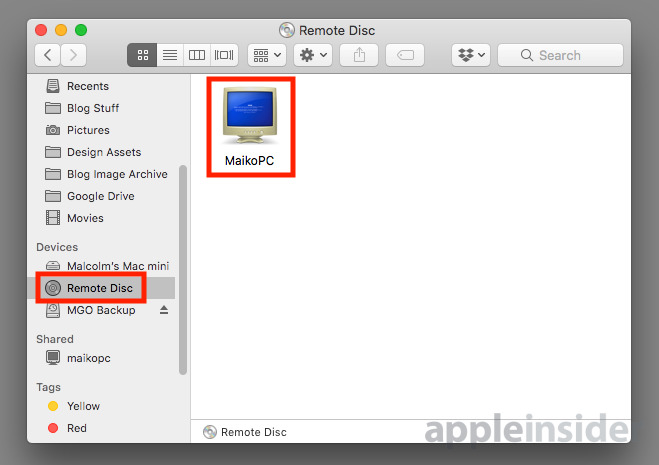
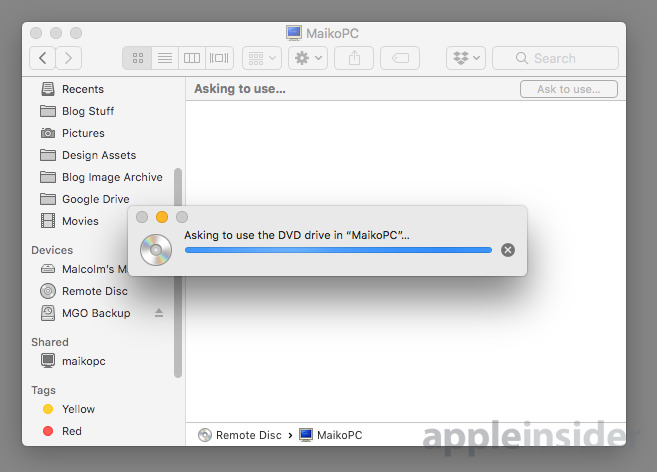
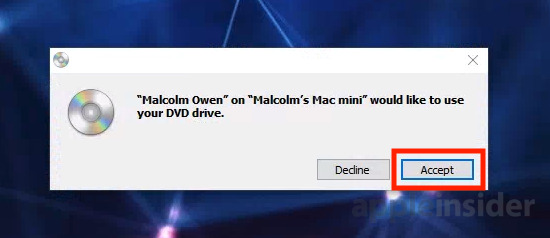
If the option to ask permission before usage is ticked, a warning box will appear on the local Mac advising of this while awaiting a response. At the same time, a box will appear on the remote desktop asking for permission to use the drive. Click Accept on this panel.
At this point, the drive's contents will be viewable, and can be used in the same way as a local optical drive.
Disconnecting
Once you are finished using the drive, remember to disconnect the local Mac from it, freeing it up for other users if necessary. Select the mounted disc in Finder and click the eject icon to the side. This can also work with the eject button to the side of Remote Disc.Further Notes
For this to work, both of the computers need to be turned on, logged in, and accessing the same network. Obviously, this will not work if the remote Mac or PC is turned off.Apple also warns that this sort of usage is not suited for a number of disc types and tasks, such as playing audio CDs, DVD or Blu-ray movies over a network, running copy-protected discs, and Windows installation discs. These are better suited to an external optical drive connected locally, or in some cases, creating a disc image on the remote host and transferring it over the network for local mounting.
Comments
As a reminder, AppleInsider is for everybody.
PS: Segue, for those that are looking that are looking for slick ways to get Win ISO and installations without having to burn bootable DVDs, Ive had a lot of success with the following apps:
The first one is great for taking, say, a Win ISO and making it into a football flash drive, and the latter will allow you to take a Win ISO and make it into a pre-installed OS—not just an installer—that you can then put into into another machine. MS offers an option for the former, but usually it comes back saying it couldn't make the drive bootable. The WinToUSB takes such longer because of how it extracts files into their directories (instead of just doing a file copy), but it has made getting Windows installed on crappy WinPCs a cake walk.
I found that whenever I get that cannot make bootable issue the easyueft fixes it. Brilliant little app. Older Macs in particular have problems with EFI in BootCamp too.
Well, duh!!
The point of the article was to show you how to do it.