How to annotate screenshots with Markup on the iPhone or iPad

If you need to help someone use an app on an iPhone or iPad, it is sometimes better to show where or how to perform an action than to verbally explain it. AppleInsider explains how to take advantage of the Markup tools built into iOS to illustrate to another person what to do via annotated screenshots.

The ability to quickly annotate screenshots can be handy for a variety of reasons, ranging from making notes on an image to guide family members using a new iPad to perform tasks, to illustrating ideas for changes or new elements of an app. Drawing things on screen can also be used for frivolous purposes, like doodling on top of a shot of someone's face.
Markup is also extremely handy as it means the annotations can be made on the iOS device itself, without going into an image editing app or sending the image to a Mac to add the notes. The almost immediate availability of Markup also makes the tool one of the quickest ways to get the annotations added, and in a relatively tidy and simple way.
In this guide, we are sticking to the more practical uses of the Markup tools, and how to create a screenshot illustrating where something is within an iOS app for another person. For this example, showing where to find a specific section in the AppleInsider app.
For an iPhone X, hold the Side Button on the right-hand side of the smartphone, then briefly press the Volume Up button before releasing both buttons.
For earlier iPhone variants as well as all iPad, iPad Pro, and iPod touch models, hold the Top or Side Button, press down the Home button, then release all buttons.

If successful, the screen will flash white, and a small thumbnail of the screenshot will appear in the bottom-left corner. This image will disappear on its own, but it can also be swiped away.
At the bottom of the screen are the pen, highlighter, pencil, eraser, and Magic Rope selection tool, along with a selection of colors you can use to change the color of items you add to the image.
To the far right is a small plus that can be used to add typed text, saved signatures, assorted shapes, and a magnifier, with the latter able to stylistically zoom in on a specific part of the image. At the bottom left is the undo and redo buttons, allowing for users to go back to previous incarnations of the image to undo mistakes.
Once you have made your changes, you can use the top right Share icon to perform various actions, including sending it to another device with AirDrop and using it with other apps. Tapping Done will bring up options to Delete Screenshot or Save to Photos.
By default, the screenshot will be saved if left to disappear. To see it, open the Photos app and scroll down to the most-recent images added to the app, usually at the bottom of the list under Photos, and tap the image in question.
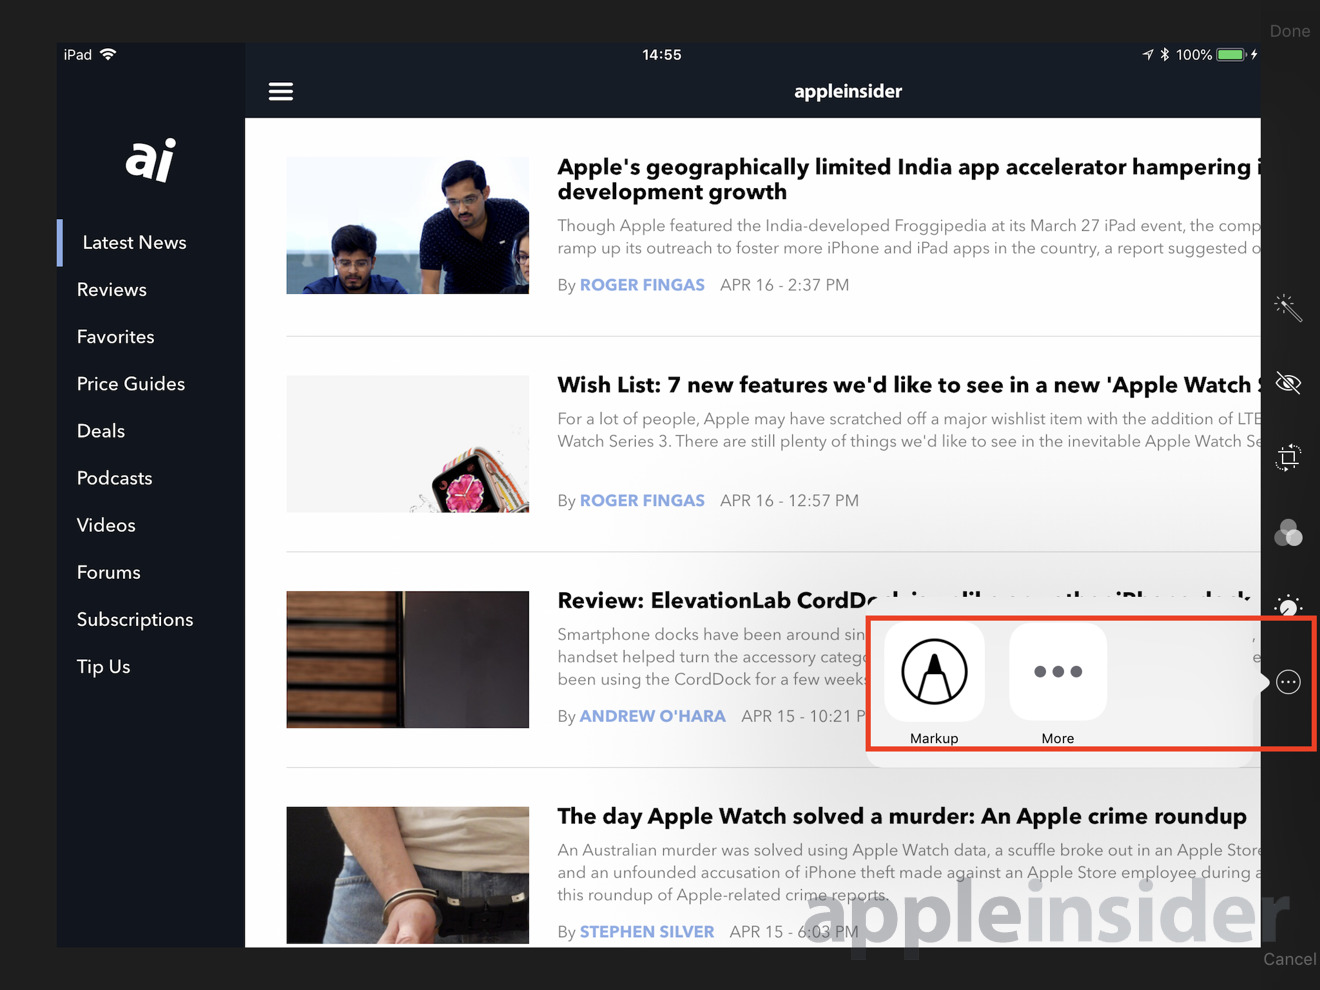
Tap Edit in the top-right to make the screen background go dark and to bring up the Edit menu. Tap the three dots in the circle on the right-hand side of the screen, and select Markup in the pop-up menu.
This Markup menu works in the same way as Instant Markup, just with a darker background. After completing the edits, tap Done in the top right corner to exit Markup, then Done in the Edit Menu to save the finished image.
At this point, you can select the edited image, tap the Share icon in the top right, and select the messaging app or other item you want to use with the image.
Owners of the new iPad or iPad Pro users will also be able to take advantage of the Apple Pencil while using Markup, using its pressure sensitivity for thicker lines and tilt sensing for shading with the pencil tool.
The ability to quickly annotate screenshots can be handy for a variety of reasons, ranging from making notes on an image to guide family members using a new iPad to perform tasks, to illustrating ideas for changes or new elements of an app. Drawing things on screen can also be used for frivolous purposes, like doodling on top of a shot of someone's face.
Markup is also extremely handy as it means the annotations can be made on the iOS device itself, without going into an image editing app or sending the image to a Mac to add the notes. The almost immediate availability of Markup also makes the tool one of the quickest ways to get the annotations added, and in a relatively tidy and simple way.
In this guide, we are sticking to the more practical uses of the Markup tools, and how to create a screenshot illustrating where something is within an iOS app for another person. For this example, showing where to find a specific section in the AppleInsider app.
Taking Screenshots
The first part of the process is to take the screenshot to illustrate the thing you want to show. Navigate your iOS device and its apps to find the image you want to use, then take the screenshot.For an iPhone X, hold the Side Button on the right-hand side of the smartphone, then briefly press the Volume Up button before releasing both buttons.
For earlier iPhone variants as well as all iPad, iPad Pro, and iPod touch models, hold the Top or Side Button, press down the Home button, then release all buttons.
If successful, the screen will flash white, and a small thumbnail of the screenshot will appear in the bottom-left corner. This image will disappear on its own, but it can also be swiped away.
Instant Markup
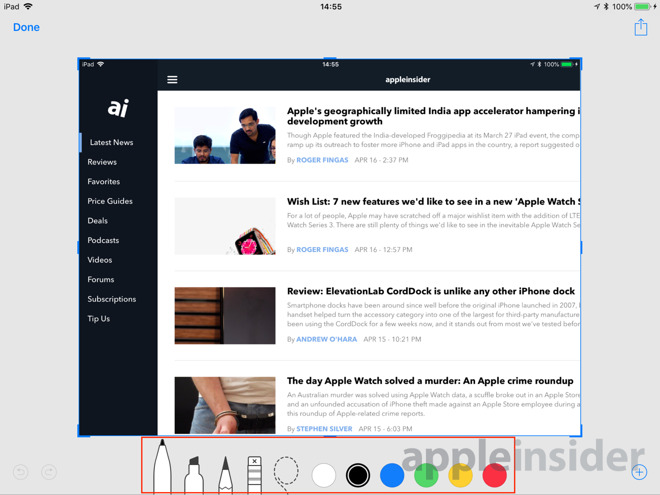
The quickest way to annotate images is to start making changes as soon as the screenshot is taken. Before it disappears, tap the thumbnail to bring up the Markup menu, with the screenshot in the middle of the screen ready for editing.At the bottom of the screen are the pen, highlighter, pencil, eraser, and Magic Rope selection tool, along with a selection of colors you can use to change the color of items you add to the image.
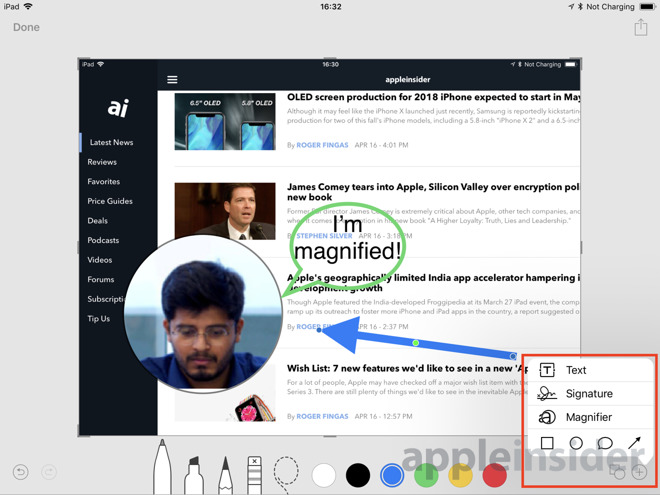
To the far right is a small plus that can be used to add typed text, saved signatures, assorted shapes, and a magnifier, with the latter able to stylistically zoom in on a specific part of the image. At the bottom left is the undo and redo buttons, allowing for users to go back to previous incarnations of the image to undo mistakes.
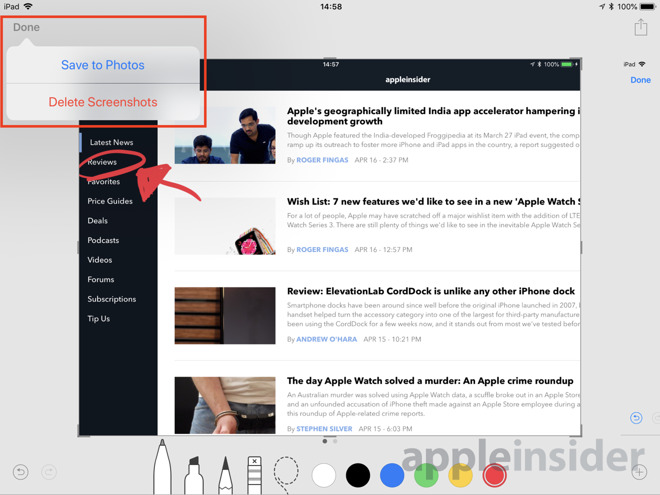
Once you have made your changes, you can use the top right Share icon to perform various actions, including sending it to another device with AirDrop and using it with other apps. Tapping Done will bring up options to Delete Screenshot or Save to Photos.
Not-So-Instant Markup
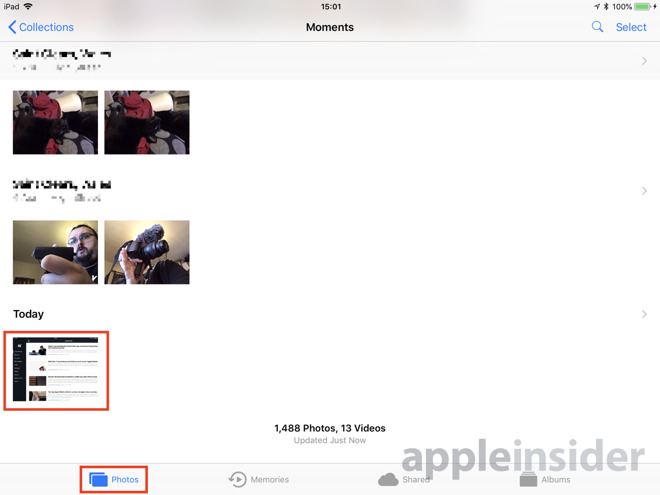
If the thumbnail has disappeared from the screen before you can make changes, it is still possible to make changes to the image, but it takes a few more steps.By default, the screenshot will be saved if left to disappear. To see it, open the Photos app and scroll down to the most-recent images added to the app, usually at the bottom of the list under Photos, and tap the image in question.
Tap Edit in the top-right to make the screen background go dark and to bring up the Edit menu. Tap the three dots in the circle on the right-hand side of the screen, and select Markup in the pop-up menu.

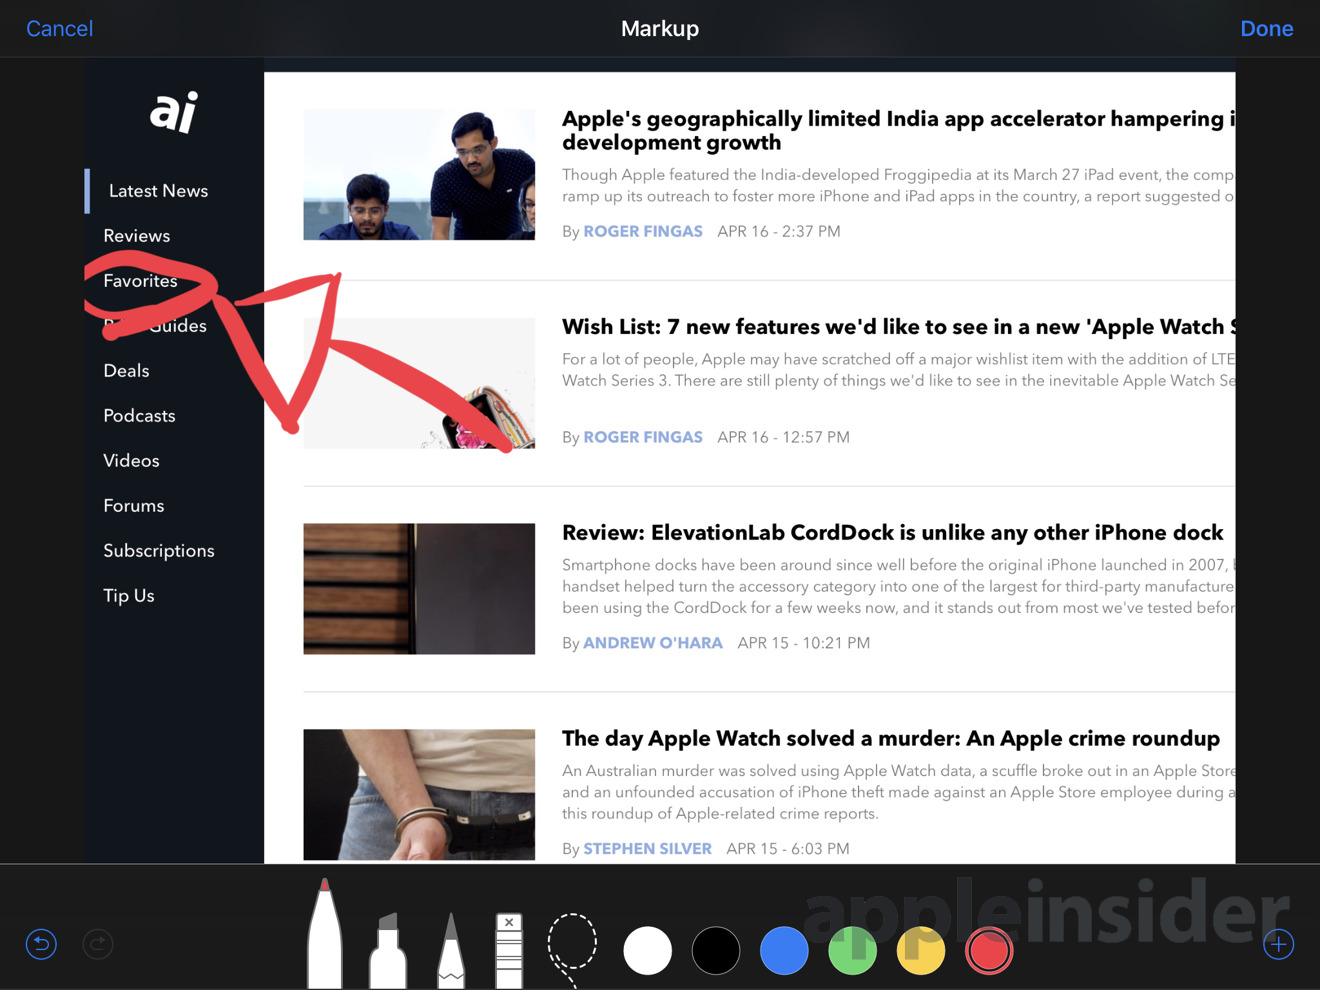
This Markup menu works in the same way as Instant Markup, just with a darker background. After completing the edits, tap Done in the top right corner to exit Markup, then Done in the Edit Menu to save the finished image.
At this point, you can select the edited image, tap the Share icon in the top right, and select the messaging app or other item you want to use with the image.
Further thoughts
Instant Markup is capable of handling multiple screenshots at a time, if they are taken in quick succession. Tap the thumbnail before it disappears to bring up Markup after taking all the shots, and then swipe from the side to navigate between the images.Owners of the new iPad or iPad Pro users will also be able to take advantage of the Apple Pencil while using Markup, using its pressure sensitivity for thicker lines and tilt sensing for shading with the pencil tool.
Comments