How to take advantage of the Dock's Stacks to easily access your most-used files

Stacks offer the ability to quickly access regularly used files from the macOS Dock, instead of storing the documents on the desktop. AppleInsider teaches the basics of Stacks, including how to use the feature to create your own easily accessed file collection on the Dock.
As a concept, Stacks are effectively folders stored on the dock, taking up a section on the right hand side of the familiar grey bar. The vast majority of users will have regularly used one stack already located on the Dock, namely the Downloads folder, but not many will have considered placing down a Stack of their own.
Stacks always reside to the right-hand side of the vertical separator line, alongside stored documents, minimized windows, and the Trash. It is not possible to create a Stack to the left of the separator line, which is an area dedicated to apps.
There are a few reasons for using a Stack for storing documents instead of the desktop, but it is mainly to be used as an easy-to-access location for regularly accessed files, documents, or application aliases to be kept. Folders on the desktop may be blocked from view by application windows clogging up the screen, forcing users to move or minimize apps to get to the folder in the first place.
As the Stack reflects the contents of a folder located elsewhere on the Mac, the folder in question could be stored in a different location than the desktop, such as in a user's Documents folder, creating more space on the desktop that could be used to place other folders or files.
If it is empty, transfer the files you want to have accessible in the Stack to the folder. This can be done by dragging and dropping the selected files over, or by using the Copy and Paste commands in the Edit menu, or by using the Command-C and Command-V keyboard shortcuts.
Once the folder is ready, drag it into the Dock, to the right-hand side of the separator line. This works for both folders stored on the desktop and those accessed through Finder.
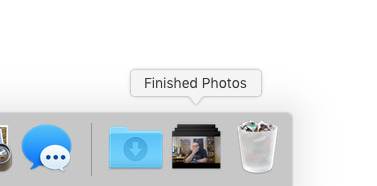
Once dragged, the folder icon will appear on the Dock, with the name of the Stack visible once hovered over with the cursor. Depending on the contents of the Stack, such as if it contains images, the icon may change from the folder to a thumbnail of its contents.
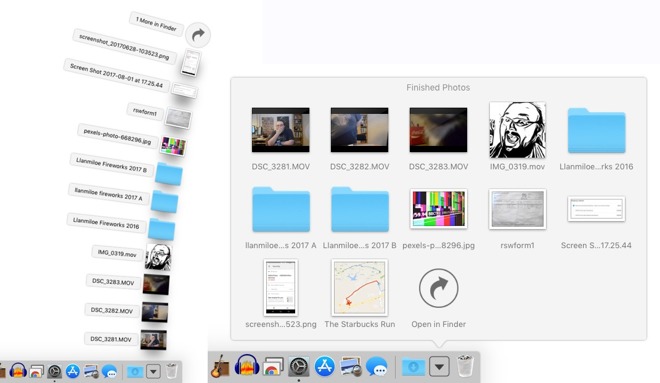
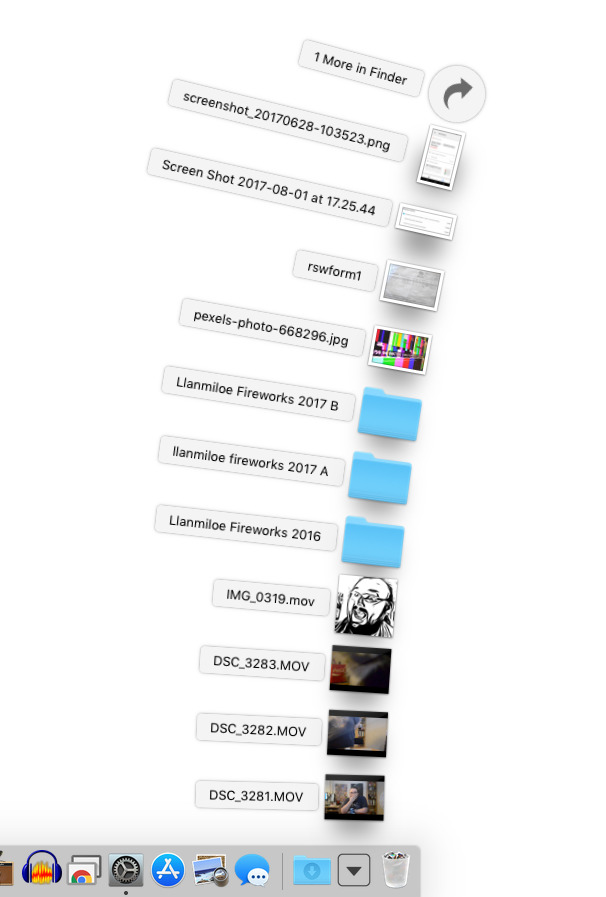
The Fan will show large icons and the names for a selection of files stored in the folder, arranged by the selected Sort By option in the same menu. For example, if it is sorted by Date Added, the list will show the most recently-added file at the bottom of the list, with the oldest nearer the top.
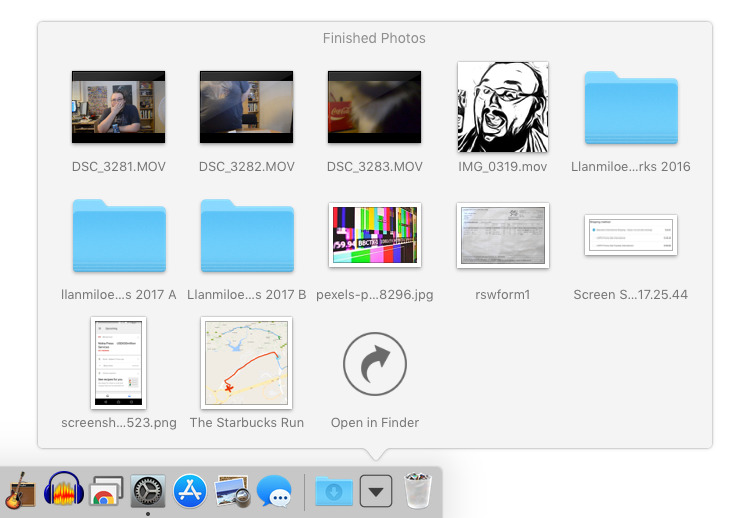
The Grid view will, as the name suggests, display a grid view of the Stack's contents with large icons, again sorted by the selected menu option. This grid is scrollable, showing all of the Stack's files, and users can even view the contents of folders stored in the Stack without leaving the Stack view.
Lastly, the List creates a long list of the Stack's files and folders, again using the same sorting options as before to dictate the order of files. Like with the Grid, Stack folders can be accessed without leaving the List view.
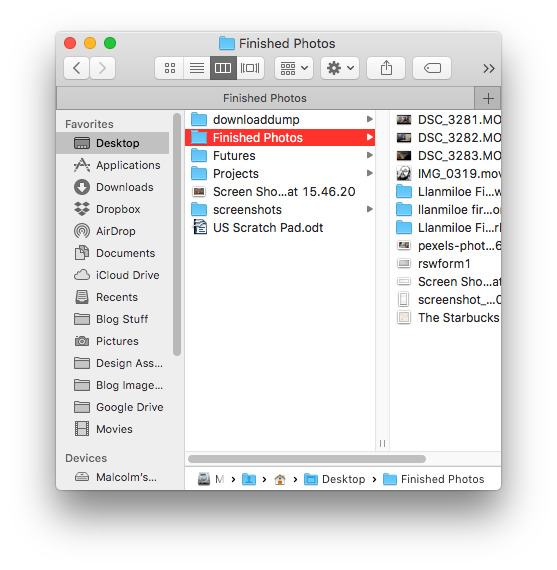
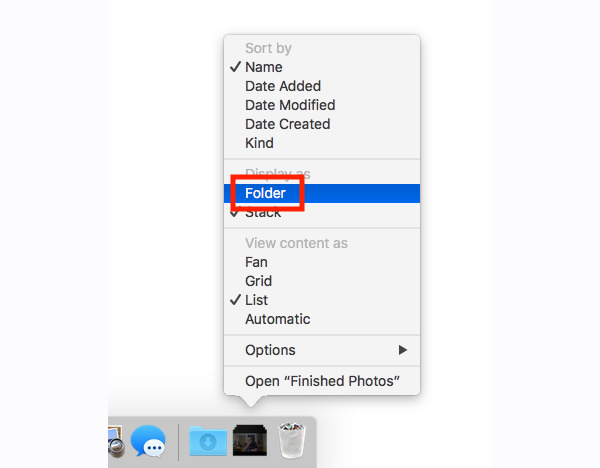
In the event that you would rather look at the contents of a Stack conventionally, right-clicking the Stack and selecting Display as Folder will instead open it as a normal folder within Finder. It is also possible to open the Stack within finder from the three Stack views, with each including a link to Open in Finder.
While this will remove the Stack from the dock, this will not affect the files viewable within the Stack. The documents will remain in the folder used for the Stack, in the location the folder was initially placed.
As a concept, Stacks are effectively folders stored on the dock, taking up a section on the right hand side of the familiar grey bar. The vast majority of users will have regularly used one stack already located on the Dock, namely the Downloads folder, but not many will have considered placing down a Stack of their own.
Stacks always reside to the right-hand side of the vertical separator line, alongside stored documents, minimized windows, and the Trash. It is not possible to create a Stack to the left of the separator line, which is an area dedicated to apps.
There are a few reasons for using a Stack for storing documents instead of the desktop, but it is mainly to be used as an easy-to-access location for regularly accessed files, documents, or application aliases to be kept. Folders on the desktop may be blocked from view by application windows clogging up the screen, forcing users to move or minimize apps to get to the folder in the first place.
As the Stack reflects the contents of a folder located elsewhere on the Mac, the folder in question could be stored in a different location than the desktop, such as in a user's Documents folder, creating more space on the desktop that could be used to place other folders or files.
Creating the Stack
First you must select the folder that will become the Stack. This can be one that already exists on the desktop or a brand new one created in Finder by right-clicking and selecting New Folder where you want it stored in the Finder.If it is empty, transfer the files you want to have accessible in the Stack to the folder. This can be done by dragging and dropping the selected files over, or by using the Copy and Paste commands in the Edit menu, or by using the Command-C and Command-V keyboard shortcuts.
Once the folder is ready, drag it into the Dock, to the right-hand side of the separator line. This works for both folders stored on the desktop and those accessed through Finder.
Once dragged, the folder icon will appear on the Dock, with the name of the Stack visible once hovered over with the cursor. Depending on the contents of the Stack, such as if it contains images, the icon may change from the folder to a thumbnail of its contents.
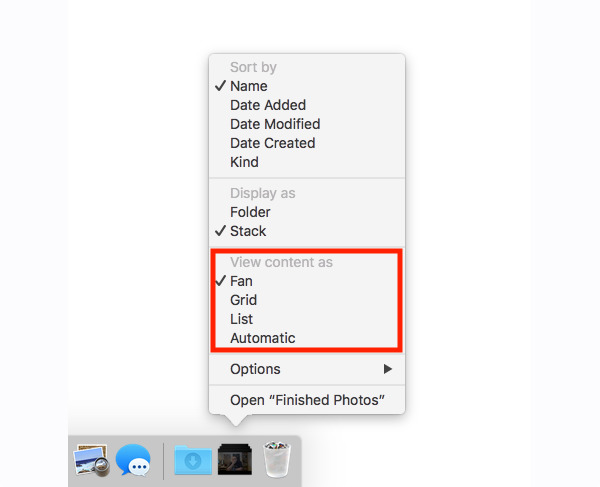
Customizations
Once the Stack has been created, you can adjust the way it works in the Dock by right-clicking the icon. There are three primary views for Stacks: Fan, Grid, and List.The Fan will show large icons and the names for a selection of files stored in the folder, arranged by the selected Sort By option in the same menu. For example, if it is sorted by Date Added, the list will show the most recently-added file at the bottom of the list, with the oldest nearer the top.
The Grid view will, as the name suggests, display a grid view of the Stack's contents with large icons, again sorted by the selected menu option. This grid is scrollable, showing all of the Stack's files, and users can even view the contents of folders stored in the Stack without leaving the Stack view.
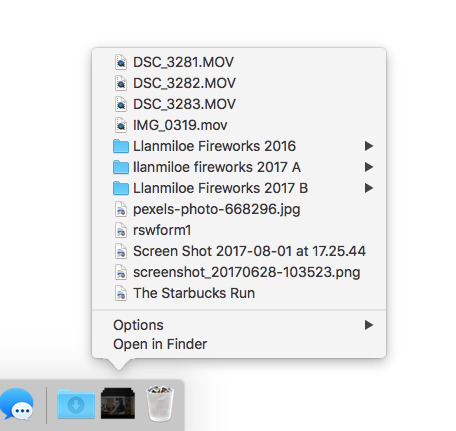
Lastly, the List creates a long list of the Stack's files and folders, again using the same sorting options as before to dictate the order of files. Like with the Grid, Stack folders can be accessed without leaving the List view.
In the event that you would rather look at the contents of a Stack conventionally, right-clicking the Stack and selecting Display as Folder will instead open it as a normal folder within Finder. It is also possible to open the Stack within finder from the three Stack views, with each including a link to Open in Finder.
Stack Removal
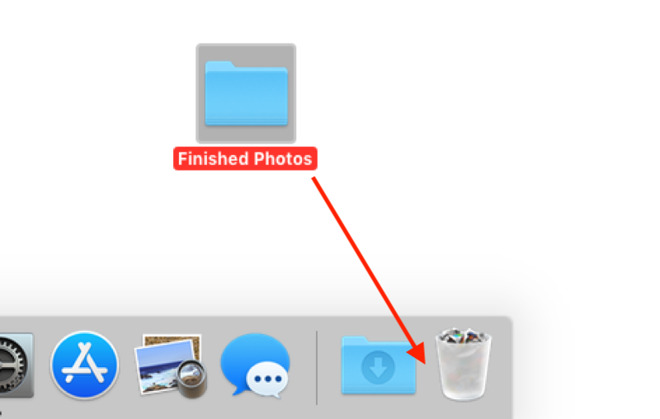
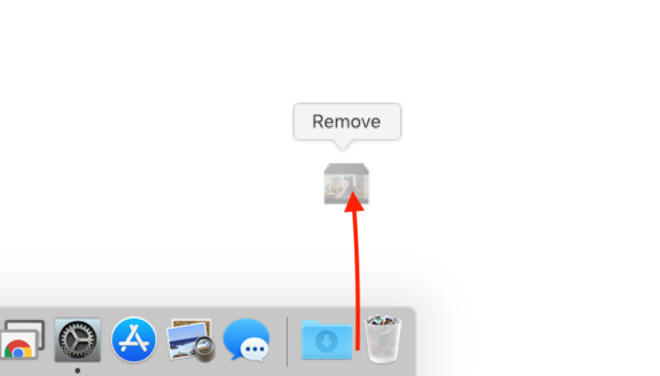
If you don't want to have a stack taking up space on the Dock, it can be removed in a similar way to apps. Simply drag the Stack off the Dock until it goes translucent and a Remove prompt appears, then release the Stack.While this will remove the Stack from the dock, this will not affect the files viewable within the Stack. The documents will remain in the folder used for the Stack, in the location the folder was initially placed.
Comments