Ender-3 V2 Neo review: 3D printing, with the beginner in mind

If you're looking to get started in 3D printing, Creality's Ender-3 V2 Neo 3D has some great features for beginners worth checking out.

A decade ago, 3D printing was a niche hobby, but that's no longer the case. That's why I agreed to try out Creality's Ender-3 V2 Neo 3D Printer, a $299 3D printer designed for beginners and professionals alike.
Creality says the Ender-3 V2 Neo is a human-centered device and suggests nearly anyone could use it. I wanted to see if it was indeed the case.
It's shipped out in three pieces -- the build plate, the gantry -- which already has the nozzle and hot-end attached, and the control panel. Setup mainly involves putting these three pieces together and then clipping a few wires in place.
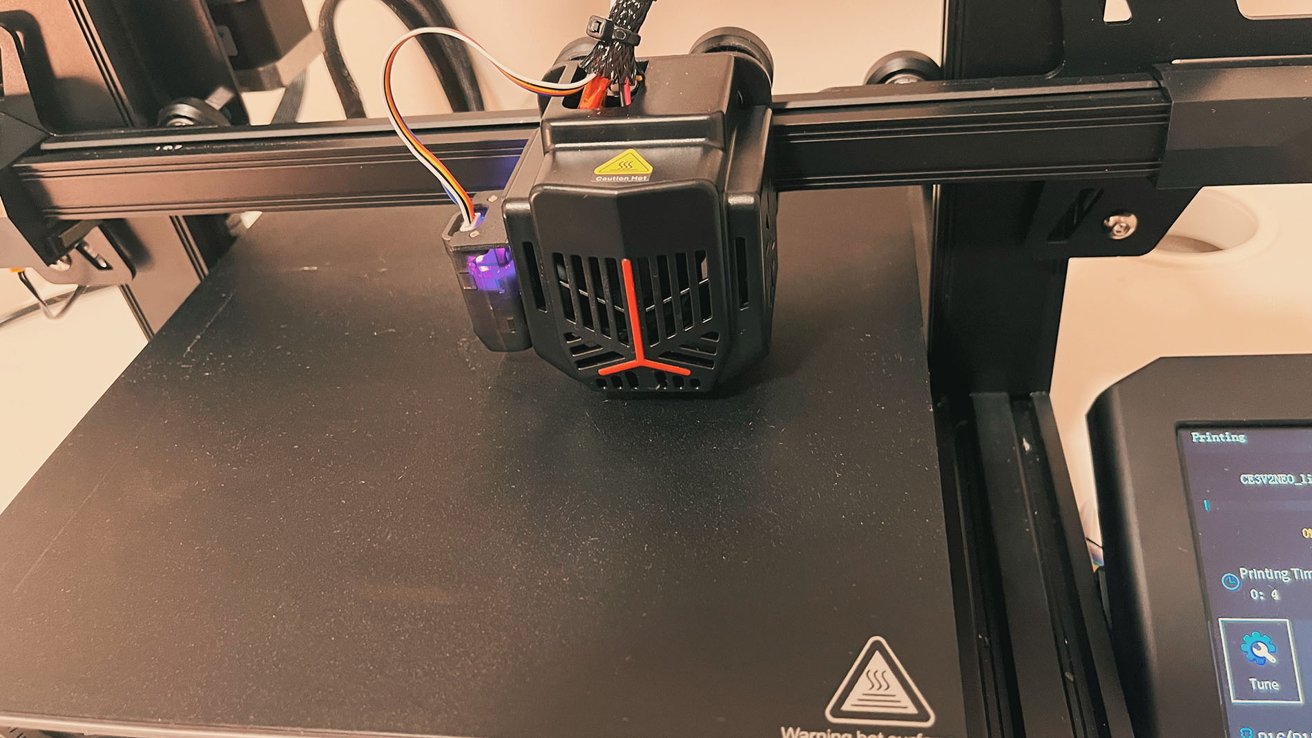
The hot end, situated on the gantry
This can be initially intimidating, but the Ender-3 V2 Neo went together in under 20 minutes in a process that made me feel more confident about embarking on my 3D printing adventure. The relatively sparse instructions did a good job of walking me through the process.
In addition to receiving the printer, you also get a small selection of helpful tools. This includes a wrench, which can be used to tighten or loosen the belts as needed, a scraper for removing stubborn builds, a hex key set required for assembly and maintenance, and a nozzle cleaning pin.
The on-device interface is easy to use, as there's a single knob used to navigate through the menus on the Ender-3 V2 Neo. Selecting is done with a simple press on the top of the knob.
The actual on-device software is easy to understand, too, which I appreciated as a first-time user.
If you're like me, you might see the option to auto-level your build plate and assume it will take care of all your leveling requirements.
That's not the case at all, as you still need to manually level your build plate to be pretty level. Once finished, then you can use the auto-leveling feature.
If you don't manually level your build plate, you'll have a first print that looks like this.
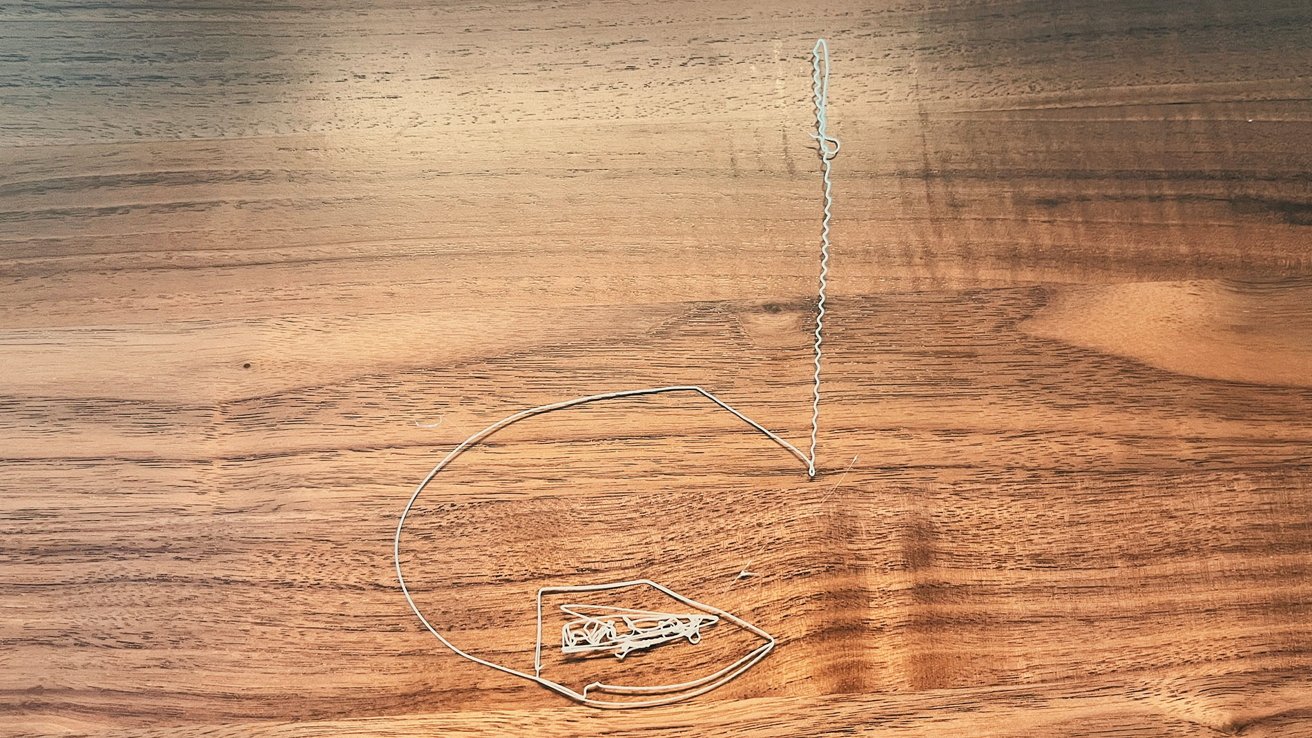
A failed 3DBenchy
Leveling your build plate is tiresome and primarily involves turning four wheels under it until the nozzle has a clearance of 0.1mm at each corner. You do this by sliding a piece of paper under the nozzle at these key points -- the paper should slightly catch the nozzle.
Unfortunately, you have to do this several times, too, because turning one wheel will often cause the build plate to change at the other corners.
Fortunately, there's a helpful YouTube video by Creality that shows how to go about doing so.
Once everything is level, then you can use the auto-level feature, set your z-offset, and hopefully, your 3DBenchy comes out looking like this.
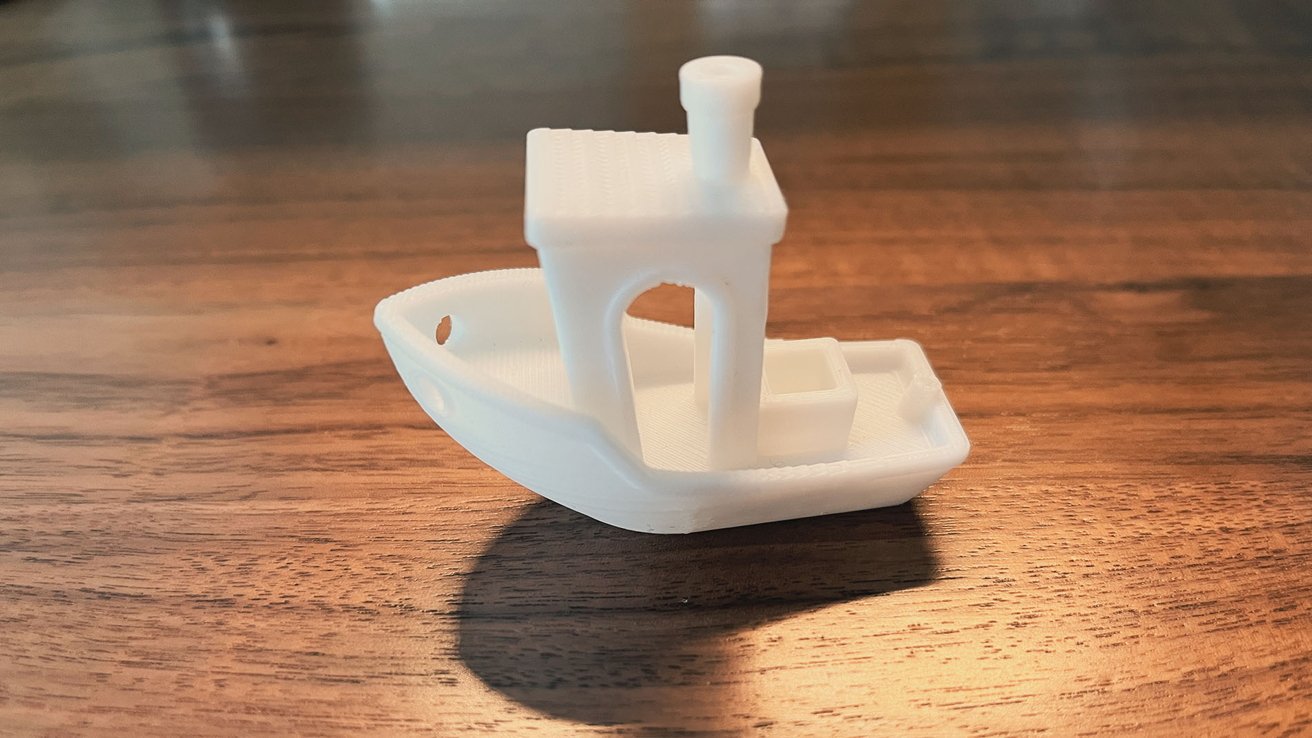
3DBenchy, looking just as she should!
There are plenty of places to get 3D models, though there are a few places you may want to bookmark before you get started.
So far, I've had a great time with Cults3D, a large marketplace where people can sell their 3D prints -- or sometimes even offer them for free. The interface is easy to use, accepts credit cards and PayPal, and encourages people to post pictures of their builds.
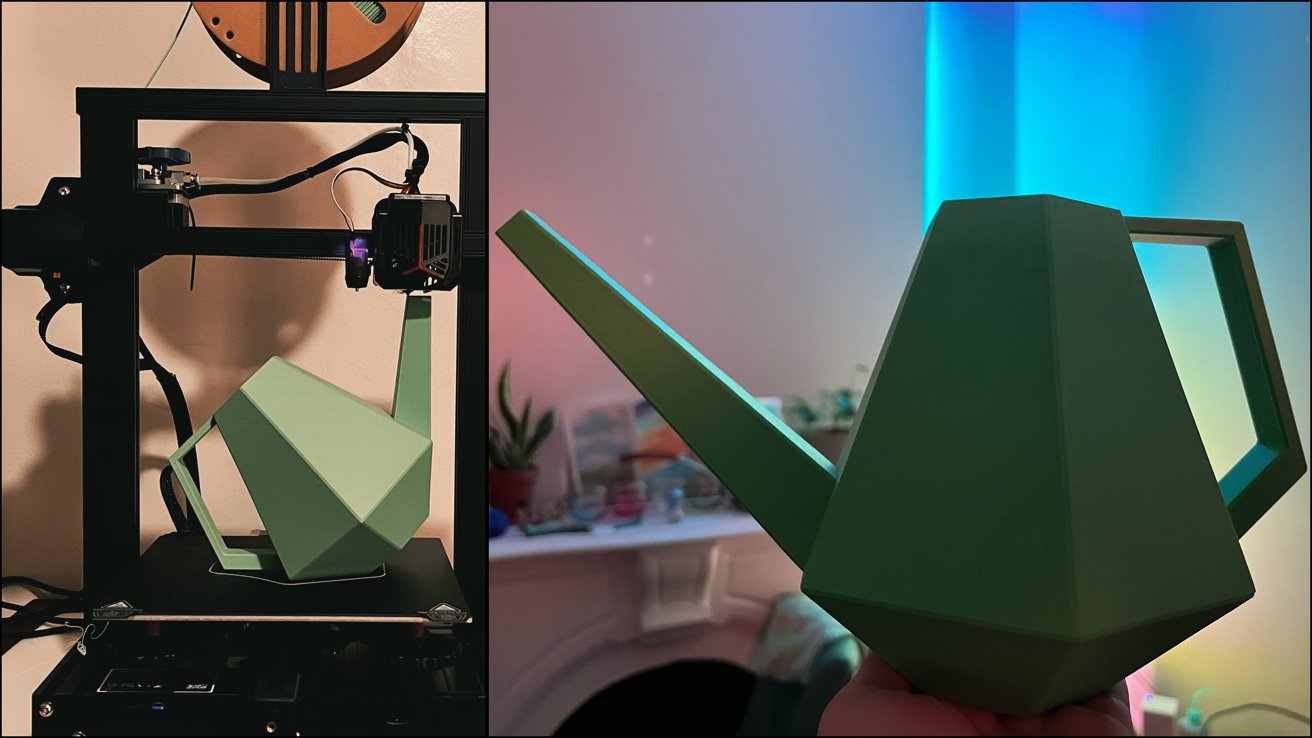
This watering can took just about 24 hours to print
My first non-Benchy print was a gorgeous geometric watering can by Gazzaladra, a designer who sells his wares on Cults3D.
Thingiverse is popular, too, housing thousands of free models across all kinds of categories. The interface is more challenging to use than Cults3D, but it's still a great site to keep in your back pocket.
Etsy is another place that offers 3D files for print as well. The upside is the creators usually post some fantastic finished photos of their creations, but the biggest drawback is it can be expensive.
Additionally, 3D slicing software allows you to arrange your models for printing or add additional models to print more than one object at a time.
As always, there are dozens of ways you can accomplish this.
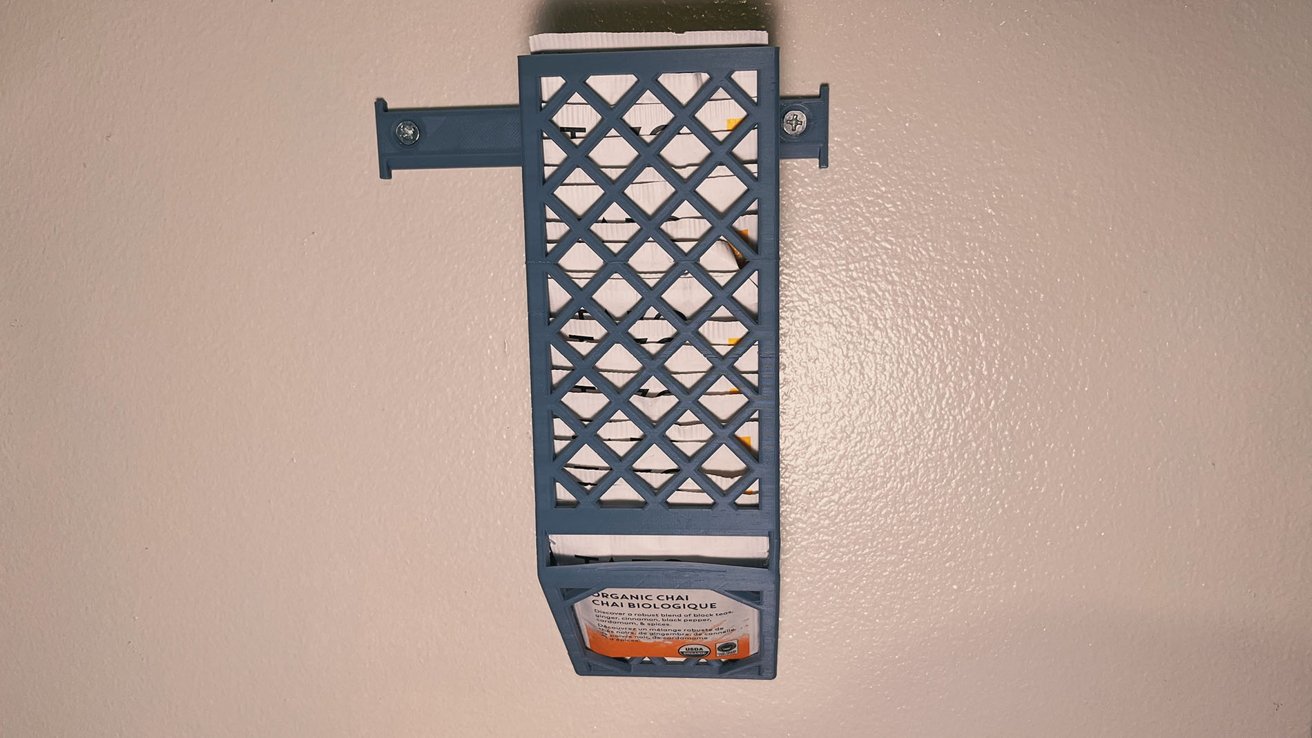
A teabag dispenser, which took nearly 19 hours to print
Creality 3D printers come with Creality Slicer, a free option designed to work directly with their line of printers. However, Creality Slicer is far from the only 3D slicing software out there.
Cura, for example, is pretty popular. It's free, open source, and a popular choice for beginners. Creality Slicer is a skinned and slightly modified version of a 4.x Cura.
While I had initially started out using Creality Slicer, I found some of the options in the Cura 5.2.1 were better for troubleshooting print problems -- which I'll gladly cover in the next section.
We'll be talking more about the other plastics in future pieces.
This becomes readily apparent once you start printing with different filaments -- and I don't mean just different types of plastic. For example, one brand or color of PLA may require a different nozzle temperature than the next.
Manufacturers don't provide an exact temperature but a range at which your filament should work. But this may not even be the correct range -- your filament may function best printed outside what the manufacturer suggests.
Every time you try a new filament you've never used, you'll have to figure out what temperature filament needs. You can do this in several ways, but I suggest printing a temperature tower.
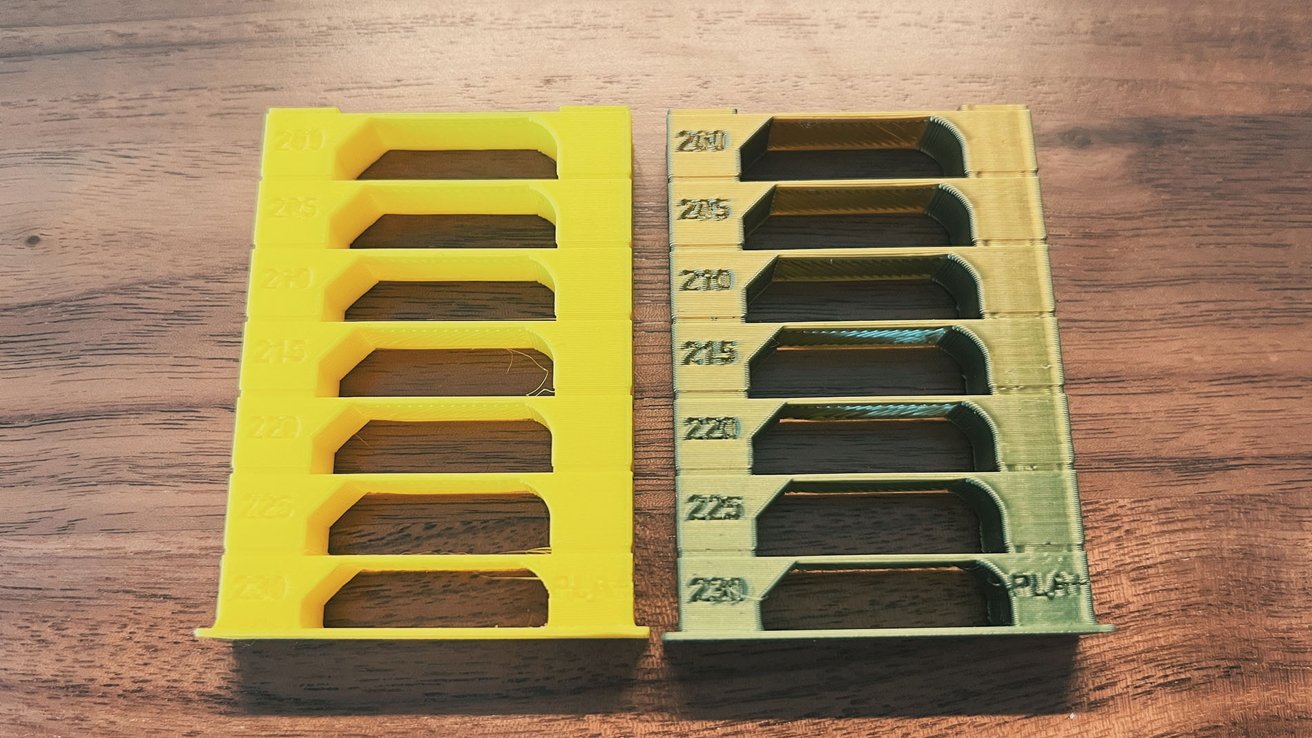
A pair of temperature towers
A temperature tower is a small tower comprised of multiple levels printed at different temperatures. The goal is to find out which temperature creates the cleanest and sturdiest print -- and I found this easiest to achieve using Cura 5.2.1.
Once you find your perfect temperature, I suggest writing the nozzle and print bed temperatures for each spool of 3D filament you use. Then, write it down on the spool or in a notepad you keep near your 3D printer.
While I'm comfortable fussing with things on the software end, I'm not the most comfortable with disassembling and repairing hardware.
That's why I became distraught when my printer began throwing out a bizarre error. Seemingly out of nowhere, it would stop printing, blare an alarm, and then the display would read, "nozzle is too lowperature."
Upon researching the error, I found it wasn't particularly rare. Figuring out what was causing it could be a nightmare.
Most people were quick to prescribe the same solution "It's a bad thermistor, you'll need to get a new one!" but I felt like this couldn't have been the issue. I'd only done a handful of small prints, and I treated the machine with kid gloves -- it shouldn't have burnt out already.
Other people suggested it could be a firmware issue. Some posited the nozzle could be clogged, the silicon sock around the nozzle was missing, or my hot end had been damaged.
Again, none of these should have been the problem -- I was only six or seven prints in at the most.
As it turns out, the issue wasn't with my printer but the filament itself. The errors only occurred when I used a silk PLA filament.
While the manufacturer suggests the filament could be printed as low as 195C, I found, more often than not, it would cause my printer to error out if it dipped below 200C. So I increased my temperature to 210C, and suddenly I wasn't getting nozzle temperature errors anymore.
Remember how I said manufacturers' guidelines aren't particularly useful -- this is what I meant.
Silk PLA is notoriously fussy and often requires much higher temperatures than most people print PLA. Even at 210C, I had terrible delamination problems in certain areas with my prints.
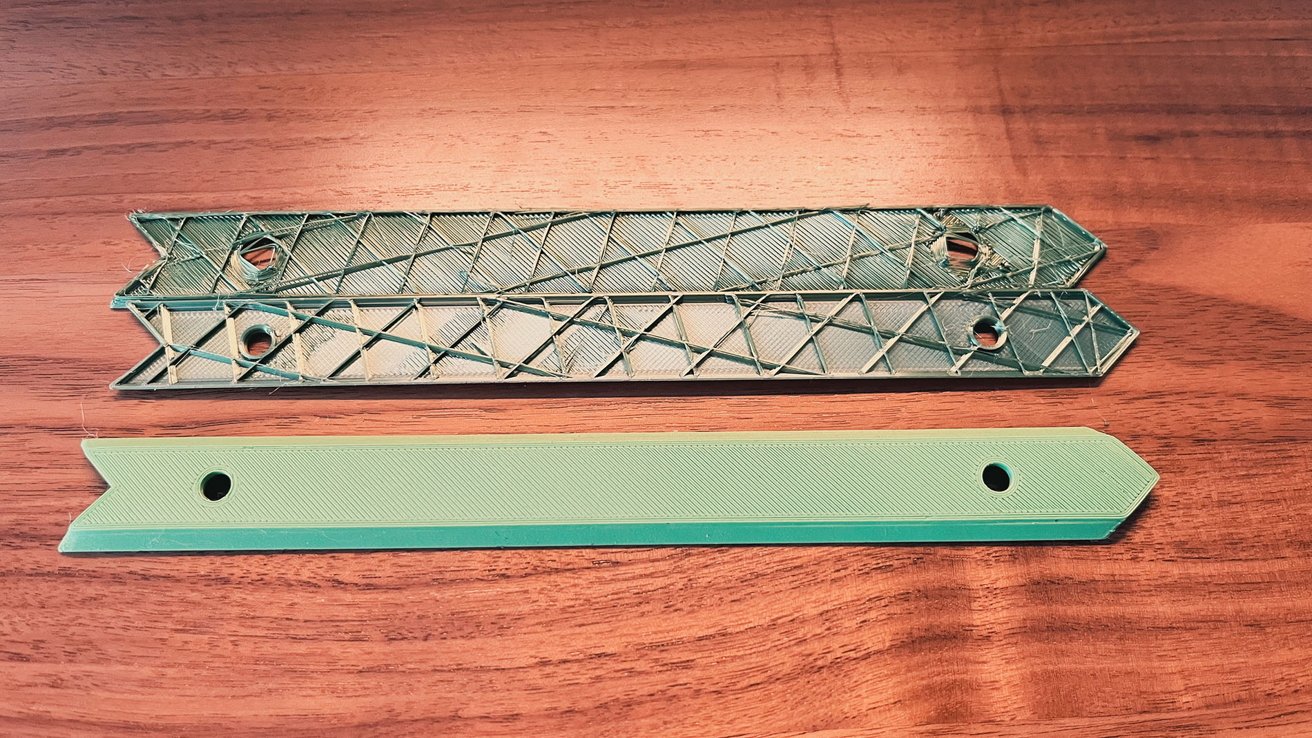
A part printed in Silk PLA, showing adhesion problems and the same part printed in PLA looking as it should
When I switched my searches from "nozzle temperature too low" to "silk PLA printing problems," I suddenly found a host of people talking about how silk PLA can cause all sorts of issues if printed at low temperatures. This could include clogging the hot end, poor layer adhesion, poor build plate adhesion, warping, and more.
Many people suggested printing it as high as 240C -- a full 15C higher than the manufacturer recommends. So I decided to try it at 225C. While it didn't fix all of my problems, and I think that the filament I have is particularly ill-suited to the prints I wanted to make, it did improve quite a few of my issues.
After I switched to the Hatchbox brand of PLA, I had no issues printing at 200C, and no layer adhesion problems on my projects.
Long story long, it's worth honing your search skills if you plan on taking up 3D printing. I suggest heading to your local makerspace, library, or college campus and seeing if they'll give you a crash course in 3D printing.
I didn't do this and still learned quite a bit through trial and error, but I would have greatly benefited from it had I been able to.
If your 3D printer has a removable magnetic bed -- and the Ender-3 V2 Neo does -- it's better to remove stubborn prints by removing the build plate and gently bending it to pop them off.
While the scraper is great for removing small pieces, I found prints with large or complicated footprints more difficult. I also learned that you could undo all the hard work you spent leveling your build plate if you go after it too aggressively with a scraper.
You should also clean your build plate after every build, especially if you touch your build plate with your hands. Although some people clean their build plates with acetone or Simple Green All-Purpose cleaner, rubbing alcohol on a microfiber cloth did the trick for me. Ensure you let your printer cool to room temperature first, as cleaning fumes are a fire hazard.
Whatever you assume your problem is, you should check to ensure your build plate is level and your nozzle is at the appropriate distance when it is at "home." All it takes is being off by just a few millimeters to cause your prints to fail spectacularly.
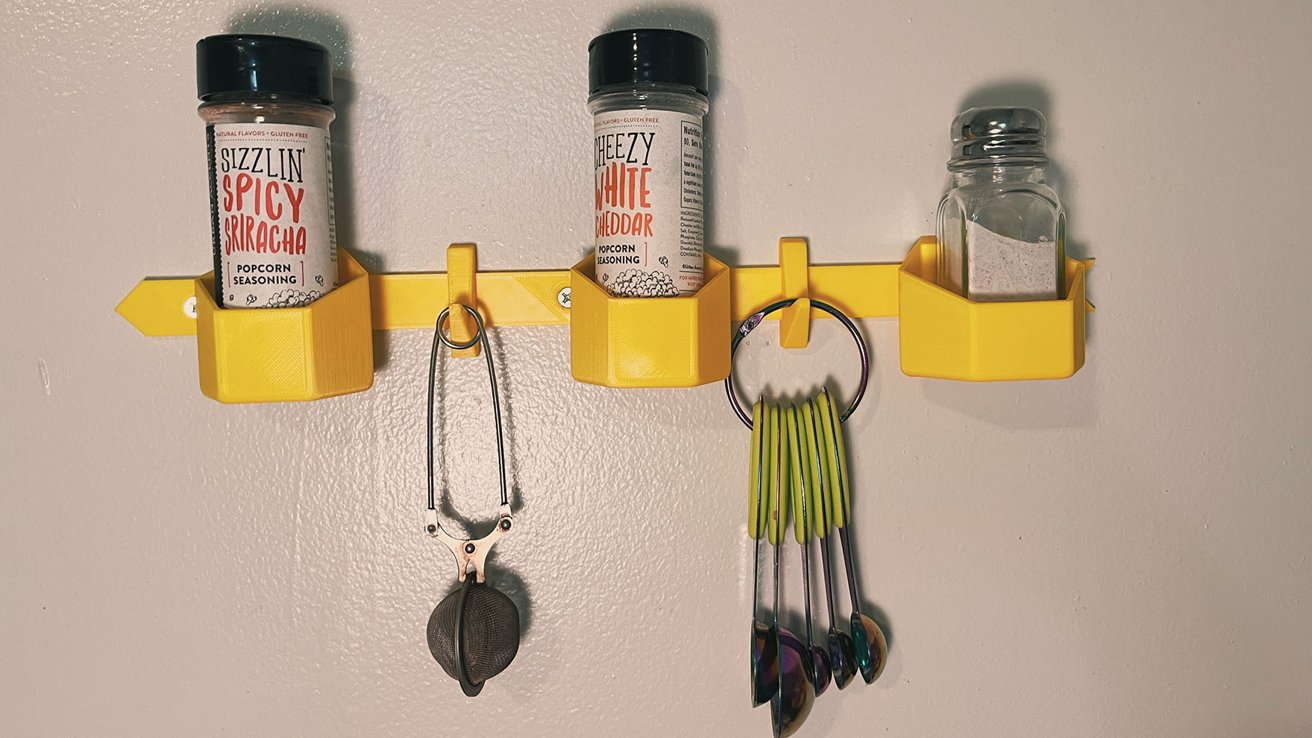
This spice rack, designed by Gazzaladra, can be printed in small batches making it great for beginners
And lastly, when you first start, begin with smaller, faster builds, and learn how to spot even minor defects and what may be causing them.
While you might be excited to print a complex model as soon as you unbox your printer, stick with 3DBenchy and similar models until you know everything works.
One of the most significant benefits of using the Ender-3 V2 Neo is that it's a very widely used printer. This means you've got a nearly endless supply of people who have experienced just about any problem you could run into.
Many people have also figured out the best way to use popular brands of filaments, how to print popular models, and more.
While I'm far from a seasoned expert, I'm more than happy with my experience.
So far. I'll be coming back to talk about it more, much later.
Read on AppleInsider
A decade ago, 3D printing was a niche hobby, but that's no longer the case. That's why I agreed to try out Creality's Ender-3 V2 Neo 3D Printer, a $299 3D printer designed for beginners and professionals alike.
Creality says the Ender-3 V2 Neo is a human-centered device and suggests nearly anyone could use it. I wanted to see if it was indeed the case.
Ender-3 V2 Neo 3D Printer - Important specs
Before I delve into my experience with the Ender-3 V2 Neo 3D Printer, I'd like to take the time to give a few important specs of the machine.- Printer type: Fused deposition modeling (filament printer)
- Build Volume: 220mm by 220mm by 250mm
- Build plate surface:Spring steel, removable, bendable
- Heat bed max temperature: 100C
- Number of nozzles: 1
- Nozzle max temperature: 260C
- Extruder type: Full-metal Bowden extruder
- Rated power: 350W
Assembling the Ender-3 V2 Neo
I'd never used a 3D printer before, so I assumed it would be a hassle to set it up. However, when it came to assembling the machine, it was better than I thought it would be.It's shipped out in three pieces -- the build plate, the gantry -- which already has the nozzle and hot-end attached, and the control panel. Setup mainly involves putting these three pieces together and then clipping a few wires in place.
The hot end, situated on the gantry
This can be initially intimidating, but the Ender-3 V2 Neo went together in under 20 minutes in a process that made me feel more confident about embarking on my 3D printing adventure. The relatively sparse instructions did a good job of walking me through the process.
In addition to receiving the printer, you also get a small selection of helpful tools. This includes a wrench, which can be used to tighten or loosen the belts as needed, a scraper for removing stubborn builds, a hex key set required for assembly and maintenance, and a nozzle cleaning pin.
Ender-3 V2 Neo 3D Printer - The interface
Once everything is set up, it's time to turn your printer on and get to know it better. This is done via the device display attached to the right-hand side of the build plate.The on-device interface is easy to use, as there's a single knob used to navigate through the menus on the Ender-3 V2 Neo. Selecting is done with a simple press on the top of the knob.
The actual on-device software is easy to understand, too, which I appreciated as a first-time user.
Preparing to print on the Ender-3 V2 Neo 3D Printer
While I found assembling the Ender-3 V2 Neo very easy, it took me only a little time to hit my first snag. As it turns out, a "secret" step is not immediately apparent.If you're like me, you might see the option to auto-level your build plate and assume it will take care of all your leveling requirements.
That's not the case at all, as you still need to manually level your build plate to be pretty level. Once finished, then you can use the auto-leveling feature.
If you don't manually level your build plate, you'll have a first print that looks like this.
A failed 3DBenchy
Leveling your build plate is tiresome and primarily involves turning four wheels under it until the nozzle has a clearance of 0.1mm at each corner. You do this by sliding a piece of paper under the nozzle at these key points -- the paper should slightly catch the nozzle.
Unfortunately, you have to do this several times, too, because turning one wheel will often cause the build plate to change at the other corners.
Fortunately, there's a helpful YouTube video by Creality that shows how to go about doing so.
Once everything is level, then you can use the auto-level feature, set your z-offset, and hopefully, your 3DBenchy comes out looking like this.
3DBenchy, looking just as she should!
Finding things to print...
As much as I enjoyed printing 3DBenchy, I wasn't planning on being in the small model boat market, so I knew I'd have to find a place to get files to 3D print.There are plenty of places to get 3D models, though there are a few places you may want to bookmark before you get started.
So far, I've had a great time with Cults3D, a large marketplace where people can sell their 3D prints -- or sometimes even offer them for free. The interface is easy to use, accepts credit cards and PayPal, and encourages people to post pictures of their builds.
This watering can took just about 24 hours to print
My first non-Benchy print was a gorgeous geometric watering can by Gazzaladra, a designer who sells his wares on Cults3D.
Thingiverse is popular, too, housing thousands of free models across all kinds of categories. The interface is more challenging to use than Cults3D, but it's still a great site to keep in your back pocket.
Etsy is another place that offers 3D files for print as well. The upside is the creators usually post some fantastic finished photos of their creations, but the biggest drawback is it can be expensive.
...and then printing them
When it comes time to print the 3D model, you'll need to "slice" them. Slicing a 3D model is when you import it into a program that cuts the model into layers, allowing it to be printed.Additionally, 3D slicing software allows you to arrange your models for printing or add additional models to print more than one object at a time.
As always, there are dozens of ways you can accomplish this.
A teabag dispenser, which took nearly 19 hours to print
Creality 3D printers come with Creality Slicer, a free option designed to work directly with their line of printers. However, Creality Slicer is far from the only 3D slicing software out there.
Cura, for example, is pretty popular. It's free, open source, and a popular choice for beginners. Creality Slicer is a skinned and slightly modified version of a 4.x Cura.
While I had initially started out using Creality Slicer, I found some of the options in the Cura 5.2.1 were better for troubleshooting print problems -- which I'll gladly cover in the next section.
A quick note about filaments
According to Creality, the Ender-3 V2 Neo is compatible with the following filament types.- PLA
- ABS
- PETG
We'll be talking more about the other plastics in future pieces.
Be prepared to fiddle with settings
As fun as 3D printing is, it's crucial to realize it is a challenging hobby.This becomes readily apparent once you start printing with different filaments -- and I don't mean just different types of plastic. For example, one brand or color of PLA may require a different nozzle temperature than the next.
Manufacturers don't provide an exact temperature but a range at which your filament should work. But this may not even be the correct range -- your filament may function best printed outside what the manufacturer suggests.
Every time you try a new filament you've never used, you'll have to figure out what temperature filament needs. You can do this in several ways, but I suggest printing a temperature tower.
A pair of temperature towers
A temperature tower is a small tower comprised of multiple levels printed at different temperatures. The goal is to find out which temperature creates the cleanest and sturdiest print -- and I found this easiest to achieve using Cura 5.2.1.
Once you find your perfect temperature, I suggest writing the nozzle and print bed temperatures for each spool of 3D filament you use. Then, write it down on the spool or in a notepad you keep near your 3D printer.
When things go wrong
If there's one genuinely intimidating aspect of 3D printing, it's the amount of troubleshooting you will need. Unfortunately, it is not a small amount.While I'm comfortable fussing with things on the software end, I'm not the most comfortable with disassembling and repairing hardware.
That's why I became distraught when my printer began throwing out a bizarre error. Seemingly out of nowhere, it would stop printing, blare an alarm, and then the display would read, "nozzle is too lowperature."
Upon researching the error, I found it wasn't particularly rare. Figuring out what was causing it could be a nightmare.
Most people were quick to prescribe the same solution "It's a bad thermistor, you'll need to get a new one!" but I felt like this couldn't have been the issue. I'd only done a handful of small prints, and I treated the machine with kid gloves -- it shouldn't have burnt out already.
Other people suggested it could be a firmware issue. Some posited the nozzle could be clogged, the silicon sock around the nozzle was missing, or my hot end had been damaged.
Again, none of these should have been the problem -- I was only six or seven prints in at the most.
As it turns out, the issue wasn't with my printer but the filament itself. The errors only occurred when I used a silk PLA filament.
While the manufacturer suggests the filament could be printed as low as 195C, I found, more often than not, it would cause my printer to error out if it dipped below 200C. So I increased my temperature to 210C, and suddenly I wasn't getting nozzle temperature errors anymore.
Remember how I said manufacturers' guidelines aren't particularly useful -- this is what I meant.
Silk PLA is notoriously fussy and often requires much higher temperatures than most people print PLA. Even at 210C, I had terrible delamination problems in certain areas with my prints.
A part printed in Silk PLA, showing adhesion problems and the same part printed in PLA looking as it should
When I switched my searches from "nozzle temperature too low" to "silk PLA printing problems," I suddenly found a host of people talking about how silk PLA can cause all sorts of issues if printed at low temperatures. This could include clogging the hot end, poor layer adhesion, poor build plate adhesion, warping, and more.
Many people suggested printing it as high as 240C -- a full 15C higher than the manufacturer recommends. So I decided to try it at 225C. While it didn't fix all of my problems, and I think that the filament I have is particularly ill-suited to the prints I wanted to make, it did improve quite a few of my issues.
After I switched to the Hatchbox brand of PLA, I had no issues printing at 200C, and no layer adhesion problems on my projects.
Long story long, it's worth honing your search skills if you plan on taking up 3D printing. I suggest heading to your local makerspace, library, or college campus and seeing if they'll give you a crash course in 3D printing.
I didn't do this and still learned quite a bit through trial and error, but I would have greatly benefited from it had I been able to.
Tricks I picked up from using the Ender-3 V2 Neo
If anyone is interested in trying their hand at 3D printing, I've learned a few tricks over the last month that I'm willing to share.If your 3D printer has a removable magnetic bed -- and the Ender-3 V2 Neo does -- it's better to remove stubborn prints by removing the build plate and gently bending it to pop them off.
While the scraper is great for removing small pieces, I found prints with large or complicated footprints more difficult. I also learned that you could undo all the hard work you spent leveling your build plate if you go after it too aggressively with a scraper.
You should also clean your build plate after every build, especially if you touch your build plate with your hands. Although some people clean their build plates with acetone or Simple Green All-Purpose cleaner, rubbing alcohol on a microfiber cloth did the trick for me. Ensure you let your printer cool to room temperature first, as cleaning fumes are a fire hazard.
Whatever you assume your problem is, you should check to ensure your build plate is level and your nozzle is at the appropriate distance when it is at "home." All it takes is being off by just a few millimeters to cause your prints to fail spectacularly.
This spice rack, designed by Gazzaladra, can be printed in small batches making it great for beginners
And lastly, when you first start, begin with smaller, faster builds, and learn how to spot even minor defects and what may be causing them.
While you might be excited to print a complex model as soon as you unbox your printer, stick with 3DBenchy and similar models until you know everything works.
My experience with the Ender-3 V2 Neo
Overall, I liked learning to use the Ender-3 V2 Neo, and while I'm pretty early in my 3D printing journey, I'm feeling reasonably confident in my skills.One of the most significant benefits of using the Ender-3 V2 Neo is that it's a very widely used printer. This means you've got a nearly endless supply of people who have experienced just about any problem you could run into.
Many people have also figured out the best way to use popular brands of filaments, how to print popular models, and more.
While I'm far from a seasoned expert, I'm more than happy with my experience.
So far. I'll be coming back to talk about it more, much later.
Ender-3 V2 Neo 3D Printer - Pros
- Full-metal Bowden extruder ensures smooth extrusion
- Easy-to-use navigationscreen and on-device firmware
- Very easy assembly
Ender-3 V2 Neo 3D Printer - Cons
- Setup doesn't discuss the importance of manually leveling your machine
- Error codes are cryptic
- Like all 3D printers, the learning curve is steep
Where to buy the Ender-3 V2 Neo 3D Printer
You can purchase the Creality Ender-3 V2 Neo from the company directly for $299 or via Creality's Amazon Store for $319.Read on AppleInsider
Comments
Why is a printer that's almost thrice the price of this one "better" for beginners? I'm sure you have reasons for thinking so; perhaps you could relate them.