How to make a video screensaver for your Mac

We've got dynamic desktops but we're stuck with ordinary old screensavers. Except, with the right software and settings, you can replace that with a new video screensaver. AppleInsider explains what you need to do.
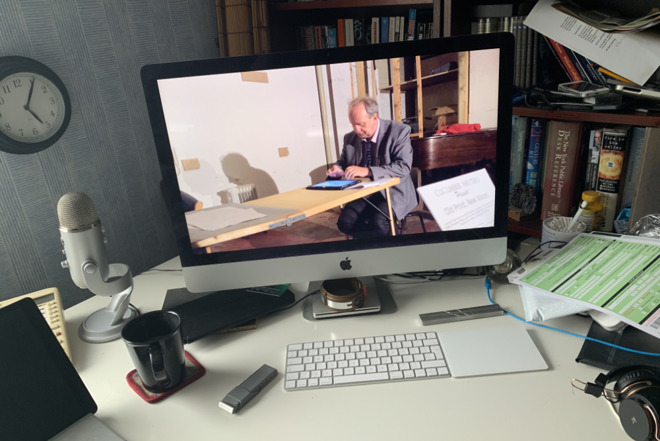
A video screensaver playing on an iMac
We don't really need screensavers anymore and the number of times you've heard people mix them up with wallpaper is probably a clue. Yet if there's no longer any such thing as images burning in to our CRT monitors, there is such a thing as blank screens looking very boring.
To be fair, a Mac's screen goes blank for a reason. It's better for the environment than having it on all the time and it's also more secure than leaving all your documents open for the world to see.
Yet you thought this during Apple's October 30 event: that opening animation was joyous. If Apple sold that as a screensaver, you'd buy it and they'd probably get even more people switching from Windows.
Unfortunately, they don't and even if you could figure out a way to have a video screensaver, you couldn't take Apple's property like that. Nothing changes the legal side but it turns out that it is possible to have a video screensaver.
You bring the video you own the rights to and we'll get it on your screensaver.
Given that you're just looking for some moving images on your screensaver, you're not charging audiences and offering popcorn, you can take a short cut to converting images. Unless it's playing on a DVD or is that major motion picture you directed and is now on the iTunes Store, you can screen-record your video.
You may well be able to take the original video in its entirety and play that but for a screensaver, you really just want a few minutes at most. This thing is going to loop around forever, you're not going to watch every second every time.
So find a part of your video that you like and then screen-record it.
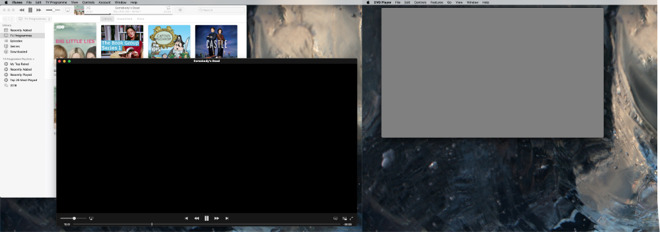
Trying to record any video from iTunes (left) or DVD (right)
Macs won't allow you to screen-record from shiny disk or iTunes: if you try it, your recording will feature a perfectly black screen from iTunes or a perfectly gray one from DVD.
In theory you could play that video in QuickTime Player, VLC or just by tapping the space bar and seeing it in Mojave's Quick Look. In practice, we would find that Mojave's screen recorder would then regularly record only distorted images.

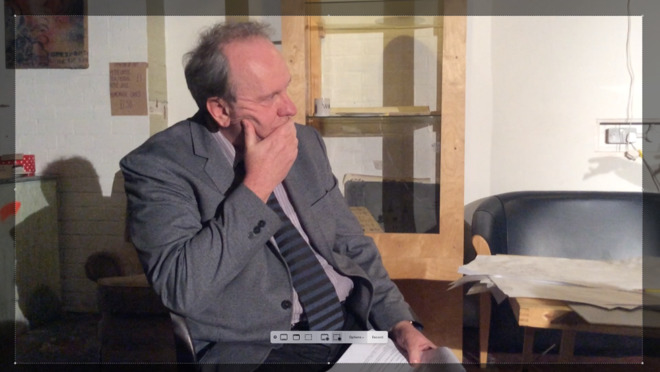
How Apple protects copyright videos: it distorts results in Mojave's regular screen recording feature
That's a combination of these players and Apple's attempts to stop you pirating videos you don't own.
Apps like Screenflow will let you record videos of your own that you play in QuickTime Player but you can also upload them to YouTube. Upload the video to YouTube and even if you never make it public, you can play it yourself in your browser and then screen record that.
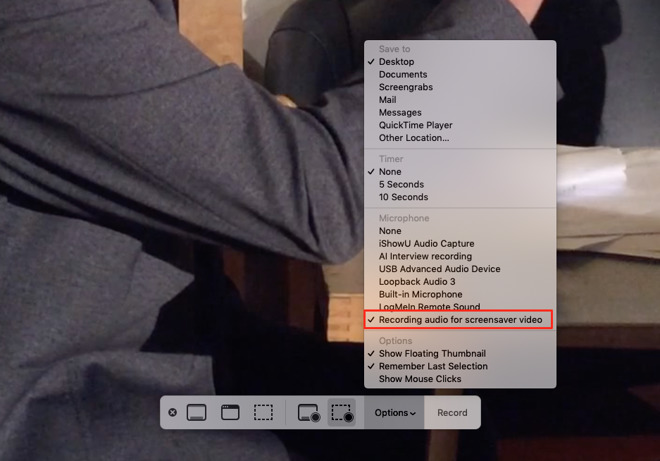
You can screen-record it using the new feature in macOS Mojave. Hold down Command-Shift and tap 5. You get options for taking screenshots or videos.
In theory, then, you set this recording going and then you play your video. In practice, Mojave's built-in screen recorder records where your mouse cursor is. It shouldn't and in the beta versions of macOS Mojave there was an option to switch that off but it's gone.
If you record slightly less than full screen, you avoid issues with cursor movement, menubar and the Dock
So rather than have Mojave record your entire Mac screen, click to have it record a portion. Drag that portion to almost but not quite fill the screen. Leave yourself a border for the mouse cursor to sit in. Avoid putting the mouse anywhere near the top or bottom of the screen as its presence will call up the menubar or the Dock.
Now start your video, click the control to make it full screen. Move your cursor to the left or right and let the video play for a long as you want.
So it might be fun for you to hear a, say, someone mimicking Arnold Schwarzenegger saying you'll be back, but it will be hell on Earth for anyone sitting near your Mac who's going to hear it said over and over.
Screenflow includes the ability to record your Mac's audio
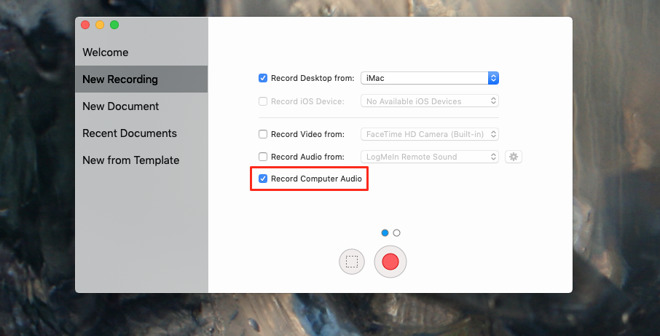
Silent screensavers are the best, which is handy because that's all you can realistically do with Mojave's screen recorder. While you do get options for audio, they're all to do with inputs to the Mac such as the built-in Microphone or any other mic you've got connected. There's no way to tell it to record the Mac's own sounds.
To do that, you'll need an app like Screenflow that will record the Mac's audio, or you have to work around it. Here we've used Rogue Amoeba's Loopback to take the audio from Safari because we're going to record from our YouTube video playing in the browser.
This audio is presented to Mojave as a new source that's just the same as the microphones that happen to be plugged into this Mac.
Mojave's screen recorder doesn't allow you to capture the Mac's audio but here we're using Loopback to present Safari as a new audio source like a microphone
Most of the time, though, you're going to find that the start and end are wrong. The start shows you moving your cursor out of the way, for instance, and the end is a bit abrupt.
Click on the Trim icon at top right of the video player. A timeline view of the video, a filmstrip-like series of stills, becomes editable and you can drag from left or right to tidy up the ends. It's called topping and tailing, and Mojave's built-in video editor is very good for swift work like this.
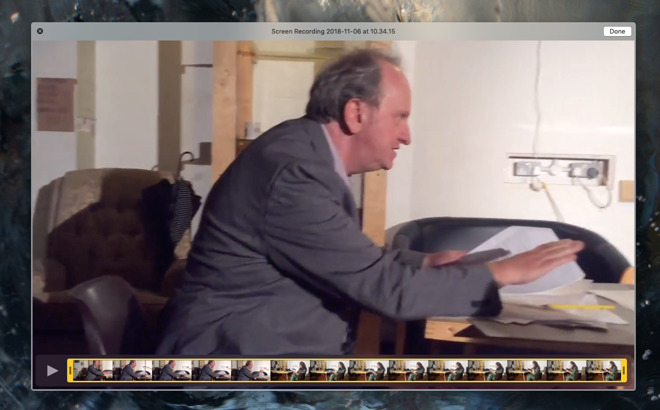
You can make basic trims in Mojave's video player
It's not good at all for anything else. You can't take, say, ten seconds from the middle of the video and another five from the end. You can only trim the whole long recording down into a shorter one. Then you also can't do anything about an abrupt ending: there's no way to fade out, for instance.
Depending on your video, you might not care about that. If you do, though, you'll need to load the video into iMovie or a professional editor like Final Cut Pro X.
When it's finished, save the final video to somewhere you'll remember. As this is going to be a screensaver and usually screensavers are kept in your Pictures folder, we created a subfolder in there called Video Screensavers.
It installs into System Preferences and becomes part of the Desktop & Screensaver pane. In that pane, click on the Screensaver button and you'll get a series of options including built-in videos from Apple that you didn't even know where there.
You weren't missing much. Scroll down to the SaveHollywood one and click on that. Then click the button marked Screen Saver Options. You get a drop down menu with extensive options.
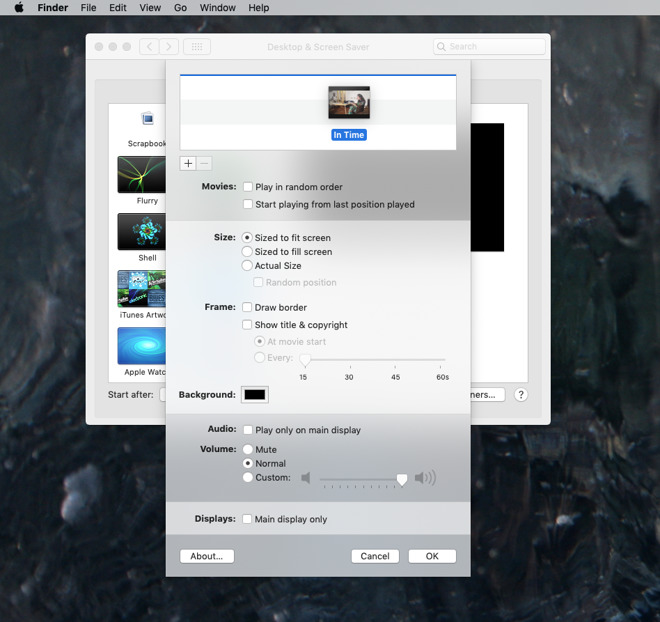
Using the SaveHollywood System Preference
At the top, there's a blank section. Drag your video into there. You could drag as many as you like and it would play them all but this isn't something to go crazy about. If you happen to own the rights to, say, a ten-part series you've made for Netflix, go ahead. Otherwise, just stick one in there for now.
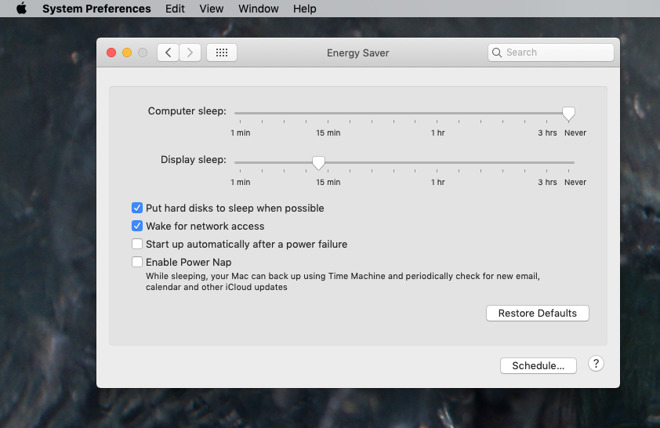
Remember to adjust your Display Sleep option or your Mac will go blank before the screensaver can start
You may well have your Mac set to blank the screen so quickly after you stop using your Mac that the screensaver doesn't have time to kick in.
Drag the slider to allow a few more minutes and then you really are set. You can walk away from your Mac and come back knowing that your screensaver is playing video.
Keep up with AppleInsider by downloading the AppleInsider app for iOS, and follow us on YouTube, Twitter @appleinsider and Facebook for live, late-breaking coverage. You can also check out our official Instagram account for exclusive photos.
A video screensaver playing on an iMac
We don't really need screensavers anymore and the number of times you've heard people mix them up with wallpaper is probably a clue. Yet if there's no longer any such thing as images burning in to our CRT monitors, there is such a thing as blank screens looking very boring.
To be fair, a Mac's screen goes blank for a reason. It's better for the environment than having it on all the time and it's also more secure than leaving all your documents open for the world to see.
Yet you thought this during Apple's October 30 event: that opening animation was joyous. If Apple sold that as a screensaver, you'd buy it and they'd probably get even more people switching from Windows.
Unfortunately, they don't and even if you could figure out a way to have a video screensaver, you couldn't take Apple's property like that. Nothing changes the legal side but it turns out that it is possible to have a video screensaver.
You bring the video you own the rights to and we'll get it on your screensaver.
First, find your video
This works with any type of video that your Mac can play without any extra tools. So if you can drag it to iTunes and it plays, you're fine. If it's instead in a format like .mkv, you'll need to find a converter first.Given that you're just looking for some moving images on your screensaver, you're not charging audiences and offering popcorn, you can take a short cut to converting images. Unless it's playing on a DVD or is that major motion picture you directed and is now on the iTunes Store, you can screen-record your video.
You may well be able to take the original video in its entirety and play that but for a screensaver, you really just want a few minutes at most. This thing is going to loop around forever, you're not going to watch every second every time.
So find a part of your video that you like and then screen-record it.
Trying to record any video from iTunes (left) or DVD (right)
Macs won't allow you to screen-record from shiny disk or iTunes: if you try it, your recording will feature a perfectly black screen from iTunes or a perfectly gray one from DVD.
In theory you could play that video in QuickTime Player, VLC or just by tapping the space bar and seeing it in Mojave's Quick Look. In practice, we would find that Mojave's screen recorder would then regularly record only distorted images.
How Apple protects copyright videos: it distorts results in Mojave's regular screen recording feature
That's a combination of these players and Apple's attempts to stop you pirating videos you don't own.
Apps like Screenflow will let you record videos of your own that you play in QuickTime Player but you can also upload them to YouTube. Upload the video to YouTube and even if you never make it public, you can play it yourself in your browser and then screen record that.
You can screen-record it using the new feature in macOS Mojave. Hold down Command-Shift and tap 5. You get options for taking screenshots or videos.
In theory, then, you set this recording going and then you play your video. In practice, Mojave's built-in screen recorder records where your mouse cursor is. It shouldn't and in the beta versions of macOS Mojave there was an option to switch that off but it's gone.
If you record slightly less than full screen, you avoid issues with cursor movement, menubar and the Dock
So rather than have Mojave record your entire Mac screen, click to have it record a portion. Drag that portion to almost but not quite fill the screen. Leave yourself a border for the mouse cursor to sit in. Avoid putting the mouse anywhere near the top or bottom of the screen as its presence will call up the menubar or the Dock.
Now start your video, click the control to make it full screen. Move your cursor to the left or right and let the video play for a long as you want.
Find your audio
This is not a good idea. Remember that you're making a video screensaver that will play when you leave your Mac.So it might be fun for you to hear a, say, someone mimicking Arnold Schwarzenegger saying you'll be back, but it will be hell on Earth for anyone sitting near your Mac who's going to hear it said over and over.
Screenflow includes the ability to record your Mac's audio
Silent screensavers are the best, which is handy because that's all you can realistically do with Mojave's screen recorder. While you do get options for audio, they're all to do with inputs to the Mac such as the built-in Microphone or any other mic you've got connected. There's no way to tell it to record the Mac's own sounds.
To do that, you'll need an app like Screenflow that will record the Mac's audio, or you have to work around it. Here we've used Rogue Amoeba's Loopback to take the audio from Safari because we're going to record from our YouTube video playing in the browser.
This audio is presented to Mojave as a new source that's just the same as the microphones that happen to be plugged into this Mac.
Mojave's screen recorder doesn't allow you to capture the Mac's audio but here we're using Loopback to present Safari as a new audio source like a microphone
Concentrate on video
When it's done, end the video and the recording. For a few moments, Mojave will show you a thumbnail of the video on your screen. Click on that and you get into the video player. You can watch the recording there and if it's what you wanted, you're done.Most of the time, though, you're going to find that the start and end are wrong. The start shows you moving your cursor out of the way, for instance, and the end is a bit abrupt.
Click on the Trim icon at top right of the video player. A timeline view of the video, a filmstrip-like series of stills, becomes editable and you can drag from left or right to tidy up the ends. It's called topping and tailing, and Mojave's built-in video editor is very good for swift work like this.
You can make basic trims in Mojave's video player
It's not good at all for anything else. You can't take, say, ten seconds from the middle of the video and another five from the end. You can only trim the whole long recording down into a shorter one. Then you also can't do anything about an abrupt ending: there's no way to fade out, for instance.
Depending on your video, you might not care about that. If you do, though, you'll need to load the video into iMovie or a professional editor like Final Cut Pro X.
When it's finished, save the final video to somewhere you'll remember. As this is going to be a screensaver and usually screensavers are kept in your Pictures folder, we created a subfolder in there called Video Screensavers.
Fire up your screensaver
Now go download a free Mac app called SaveHollywood.It installs into System Preferences and becomes part of the Desktop & Screensaver pane. In that pane, click on the Screensaver button and you'll get a series of options including built-in videos from Apple that you didn't even know where there.
You weren't missing much. Scroll down to the SaveHollywood one and click on that. Then click the button marked Screen Saver Options. You get a drop down menu with extensive options.
Using the SaveHollywood System Preference
At the top, there's a blank section. Drag your video into there. You could drag as many as you like and it would play them all but this isn't something to go crazy about. If you happen to own the rights to, say, a ten-part series you've made for Netflix, go ahead. Otherwise, just stick one in there for now.
That should be it
You've got the video, it's installed in System Preferences, you should be good to go. However, check System Preferences, Energy Saver too.Remember to adjust your Display Sleep option or your Mac will go blank before the screensaver can start
You may well have your Mac set to blank the screen so quickly after you stop using your Mac that the screensaver doesn't have time to kick in.
Drag the slider to allow a few more minutes and then you really are set. You can walk away from your Mac and come back knowing that your screensaver is playing video.
Keep up with AppleInsider by downloading the AppleInsider app for iOS, and follow us on YouTube, Twitter @appleinsider and Facebook for live, late-breaking coverage. You can also check out our official Instagram account for exclusive photos.
Comments