Here's how to get started with your new Apple TV 4K or Apple TV HD
Apple doesn't provide everything you need right in the box with the Apple TV, and a perfect set-up can be a little fiddly. Then when you're hooked on how well it works, Apple TV has some nice extra touches that make viewing even better.
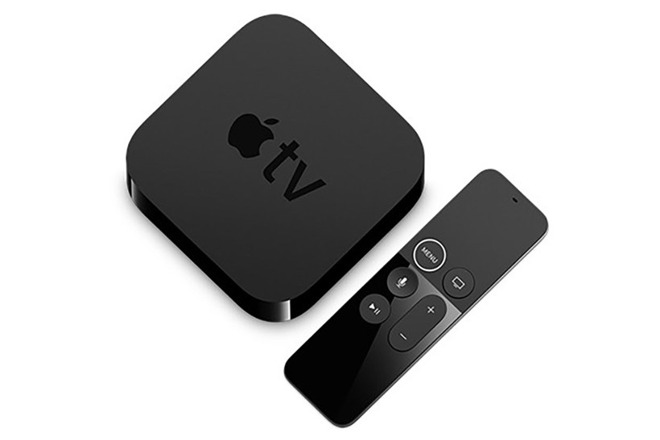
Apple TV 4K with Siri Remote
Whatever way you set up whichever version of Apple TV you have, the end result is going to be the same. You're going to have a very iOS-like display of apps on your television set and they will include every possible type of video streaming you can have. That's where it starts to get a little tricky, though, as what you can have depends on whether you have a cable subscription or whether you now choose to buy individual apps such as Netflix.
That's even before Apple launches its Apple TV+ and Apple TV Channels service, which will change what's available -- and what it costs.
Before and after that launch, though, there is also the issue of your TV set and what it is physically able to show.
The difference is in the video and audio that the Apple TV can send to your television set. Apple TV 4K can output video up to 2160p with Dolby Vision and HDR10. Even if you don't happen to know what the numbers mean, you can still see the difference: the regular Apple TV HD outputs video at 1080p.
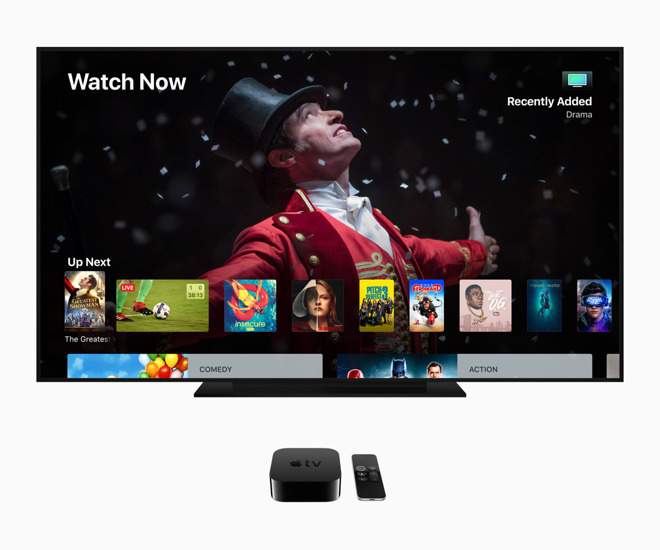
Apple promoting the addition of Dolby Atmos audio to Apple TV
There are also audio differences with the Apple TV 4K being able to send up to Dolby Atmos 360-degree cinema sound to your television set where the regular model goes to the lesser Dolby Digital Plus 7.1 surround sound.
To make this happen, there are internal differences in the two models with the regular HD one running Apple's A8 processor and the 4K version having Apple's A10X Fusion chip. Similarly, there are differences externally to do with what your Apple TV can connect to. Both have HDMI, though the Apple TV 4K has the later HDMI 2.0a instead of HDMI 1.4. And there are differences to do with Bluetooth plus connecting to Wi-Fi or wired networks.
There's also a difference in the price. The regular Apple TV HD currently costs $149 while the Apple TV 4K comes in at either $179 or $199 depending on how much storage space it has.
It comes down to this, though. If you have an Apple TV 4K then you can do everything the regular Apple TV HD can and more -- but it depends on your television set whether you'll see or hear any difference.
Throughout this new user's guide, we'll talk about Apple TV HD but if you have the 4K model then practically every step is precisely the same after you've connected it to your television set.
-l.jpg)
Ports on an Apple TV (Source: Apple)
If you already have a spare HDMI cable then you might be in luck -- but you might not be because Apple TV 4K needs the cable to be HDMI 2.
Get that Belkin or any other HDMI 2 cable that is rated as working with Apple TV. Then connect your Apple TV HD to your television set using it.
The way to do this is different on every set but it typically starts with a button on your remote control called Input or Sources. Pressing that repeatedly will make the set switch through each of the possible connections it has. When you reach the HDMI one with the Apple TV connected, you'll know because the screen will initially show the Apple logo.
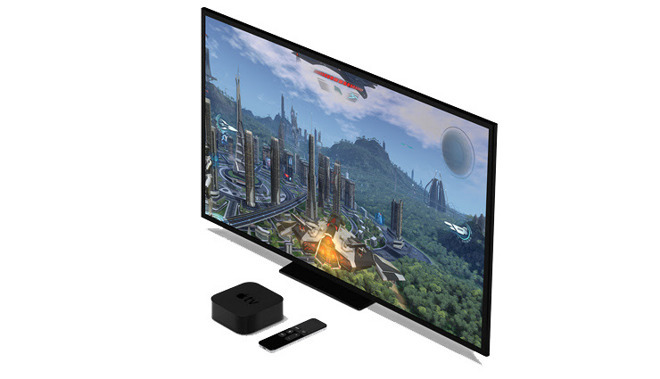
Apple TV with Siri Remote and a television set
If it's taken you more than a couple of minutes to do this, then the Apple logo will be gone but an Apple TV setup screen will be showing instead.
Get used to that Input or Source button, by the way. Later when this is all set up and you're watching TV, switching on your Apple TV HD or your cable box should make all modern television sets switch over automatically. In practice, it usually works but sometimes doesn't, and you end up having find that Source button.
You're asked to Click the trackpad on your remote to get started and pair your remote to your Apple TV HD. If you've not used a Siri Remote before then you'd be forgiven for not knowing where the trackpad is. Apple TV HD's set up does give you a faint hint: it shows a drawing of the remote and slightly shades in the top trackpad part.
The trackpad is the area above the Menu and TV buttons. It is pretty much exactly the same size as the area beneath all of the buttons but the trackpad has a matte finish while the rest is glossy. There's no way you'll ever get the top and bottom mixed up when you look at the remote, but it's equally impossible that you'll never get it wrong when you pick it up.
You use the trackpad to swipe through options and to make selections by clicking. To pair the Siri Remote to your Apple TV HD, click once on the trackpad.
If you also press the Menu button three times, though, you'll get VoiceOver. This is Apple's accessibility feature which will talk you through the rest of the setup.
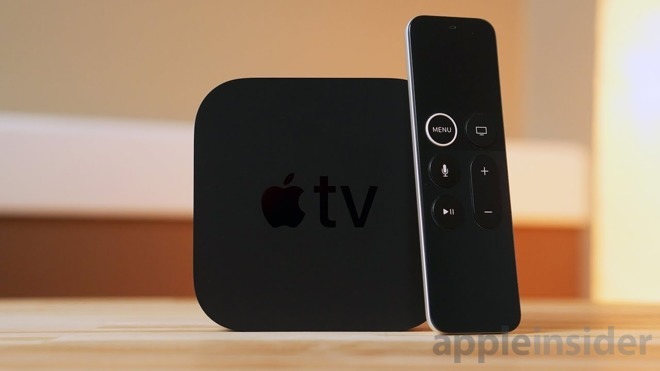
Apple TV with Siri Remote
The languages that Apple TV HD supports are presented in a long list that's headed by English. That's not only at the top of the list, it's also highlighted with a white bar. Swipe your finger or thumb down the Siri Remote's trackpad and you'll move that highlight. You'll also see a highlighted area on the trackpad follow your movements.
When you've picked your language, click the trackpad and you'll move on to specifying your country or region in much the same way.
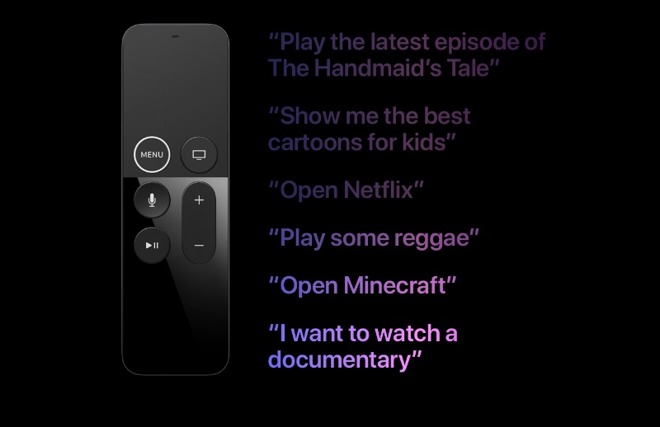
Some things you can ask Siri on Apple TV HD and 4K (Source: Apple)
Then when you've clicked on that, you're taken to a page that asks you to choose whether or not to use Siri with your Apple TV HD. Choose Use Siri. It's a peculiar thing that Apple calls the control a Siri Remote regardless of whether you disable Siri or not. And since you never have to use it if you don't want to, we just cannot think of a reason why you wouldn't choose to have Siri switched on for when you or someone else in your household do.
Apple TV HD uses the Apple ID when you're buying movies from the iTunes store or downloading apps from the App Store and so on. And then it uses your Wi-Fi in order to get those movies or apps, it uses your Wi-Fi when you're streaming Netflix or whatever.
So you need to enter these details and you could scroll down through the setup page to choose Set Up Manually. Don't. The default is the much handier and frankly much cooler Set Up with Device. Choose that.
The setup screen will now tell you to unlock your iOS device and, making sure that both Wi-Fi and Bluetooth are switched on, hold it close to the Apple TV HD itself.
It's not going to just allow anyone's iPhone to do it, though. Instead, the set up makes a Set Up New Apple TV dialog appear on your iOS device. It appears to solely have one button and that's called Set Up but actually you do have a choice. There is a small X in a close box at the top right. If you want to back out of this for any reason, you can tap that and the dialog disappears.
However, press Set Up. You'll next be asked to enter a four-digit authentication code. The iOS device will display a keypad for you to enter it and your television set will be showing a random number. Enter that and the Apple TV HD is paired to your iOS device for set up.
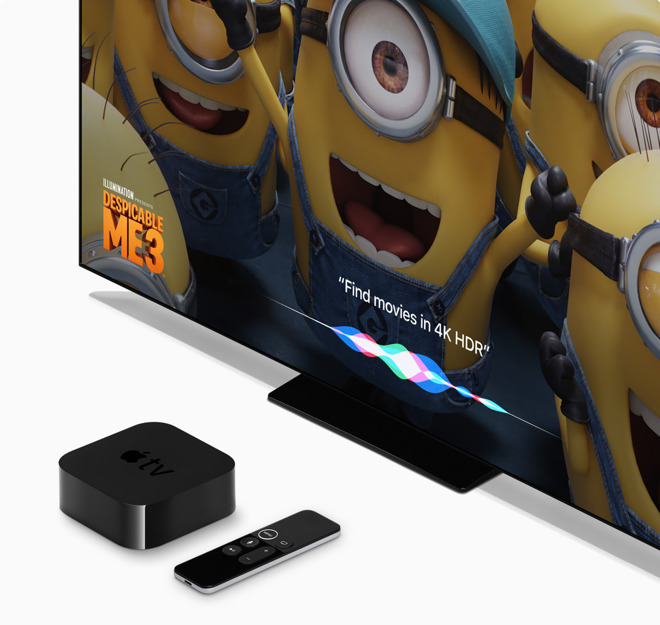
Asking Siri to find something to watch on Apple TV HD
Now you wait while it says Setting Up Wi-Fi. When that's done, it now connects your Apple ID to the Apple TV HD but, again, it doesn't just do it. You have to confirm that it is your Apple ID so your iOS device will ask you for the password.
If you're using iOS 12 and a recent iPhone, you'll be given the option to just tap on Passwords. When Face ID confirms that it's you, it will offer to put the right password in. Similarly, earlier iPhones will do the same via Touch ID and iOS 12.
Alternatively, you can just type in the password on your iOS device and tap on Sign In. After a few moments, your iOS device will display a message saying that you need to Finish on Apple TV and giving you only a Done button. Tap done and look back at your television set.
What happens then varies with the different providers but it boils down to your authenticating with them and their providing Apple TV apps for you to watch their channels or services on.
That's fine if you know you're going to be using your Apple TV HD for everything -- and if everything you watch is available on your Apple TV. The odds are, though, that Apple TV HD is going to be an adjunct to your television watching. It might very well become an important part and it may eventually replace everything else, but at first you're likely to use it alongside whatever cable or broadcast service you had before.
Since you can later download, say, the HBO app at any time, we recommend choosing Not Now.
Unless you have strong feelings about it, though, choose Enable Location Services instead.
Apple says that this means your Apple TV HD can show the correct time and date, though we'd have thought specifying your country or region would've done that already. Then the company says that apps might use the information to show you what's on at your local cinema but we've yet to find an app that does regional listings.
There are two categories of apps where Location Services are definitely used and also definitely needed. Weather apps need to know where you are to show local conditions, for one thing. And late December every year, the Santa Tracking App can only give you useful sleigh positioning data if it knows where you are.
There is also one category of app where Location Services definitely are definitely not used. You can't fool an app like Netflix, the BBC iPlayer or any one that's limited to certain geographic areas, by switching off Location Services.
For the odd time that it genuinely is useful, and because this is Apple so you know your data isn't being sold off to advertisers, choose Enable Location Services.

One of just myriad Apple Aerial Screensavers
Okay, this is about the Apple TV HD screensaver. The screensaver shows you high resolution fly-bys of beautiful locations around the world and the reason you're given an option about it because of those words 'high resolution'. There are many, many screensavers and more are made available regularly.
Apple says that even on the higher-resolution Apple TV 4K, the most one of these aerial screensavers will be is 650MB. During this setup, you only have the rather brute force option of having the screensavers on or off. The screen even tells you that new screensavers are downloaded weekly but that's the default, it's not the only option. Later you can go to Settings, General, Screen Saver, Download New Video and choose from daily, weekly, monthly and never.
If you're in a situation where your Wi-Fi is capped maybe you need to switch aerial screensavers off and you might as well do that now. Don't switch them off because of the storage size, however. The regular Apple TV HD now comes solely with 32GB storage space while the Apple TV 4K offers 32GB or 64GB. Regardless of the storage capacity, though, you can ignore how much Apple's screensavers take up because the Apple TV manages them.
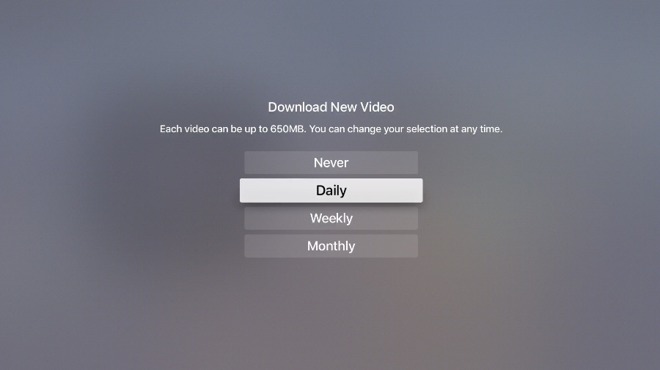
Screen Saver settings
You can't see where they are on your device so you can't delete them yourself nor see the way that Apple TV handles them. However, it will automatically download new and delete old ones according to its own secret plan.
And whatever that is, whichever aerial screensaver you have on your Apple TV HD at any given moment, they are all extraordinary. They're truly beautiful and there are countless times we've just watched them instead of anything else on our Apple TV.
If that happens to you as well -- when that happens -- then note that any time you're watching anything on Apple TV, you can quickly double-press the Menu button. That launches the screensaver immediately instead of your having to wait quietly on the home screen for five minutes first.
It's up to you whether you choose Send to Apple or Don't Send. We recommend that you choose to send, though, and that's because this information can help Apple TV app developers.
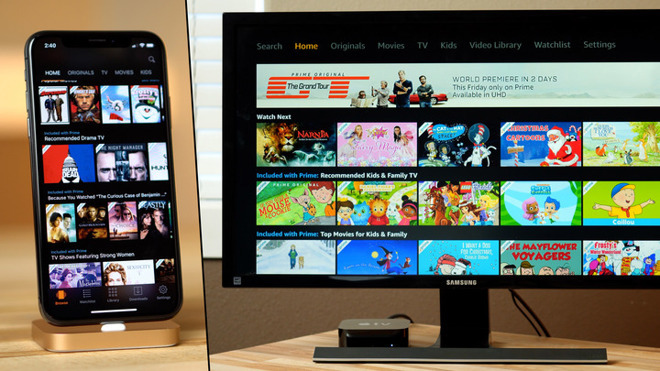
Amazon Prime on Apple TV (right)
There aren't enough of those. It's likely that the reason we can't find an app showing us local movie theater listings is that there isn't one. Apple TV's App Store is a minute fraction of that for iOS so let's at least give developers what help we can.
Whichever you decide, you're next taken to a Terms and Conditions page. Here your choices are Agree or Disagree and, to be frank, we've no idea what happens if you choose the latter. Most likely you'll get to sit there in front of a costly Apple TV HD which never shows you anything.
The 4K model will attempt to display its highest-quality Dolby Vision on screen. You're asked to Try Dolby Vision, although you have the option to say Not Now.
There's no disadvantage to trying it, however, and now is the sensible time to do so. Click Try Dolby Vision and the screen will probably go a quite scary black for a moment.
If your television set does not have Dolby Vision then that black screen will remain for around 20 seconds and then switch back to what it was before. You might, though, have a television that's able to show Dolby Vision quality but your HDMI cable is not good enough. In that case you'll see a screen that tells you to look for "sparkles, static or other display problems."
That screen has an OK button plus a Cancel one which also contains a countdown of the 20 seconds before it automatically cancels and reverts to what you had before.
If everything looks fine, choose OK.
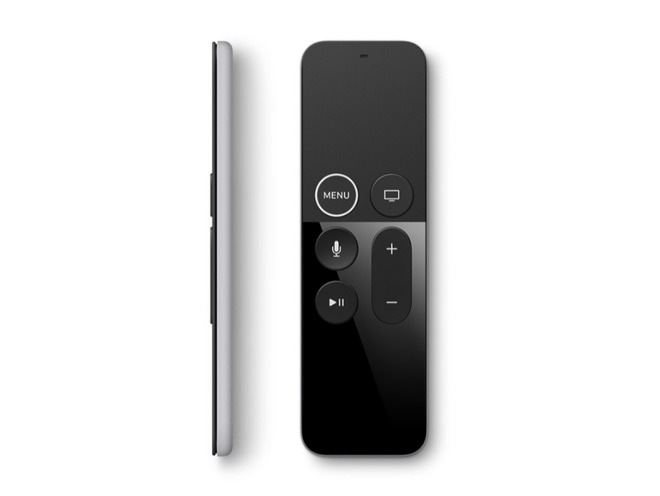
You're going to lose your Siri Remote. Cut this out and stick it on trees in your region with a reward offer
Unless you've already chosen a television provider, the home screen of Apple TV always begins with a grid of ten apps that come with the device. There is an App Store plus pre-installed apps for Music, Movies, TV shows and an so on. You move between them by swiping on the trackpad of your Siri Remote and then clicking on the one you want.
The top row of five apps are special, though. As you swipe across them, the top of the Apple TV screen changes to show you details of what you can watch or what you have been watching through them. So the Movies app, for instance, displays poster images for the latest releases and your most recent purchase.
You can move any app to the top row and in fact you can move any app to any position.
Swipe over to the app you want to move and then press and hold the Siri Remote trackpad. After a moment, you'll see that app wiggle. Unlike iOS where all the apps wiggle, here just the one does and if you now swipe around the trackpad, you move that one app. All of the others move out of the way for you until you click the trackpad. Then your moved app settles into the position you've given it.
When you've only got the standard ten apps, you're not going to do this a lot. However, apps you add go to the bottom of the rows so when you've installed, say, Netflix from the App Store, you're probably going to want to put it up toward the top.
On Apple TV, it may not.
Instead, by default, when you press the Apple TV's equivalent of the Home button -- the top-row Siri Remote button with an icon of a TV on it -- then you go into Apple's TV app.
Apple really, really wants us all to use and love its TV app. The theory is that you never need to go to the home screen because everything you want to watch is in this one TV app. It's an aggregator that shows you all the various video options you've got, from movies you can buy to TV shows you already own.
It will also recommend films to watch next or if you've been watching a TV series, it will line up the next episode for you.
This is all very good in theory and the practice is well enough done that you might love it. However, we keep hitting the same problems. If we've just seen episode 4 of a show, our Apple TV will routinely recommend we watch episode 3 next. It also heavily promotes a show on Amazon Prime because we used to have a subscription to that.
Then, worst of all in our opinion, it's usually hard to tell which recommendations you already have and which you'd have to pay extra for. We've nothing against paying for a movie, we just sometimes want to channel hop what we're already paying for.
If you love the TV app, as many people do, then you don't need to do anything. Any time you finish watching anything at all on your Apple TV, pressing that TV button takes you into the TV app.
This app is where Apple will place its forthcoming streaming video service and there have been many beta versions of the app that show improvements. However, until that's released publicly and you are able to try it out, you can instead switch it so that the TV button just takes you back to the home screen. Go to Settings, then Remotes and Devices. Choose Home Button and it switches back to taking you to the home screen.
Similarly, if you're looking at the description of a television episode in iTunes, pressing Menu will bring you back to the series. Pressing it again brings you back to the TV section of iTunes. And pressing it again takes you back up to the home screen.
To go the opposite way, to go into the TV section, into a series and so on, you swipe on the trackpad to select what you want and then you click on that trackpad to go into it.
So if you are reading an episode description in iTunes and suddenly remember that the same show might be on your Netflix subscription, you could be clicking and tapping quite a bit to come out of one and go into the other.
The truth is that this is exactly what you will do -- except that sometimes there are slightly quicker ways. Whenever you're using anything on your Apple TV, quickly press the TV twice.
This takes you into the same kind of app switcher that you get on iOS. You can swipe left and right across all the apps you've recently used, in sequence, and go into any of them by clicking on the trackpad.
Apps do go wrong on Apple TV. It's no more often than on iOS and in our experience is somewhat less, but occasionally something will freeze. When that happens, go into the app switcher, swipe across to the troubled app and then swipe up. You're flicking the app out of the list and really force-quitting it. You can then immediately re-launch it from the home screen.
Just as with the app switcher, though, this feature is similar to iOS yet different. There's no "Hey, Siri." Instead, you press the Microphone button and you keep it pressed down while you speak. You can do the same thing with the Apple Watch's Digital Crown and you used to be able to do the same thing with the iPhone and iPad's home button.
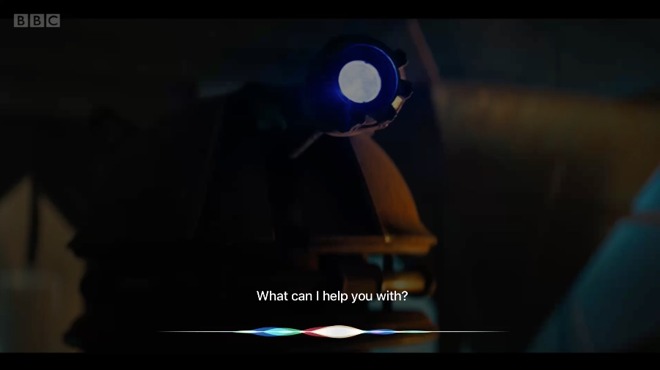
It's such a shame that you can't have Siri talk like a Dalek
What you can ask Siri to do on Apple TV, though, is more limited than on those devices. When you're at the home screen, you can ask it to "Open YouTube" and it will. You can ask it to search for Westerns or The Good Place.
Most recently, Apple added the ability to specify where you want to search. So you can now say "Show me The Good Place on Netflix," for example. It's not great, though. If you say that, your Apple TV takes you to iTunes where you can buy the show -- but there's also an Open In button which offers Netflix.
Even with that extra step, it's still faster to be able to ask Siri for a show this way than it is to open the right app first and then search within it.
Where this really glows, though, is when you're watching something and you miss an important bit. You can ask Siri "What did she just say?" and it understands. Siri will rewind the video a few seconds so that you can catch it again -- and it will also temporarily put on subtitles.
Or rather, it will if the app you're watching supports all this. The BBC's iPlayer, for instance, will rewind but doesn't show subtitles. Every app is different and that inconsistency means you tend to forget these options can exist.
What's more frustrating, though, is when you are in an app and you try to dictate a search term. This is why we like the new Siri function even if it's a bit cumbersome.
The alternative, which you can usually still do, is to go into an app's search section. It's not enough enough to be on the Search page of an app, you have to then be in its the search box and you will get that wrong.
You get used to it, though, and you even get used to YouTube's search system which just seems designed to taunt us.
Even so, Apple TV is the best of the video streaming devices. It's also the most expensive but it will change your viewing habits -- and even if it's originally an adjunct to your regular TV viewing, it will become the thing you switch on first.
And when it's done that, let it change your listening habits too. As well as having Apple Music and Podcasts on it, Apple TV can also connect to HomePod. Go to Settings, Video and Audio, then choose Audio Output.
The list of options will begin with HDMI, meaning that the Apple TV should send its audio over that cable to your television set. However, there will also be the HomePod. It'll be listed under the name you gave it, in our case Living Room. Swipe down to that and click the trackpad to select it.
Note that when you do this, the HDMI should automatically be de-selected. However, we've had occasions when it has remained on until we've positively clicked on it to switch it off. You'll notice if this happens because your HomePod and television set will play the audio at slightly different times.
If that happens, go back to the Audio Output section and click to de-select HDMI. Unless your television set has some glorious sound system attached, then the sound through the HomePod will be much better.
The only thing stopping us thinking that HomePod is the best thing we've added to our living rooms is that maybe Apple TV is instead.
Keep up with AppleInsider by downloading the AppleInsider app for iOS, and follow us on YouTube, Twitter @appleinsider and Facebook for live, late-breaking coverage. You can also check out our official Instagram account for exclusive photos.

Apple TV 4K with Siri Remote
Whatever way you set up whichever version of Apple TV you have, the end result is going to be the same. You're going to have a very iOS-like display of apps on your television set and they will include every possible type of video streaming you can have. That's where it starts to get a little tricky, though, as what you can have depends on whether you have a cable subscription or whether you now choose to buy individual apps such as Netflix.
That's even before Apple launches its Apple TV+ and Apple TV Channels service, which will change what's available -- and what it costs.
Before and after that launch, though, there is also the issue of your TV set and what it is physically able to show.
A tale of two Apple TVs
Apple currently sells two different models of Apple TV. There is the regular one, originally just called Apple TV but now renamed Apple TV HD, and a newer edition called the Apple TV 4K. There is no difference at all in how you set up either of them or how you then use these devices.The difference is in the video and audio that the Apple TV can send to your television set. Apple TV 4K can output video up to 2160p with Dolby Vision and HDR10. Even if you don't happen to know what the numbers mean, you can still see the difference: the regular Apple TV HD outputs video at 1080p.

Apple promoting the addition of Dolby Atmos audio to Apple TV
There are also audio differences with the Apple TV 4K being able to send up to Dolby Atmos 360-degree cinema sound to your television set where the regular model goes to the lesser Dolby Digital Plus 7.1 surround sound.
To make this happen, there are internal differences in the two models with the regular HD one running Apple's A8 processor and the 4K version having Apple's A10X Fusion chip. Similarly, there are differences externally to do with what your Apple TV can connect to. Both have HDMI, though the Apple TV 4K has the later HDMI 2.0a instead of HDMI 1.4. And there are differences to do with Bluetooth plus connecting to Wi-Fi or wired networks.
There's also a difference in the price. The regular Apple TV HD currently costs $149 while the Apple TV 4K comes in at either $179 or $199 depending on how much storage space it has.
It comes down to this, though. If you have an Apple TV 4K then you can do everything the regular Apple TV HD can and more -- but it depends on your television set whether you'll see or hear any difference.
Throughout this new user's guide, we'll talk about Apple TV HD but if you have the 4K model then practically every step is precisely the same after you've connected it to your television set.
Connecting to your television
Apple TV HD is useless without a HDMI cable to connect it to your television set -- yet Apple doesn't include one in the box. You have to buy it separately. Currently Apple doesn't make these cables itself but the Apple Store stocks a Belkin version. There is just the one sort and it works with both Apple TV HD and Apple TV 4K.-l.jpg)
Ports on an Apple TV (Source: Apple)
If you already have a spare HDMI cable then you might be in luck -- but you might not be because Apple TV 4K needs the cable to be HDMI 2.
Get that Belkin or any other HDMI 2 cable that is rated as working with Apple TV. Then connect your Apple TV HD to your television set using it.
Switch on
When you've got the HDMI cable connected, plug your Apple TV HD into the mains. Switch on your television set. Depending on your set, it may automatically detect that an Apple TV is connected and switch to that. If it doesn't, you'll have to manually switch your television over to the right HDMI port.The way to do this is different on every set but it typically starts with a button on your remote control called Input or Sources. Pressing that repeatedly will make the set switch through each of the possible connections it has. When you reach the HDMI one with the Apple TV connected, you'll know because the screen will initially show the Apple logo.

Apple TV with Siri Remote and a television set
If it's taken you more than a couple of minutes to do this, then the Apple logo will be gone but an Apple TV setup screen will be showing instead.
Get used to that Input or Source button, by the way. Later when this is all set up and you're watching TV, switching on your Apple TV HD or your cable box should make all modern television sets switch over automatically. In practice, it usually works but sometimes doesn't, and you end up having find that Source button.
Speaking of remotes
The first setup screen you see after the Apple TV logo is one asking you to connect your Apple remote control. This is the small, slim remote that came with your Apple TV HD and it is officially called the Siri Remote.You're asked to Click the trackpad on your remote to get started and pair your remote to your Apple TV HD. If you've not used a Siri Remote before then you'd be forgiven for not knowing where the trackpad is. Apple TV HD's set up does give you a faint hint: it shows a drawing of the remote and slightly shades in the top trackpad part.
The trackpad is the area above the Menu and TV buttons. It is pretty much exactly the same size as the area beneath all of the buttons but the trackpad has a matte finish while the rest is glossy. There's no way you'll ever get the top and bottom mixed up when you look at the remote, but it's equally impossible that you'll never get it wrong when you pick it up.
You use the trackpad to swipe through options and to make selections by clicking. To pair the Siri Remote to your Apple TV HD, click once on the trackpad.
If you also press the Menu button three times, though, you'll get VoiceOver. This is Apple's accessibility feature which will talk you through the rest of the setup.
Language and region
When you click the remote, the on-screen drawing of it will show that it's been pressed. Then the screen will switch to a page asking you to pick your language. You've just learned how to click the trackpad and now you're going to be taught how to swipe through it.
Apple TV with Siri Remote
The languages that Apple TV HD supports are presented in a long list that's headed by English. That's not only at the top of the list, it's also highlighted with a white bar. Swipe your finger or thumb down the Siri Remote's trackpad and you'll move that highlight. You'll also see a highlighted area on the trackpad follow your movements.
When you've picked your language, click the trackpad and you'll move on to specifying your country or region in much the same way.

Some things you can ask Siri on Apple TV HD and 4K (Source: Apple)
Then when you've clicked on that, you're taken to a page that asks you to choose whether or not to use Siri with your Apple TV HD. Choose Use Siri. It's a peculiar thing that Apple calls the control a Siri Remote regardless of whether you disable Siri or not. And since you never have to use it if you don't want to, we just cannot think of a reason why you wouldn't choose to have Siri switched on for when you or someone else in your household do.
The easiest part
Next, you get to save some time. Your Apple TV HD requires your Apple ID and it really needs your Wi-Fi password but Apple wants to avoid your having to type very much.Apple TV HD uses the Apple ID when you're buying movies from the iTunes store or downloading apps from the App Store and so on. And then it uses your Wi-Fi in order to get those movies or apps, it uses your Wi-Fi when you're streaming Netflix or whatever.
So you need to enter these details and you could scroll down through the setup page to choose Set Up Manually. Don't. The default is the much handier and frankly much cooler Set Up with Device. Choose that.
The setup screen will now tell you to unlock your iOS device and, making sure that both Wi-Fi and Bluetooth are switched on, hold it close to the Apple TV HD itself.
It's not going to just allow anyone's iPhone to do it, though. Instead, the set up makes a Set Up New Apple TV dialog appear on your iOS device. It appears to solely have one button and that's called Set Up but actually you do have a choice. There is a small X in a close box at the top right. If you want to back out of this for any reason, you can tap that and the dialog disappears.
However, press Set Up. You'll next be asked to enter a four-digit authentication code. The iOS device will display a keypad for you to enter it and your television set will be showing a random number. Enter that and the Apple TV HD is paired to your iOS device for set up.

Asking Siri to find something to watch on Apple TV HD
Now you wait while it says Setting Up Wi-Fi. When that's done, it now connects your Apple ID to the Apple TV HD but, again, it doesn't just do it. You have to confirm that it is your Apple ID so your iOS device will ask you for the password.
If you're using iOS 12 and a recent iPhone, you'll be given the option to just tap on Passwords. When Face ID confirms that it's you, it will offer to put the right password in. Similarly, earlier iPhones will do the same via Touch ID and iOS 12.
Alternatively, you can just type in the password on your iOS device and tap on Sign In. After a few moments, your iOS device will display a message saying that you need to Finish on Apple TV and giving you only a Done button. Tap done and look back at your television set.
TV Provider
This is the first section of the set up that we suggest you skip. What Apple would like is for you to click the Siri Remote trackpad and choose Sign In on your Apple TV HD. This will take you to a list of supported television providers such as cable companies in your region.What happens then varies with the different providers but it boils down to your authenticating with them and their providing Apple TV apps for you to watch their channels or services on.
That's fine if you know you're going to be using your Apple TV HD for everything -- and if everything you watch is available on your Apple TV. The odds are, though, that Apple TV HD is going to be an adjunct to your television watching. It might very well become an important part and it may eventually replace everything else, but at first you're likely to use it alongside whatever cable or broadcast service you had before.
Since you can later download, say, the HBO app at any time, we recommend choosing Not Now.
Location Services
The next step is to confirm that you want your Apple TV HD to use Location Services. Since you'll probably be leaving it in the living room or your den, this may not seem terribly important. And it's true, you can choose Disable Location Services if you want.Unless you have strong feelings about it, though, choose Enable Location Services instead.
Apple says that this means your Apple TV HD can show the correct time and date, though we'd have thought specifying your country or region would've done that already. Then the company says that apps might use the information to show you what's on at your local cinema but we've yet to find an app that does regional listings.
There are two categories of apps where Location Services are definitely used and also definitely needed. Weather apps need to know where you are to show local conditions, for one thing. And late December every year, the Santa Tracking App can only give you useful sleigh positioning data if it knows where you are.
There is also one category of app where Location Services definitely are definitely not used. You can't fool an app like Netflix, the BBC iPlayer or any one that's limited to certain geographic areas, by switching off Location Services.
For the odd time that it genuinely is useful, and because this is Apple so you know your data isn't being sold off to advertisers, choose Enable Location Services.
See the world
Just go right ahead and click on Automatically Download right now. Don't even bother reading the rest of the screen, it's Automatically Download that you want.
One of just myriad Apple Aerial Screensavers
Okay, this is about the Apple TV HD screensaver. The screensaver shows you high resolution fly-bys of beautiful locations around the world and the reason you're given an option about it because of those words 'high resolution'. There are many, many screensavers and more are made available regularly.
Apple says that even on the higher-resolution Apple TV 4K, the most one of these aerial screensavers will be is 650MB. During this setup, you only have the rather brute force option of having the screensavers on or off. The screen even tells you that new screensavers are downloaded weekly but that's the default, it's not the only option. Later you can go to Settings, General, Screen Saver, Download New Video and choose from daily, weekly, monthly and never.
If you're in a situation where your Wi-Fi is capped maybe you need to switch aerial screensavers off and you might as well do that now. Don't switch them off because of the storage size, however. The regular Apple TV HD now comes solely with 32GB storage space while the Apple TV 4K offers 32GB or 64GB. Regardless of the storage capacity, though, you can ignore how much Apple's screensavers take up because the Apple TV manages them.

Screen Saver settings
You can't see where they are on your device so you can't delete them yourself nor see the way that Apple TV handles them. However, it will automatically download new and delete old ones according to its own secret plan.
And whatever that is, whichever aerial screensaver you have on your Apple TV HD at any given moment, they are all extraordinary. They're truly beautiful and there are countless times we've just watched them instead of anything else on our Apple TV.
If that happens to you as well -- when that happens -- then note that any time you're watching anything on Apple TV, you can quickly double-press the Menu button. That launches the screensaver immediately instead of your having to wait quietly on the home screen for five minutes first.
Analytics, Terms and Conditions
As with any Apple device, you have to say whether you're happy for Apple to gather information about your use of apps on the Apple TV HD. It's really meant for when things go wrong as an app can send much more specific and precise information about a crash than any of us can.It's up to you whether you choose Send to Apple or Don't Send. We recommend that you choose to send, though, and that's because this information can help Apple TV app developers.

Amazon Prime on Apple TV (right)
There aren't enough of those. It's likely that the reason we can't find an app showing us local movie theater listings is that there isn't one. Apple TV's App Store is a minute fraction of that for iOS so let's at least give developers what help we can.
Whichever you decide, you're next taken to a Terms and Conditions page. Here your choices are Agree or Disagree and, to be frank, we've no idea what happens if you choose the latter. Most likely you'll get to sit there in front of a costly Apple TV HD which never shows you anything.
Best picture
You've got this far by reading the Apple TV setup screens on your television set and it looked fine. However, your set and Apple TV HD may be capable of showing you a much higher resolution image. This is the one case where it makes a difference to the setup if you have an Apple TV 4K.The 4K model will attempt to display its highest-quality Dolby Vision on screen. You're asked to Try Dolby Vision, although you have the option to say Not Now.
There's no disadvantage to trying it, however, and now is the sensible time to do so. Click Try Dolby Vision and the screen will probably go a quite scary black for a moment.
If your television set does not have Dolby Vision then that black screen will remain for around 20 seconds and then switch back to what it was before. You might, though, have a television that's able to show Dolby Vision quality but your HDMI cable is not good enough. In that case you'll see a screen that tells you to look for "sparkles, static or other display problems."
That screen has an OK button plus a Cancel one which also contains a countdown of the 20 seconds before it automatically cancels and reverts to what you had before.
If everything looks fine, choose OK.
Setup complete
That is every step you have to take to get your Apple TV HD up and running. There is more you need to know, though, including how the Siri Remote works, and how you choose and use apps.
You're going to lose your Siri Remote. Cut this out and stick it on trees in your region with a reward offer
Unless you've already chosen a television provider, the home screen of Apple TV always begins with a grid of ten apps that come with the device. There is an App Store plus pre-installed apps for Music, Movies, TV shows and an so on. You move between them by swiping on the trackpad of your Siri Remote and then clicking on the one you want.
The top row of five apps are special, though. As you swipe across them, the top of the Apple TV screen changes to show you details of what you can watch or what you have been watching through them. So the Movies app, for instance, displays poster images for the latest releases and your most recent purchase.
You can move any app to the top row and in fact you can move any app to any position.
Swipe over to the app you want to move and then press and hold the Siri Remote trackpad. After a moment, you'll see that app wiggle. Unlike iOS where all the apps wiggle, here just the one does and if you now swipe around the trackpad, you move that one app. All of the others move out of the way for you until you click the trackpad. Then your moved app settles into the position you've given it.
When you've only got the standard ten apps, you're not going to do this a lot. However, apps you add go to the bottom of the rows so when you've installed, say, Netflix from the App Store, you're probably going to want to put it up toward the top.
Home is where your TV is
There is another difference to how apps work on the Apple TV compared to other Apple devices. When you go into an app on, say, an iPhone, then you expect that flicking up from the bottom or pressing the Home button will take you back to this home screen.On Apple TV, it may not.
Instead, by default, when you press the Apple TV's equivalent of the Home button -- the top-row Siri Remote button with an icon of a TV on it -- then you go into Apple's TV app.
Apple really, really wants us all to use and love its TV app. The theory is that you never need to go to the home screen because everything you want to watch is in this one TV app. It's an aggregator that shows you all the various video options you've got, from movies you can buy to TV shows you already own.
It will also recommend films to watch next or if you've been watching a TV series, it will line up the next episode for you.
This is all very good in theory and the practice is well enough done that you might love it. However, we keep hitting the same problems. If we've just seen episode 4 of a show, our Apple TV will routinely recommend we watch episode 3 next. It also heavily promotes a show on Amazon Prime because we used to have a subscription to that.
Then, worst of all in our opinion, it's usually hard to tell which recommendations you already have and which you'd have to pay extra for. We've nothing against paying for a movie, we just sometimes want to channel hop what we're already paying for.
If you love the TV app, as many people do, then you don't need to do anything. Any time you finish watching anything at all on your Apple TV, pressing that TV button takes you into the TV app.
This app is where Apple will place its forthcoming streaming video service and there have been many beta versions of the app that show improvements. However, until that's released publicly and you are able to try it out, you can instead switch it so that the TV button just takes you back to the home screen. Go to Settings, then Remotes and Devices. Choose Home Button and it switches back to taking you to the home screen.
The menu and TV buttons
The Menu button is an odd one. It doesn't exactly give you a menu of options you can choose now, it more that it usually takes you back up a level to the last menu you looked at. So if you're watching a YouTube video, pressing Menu will stop it and take you to the list of videos you've just picked from.Similarly, if you're looking at the description of a television episode in iTunes, pressing Menu will bring you back to the series. Pressing it again brings you back to the TV section of iTunes. And pressing it again takes you back up to the home screen.
To go the opposite way, to go into the TV section, into a series and so on, you swipe on the trackpad to select what you want and then you click on that trackpad to go into it.
So if you are reading an episode description in iTunes and suddenly remember that the same show might be on your Netflix subscription, you could be clicking and tapping quite a bit to come out of one and go into the other.
The truth is that this is exactly what you will do -- except that sometimes there are slightly quicker ways. Whenever you're using anything on your Apple TV, quickly press the TV twice.
This takes you into the same kind of app switcher that you get on iOS. You can swipe left and right across all the apps you've recently used, in sequence, and go into any of them by clicking on the trackpad.
Apps do go wrong on Apple TV. It's no more often than on iOS and in our experience is somewhat less, but occasionally something will freeze. When that happens, go into the app switcher, swipe across to the troubled app and then swipe up. You're flicking the app out of the list and really force-quitting it. You can then immediately re-launch it from the home screen.
What did she just say?
You're doing all of this swiping, clicking and button-pressing with what's called the Siri Remote so you won't be surprised that you can just talk to your Apple TV too.Just as with the app switcher, though, this feature is similar to iOS yet different. There's no "Hey, Siri." Instead, you press the Microphone button and you keep it pressed down while you speak. You can do the same thing with the Apple Watch's Digital Crown and you used to be able to do the same thing with the iPhone and iPad's home button.

It's such a shame that you can't have Siri talk like a Dalek
What you can ask Siri to do on Apple TV, though, is more limited than on those devices. When you're at the home screen, you can ask it to "Open YouTube" and it will. You can ask it to search for Westerns or The Good Place.
Most recently, Apple added the ability to specify where you want to search. So you can now say "Show me The Good Place on Netflix," for example. It's not great, though. If you say that, your Apple TV takes you to iTunes where you can buy the show -- but there's also an Open In button which offers Netflix.
Even with that extra step, it's still faster to be able to ask Siri for a show this way than it is to open the right app first and then search within it.
Where this really glows, though, is when you're watching something and you miss an important bit. You can ask Siri "What did she just say?" and it understands. Siri will rewind the video a few seconds so that you can catch it again -- and it will also temporarily put on subtitles.
Or rather, it will if the app you're watching supports all this. The BBC's iPlayer, for instance, will rewind but doesn't show subtitles. Every app is different and that inconsistency means you tend to forget these options can exist.
What's more frustrating, though, is when you are in an app and you try to dictate a search term. This is why we like the new Siri function even if it's a bit cumbersome.
The alternative, which you can usually still do, is to go into an app's search section. It's not enough enough to be on the Search page of an app, you have to then be in its the search box and you will get that wrong.
You get used to it, though, and you even get used to YouTube's search system which just seems designed to taunt us.
Great experience
So searching will go wrong or it will be a bit cumbersome. You will pick up the Siri Remote the wrong way around. And you will lose that remote in the wrong place. You just will.Even so, Apple TV is the best of the video streaming devices. It's also the most expensive but it will change your viewing habits -- and even if it's originally an adjunct to your regular TV viewing, it will become the thing you switch on first.
And when it's done that, let it change your listening habits too. As well as having Apple Music and Podcasts on it, Apple TV can also connect to HomePod. Go to Settings, Video and Audio, then choose Audio Output.
The list of options will begin with HDMI, meaning that the Apple TV should send its audio over that cable to your television set. However, there will also be the HomePod. It'll be listed under the name you gave it, in our case Living Room. Swipe down to that and click the trackpad to select it.
Note that when you do this, the HDMI should automatically be de-selected. However, we've had occasions when it has remained on until we've positively clicked on it to switch it off. You'll notice if this happens because your HomePod and television set will play the audio at slightly different times.
If that happens, go back to the Audio Output section and click to de-select HDMI. Unless your television set has some glorious sound system attached, then the sound through the HomePod will be much better.
The only thing stopping us thinking that HomePod is the best thing we've added to our living rooms is that maybe Apple TV is instead.
Keep up with AppleInsider by downloading the AppleInsider app for iOS, and follow us on YouTube, Twitter @appleinsider and Facebook for live, late-breaking coverage. You can also check out our official Instagram account for exclusive photos.


Comments
NEVER use this option as the complete UI will use the expanded dynamic range and it is not designed for it. Colors and contrast will look dull. Instead leave the resolution at 4K SDR or 1080p SDR and use the options for matching dynamic range and refresh rate. This will give you a normal looking UI and when content has the extra information for HDR10/ Dolby Vision Apple TV will switch to the corresponding mode.
DV is a broadband vacuum cleaner, though. We run ~70mbps through 2 wifi networks in our compound and sometimes that's a stretch. I believe DV wants 35-45mbps as base capacity. We only have 1 TV running 4K + 1 or 2 iOS devices at a time. So far, easy peasy.
And today: Comparing a desktop to an Apple TV:
-- Both are fed by the same cable
-- Both use a CPU/computer to drive them and process the signal (and soon that is likely to be the same CPU)
-- Both use a 4K or better monitor
So, why do I have buy one set up to watch TV and another to browse the internet?
One glaring omission in the current Apple TV app is that it’s based around the mindset of a single person per device baked into iOS. Yet Apple TV is a device watched by and with significant others, spouses, kids or family in general.
When you want to use the recommendations from the TV app to watch a show, who’s watching information will be used? When you want to watch a purchased movies or shows whose purchase list will be used? When your kids are watching, will they get inappropriate recommendations based on adult viewing habits?
All this should have been solved with the introduction of Apples Family Plan yet Apples solutions are, at best, hacks. Family Plan purchases should be consolidated into a single list on a shared device but Apples current implementation makes each list separate and hard to find with their antiquated and very un-family friendly plan UI process of having to go into the settings and change one of the account logins or ferreting out some obscure UI menu selection for other family members.
Then what do you do for recommendations when multiple family members are watching? Apple needs a way to handle this as well. Maybe consolidating the viewing recommendations of several family plan members into a single list.
Apple claims to be family friendly but in this they have failed to live up to that statement IMO.
5 channels = Left Front, Center Front, Right Front, Surround Left, Surround Right
7 channels = Left Front, Center Front, Right Front, Surround Rear Left, Surround Rear Right, Surround Side Left, Surround Side Right
.1 = subwoofer
.2 = 2 height channels
.4 = 4 height channels
The height channels can be speakers mounted in the ceiling, on the ceiling or speakers sitting on top of the front and surround speakers that fire up and reflect off of the ceiling.
As for formatting, I think that is a fixable problem.
But, I go into an Apple Store and see a 5K iMac and think "That's better than any TV I'm likely to buy"
Yeah, I'm with you on that one. A pure example of form at the expense of functionality (same design philosophy as the "spoon in a bowl of soup" Apple mouse). Everything else I have that is Apple is top notch but ... Apple TV remote and Apple Mouse, this little black duck just doesn't feel the love