How to use Xcode Previews to see how your app appears as you make it

Xcode allows you to live preview your iOS views using Xcode Previews, so you can see how the app appears as you're actively developing it. Here's how to use them.

Xcode is Apple's development environment for building apps for Apple platforms. One feature of Xcode is Previews - live views of app views you are working on as you program.
In this article, we'll look at how to use Previews in Xcode for your iOS or iPadOS apps.
Getting started
To start an Xcode iOS app, open Xcode, then from Xcode's File menu, select New Project.
This opens the New Project Chooser:

Xcode's project chooser.
In the Project Chooser, select iOS at the top, App under Applications, then click the Next button.
On the next pane, set project options such as name, team, organization identifier, and SwiftUI for the user interface. You can also select to use other optional features such as storage, and tests, if you like.
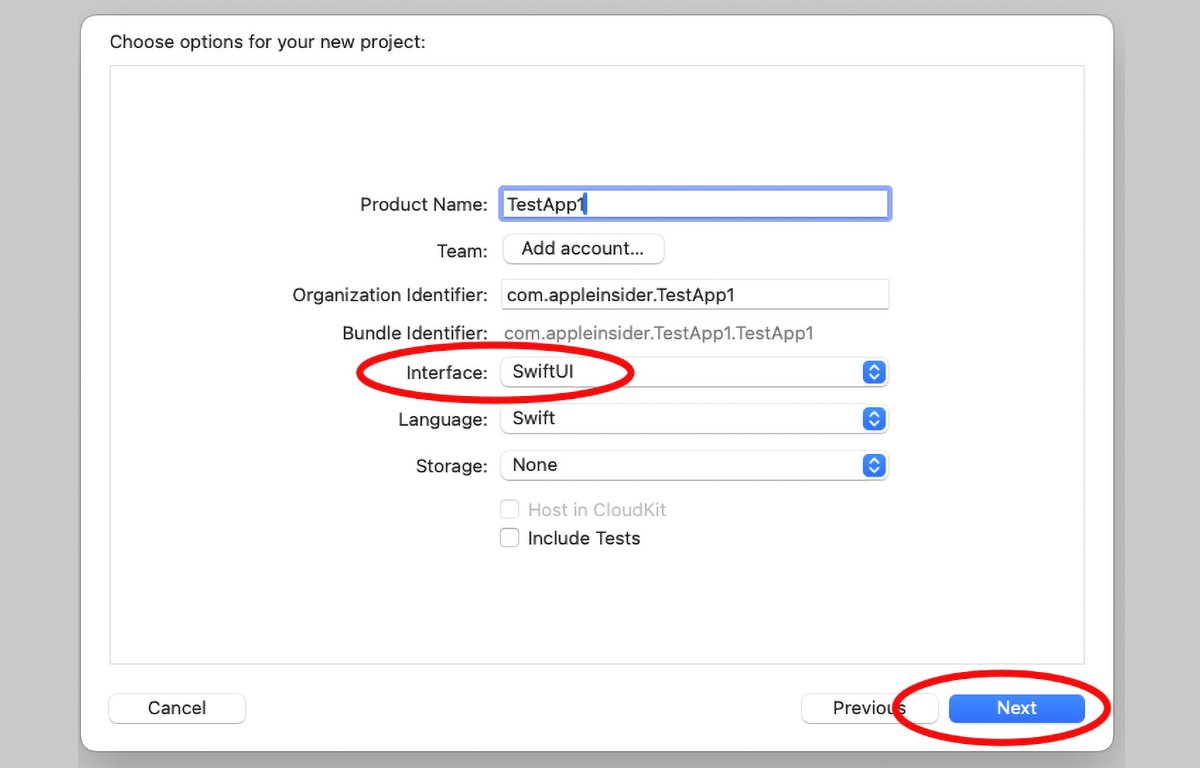
Set project options.
It is possible to use Xcode Previews in AppKit-based iOS projects, but to do so you will need to create all your UI views programmatically. This is so you can select their code in the Xcode editor, which allows Xcode to generate previews for those views.
Click the Next button again, type a name, and select a location for your project on disk in the Save panel.
Preview Content assets and the Canvas
Once your Xcode project is open, you will see a folder named "Preview Content" on the left side of the project editor. Inside that folder, there is an assets catalog file named "Preview Assets.xcassets".
Xcode creates this folder and file by default and you can use it to store any assets you need to appear in Xcode previews.
You can add and remove assets to this catalog by selecting your project (the blue icon) at the top of the Xcode editor on the left side, then selecting its target to the right of that, and scrolling down to "Development Assets" at the bottom of the General project pane:
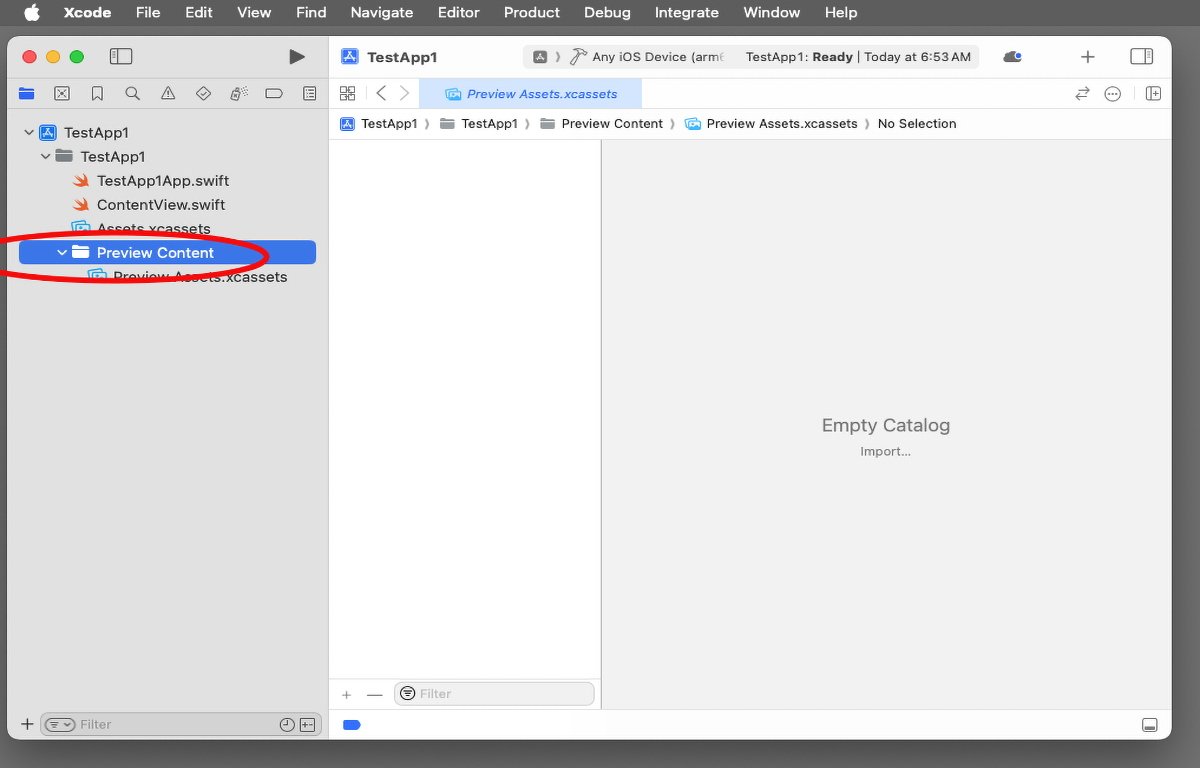
The Preview Content folder.
When you create your iOS project, XCode creates by default one content view SwiftUI file named "ContentView.swift" in the project editor on the left. If you select that file and then select one of the subviews in code in the ContentView class, you will see its preview appear on the right-hand side of the Xcode editor:
If the preview doesn't appear right away the first time you run Xcode, give it a few minutes to generate. If the preview pane isn't visible in Xcode on the right-hand side, select Editor->Canvas from Xcode's menu bar.

Show the Canvas from the Editor menu.
Once you select a subview in any SwiftUI view class, its preview will appear in the preview pane on the right. You can change the preview contents by selecting other subviews in the code on the left, and conversely selecting any item in the preview window will highlight its code in the Xcode text editor.
Controls
At the bottom of the Xcode preview pane are several controls. On the right side are zoom controls which allow you to zoom in and out on the preview pane itself, marked with magnifying glass icons:
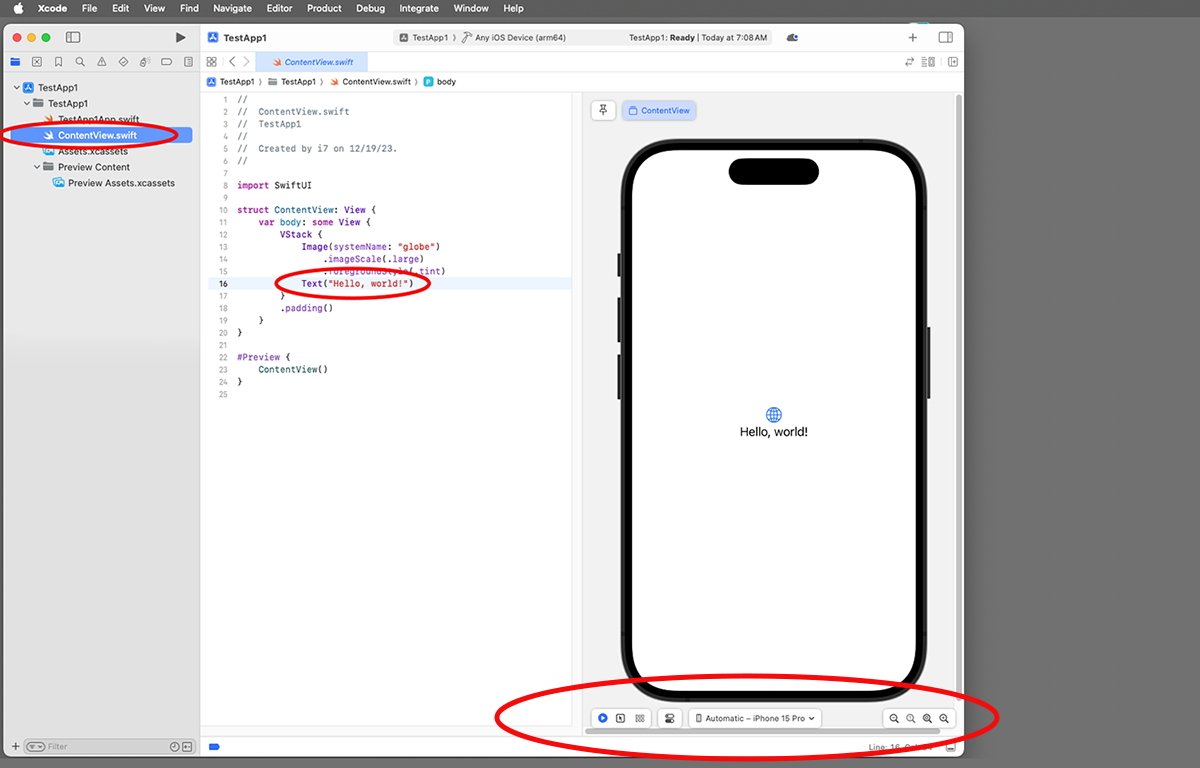
Xcode Preview controls.
In the center is a popup menu that lets you select which device model you want to use in the preview pane. To the left of that is a preferences control which allows you to set canvas color, orientation, and font sizes.
The three buttons on the left of the preview pane allow you to pause and resume previews, switch to subview selectable mode, and set variants for the color scheme, orientation, and dynamic type.
At the very top left corner of the preview pan is a button with a thumbtack icon which lets you pin or freeze the contents of the preview pane, so it doesn't change no matter what you select in the code editor.
Preview Providers
If you want to customize how the preview content is displayed, you can implement the Preview Provider protocol in Swift which you can use to change or provide data to Xcode. When a Swift class or struct conforms to a Preview Provider, the provider will be called when Xcode generates the preview.
Preview Providers are only used inside of Xcode and are unused when your app is actually built and run. For example, from Xcode's documentation:struct CircleImage_Previews: PreviewProvider {
static var previews: some View {
CircleImage()
}}
You can also use the Group keyword inside a Preview Provider to define many previews and then decide which one to return at runtime.
#Preview macro
If you are targeting iOS 13 or later, you can use the #Preview macro in code to define Xcode previews instead of using a Preview Provider.
To do so, you first define a Swift View subclass as a struct:struct ContentView: View {
var body: some View {
// ...
}}
And then below that, define that view in the #Preview macro:#Preview {
ContentView()}
In Swift and C-based languages, a macro is a compiler flag that expands at precompile time to a longer statement in which some parts of the macro definition are replaced with values.
In the case of the #Preview macro, the compiler expands it to "Preview(_:body:)" which takes an optional name and a ViewBuilder in the body parameter.
A ViewBuilder is a parameter attribute which constructs views from closures (a closure is a sort of code callback routine). In Swift, a ViewBuilder is defined by the @ViewBuilder keyword:func contextMenu<menuitems: view>(</menuitems:>
@ViewBuilder menuItems: () -> MenuItems) -> some View
If you want to define multiple previews in the same source code file using the #Preview macro, you can name each one by passing in a string:#Preview("Input true") {ContentView(someInput: true)}
Apple also provides additional preview macros for different purposes. See the Preview documentation from Apple for more information.
Apple held a session during the WWDC '23 developer conference on Xcode Previews entitled Build programmatic UI with Xcode Previews.
Previews are a quick and handy way to view what your SwiftUI code will look like when running without the need to actually compile and run your code in the iOS simulator. This speeds development and reduces the number of compile->build->run cycles you need to do for each code change.
Once you get the hang of Previews in Xcode, you'll find yourself using them daily.
Read on AppleInsider