How to emulate SNES, Genesis, and more on Apple Silicon Macs

If you fancy playing some classic games on those late-'80s and early-'90s consoles like the Super Nintendo and Sega Genesis, it's possible to get them running on your modern Mac thanks to emulation. Here's how to get started.
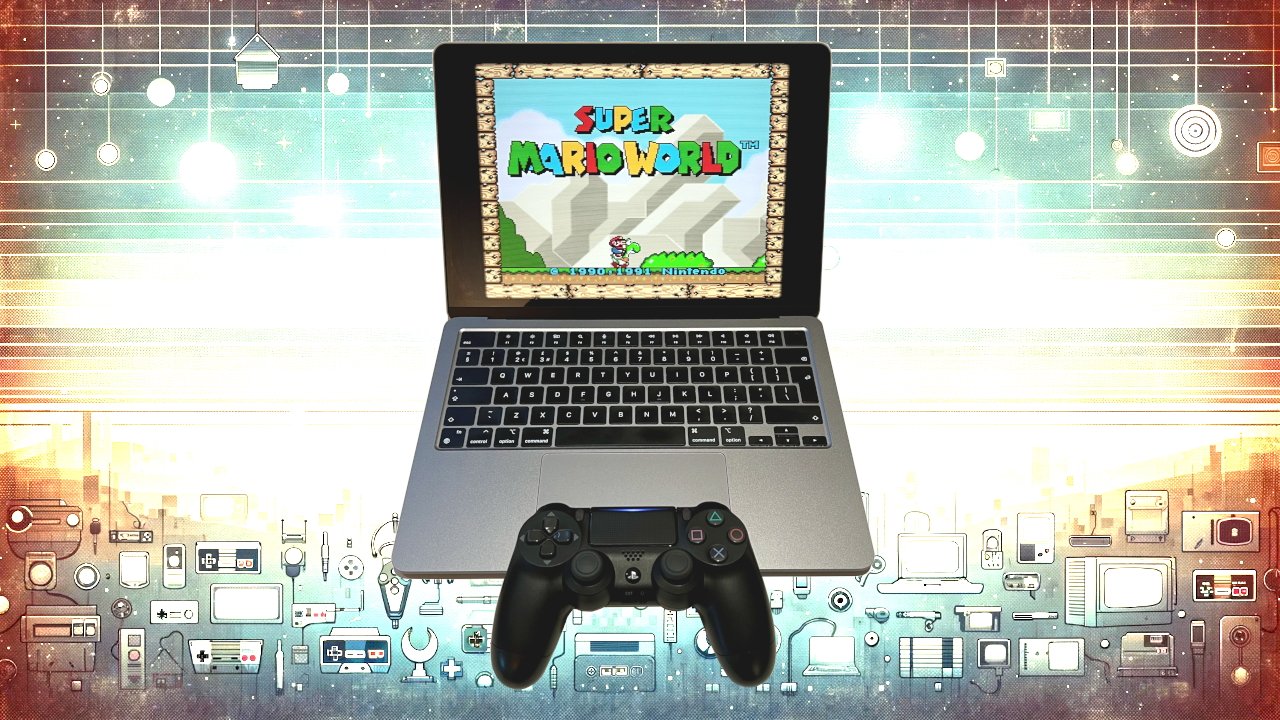
Running the best games from the past is a good reason for emulation on your Mac.
A dive into the world of retro gaming often leads to the use of emulators, if you want to play 16-bit titles from fourth-generation consoles, like the SNES and Sega Genesis (Mega Drive.)
As Apple has transitioned away from Intel CPUs, this guide tackles the changes that have come with emulating classic games on ARM architecture.
From setting up RetroArch, to connecting modern controllers for an authentic gaming experience, we cover everything you need to bring your favorite 16-bit games to a modern Mac.
Whether you're a long-time emulation enthusiast or new to the scene, these step-by-step instructions, explanations, and tips, provide everything you need to enjoy these classic games on your Mac. All with an enhanced experience.
Mac to the future: retro gaming meets modern tech
In the olden days, Apple Macs used Intel x86 CPUs, and the shared architecture with Windows PCs made porting emulation software to macOS easier. To a large extent, Mac users seeking to play console games were able to piggyback off the work of the larger Windows developer community.
However, the start of the Apple Silicon transition in 2020 brought about a unique set of challenges and opportunities for emulator developers and enthusiasts alike. 'Challenges' in the sense that work was needed to recompile and test emulators on the new architecture, and 'opportunities' in that it was possible to obtain increased performance and efficiency over x86.
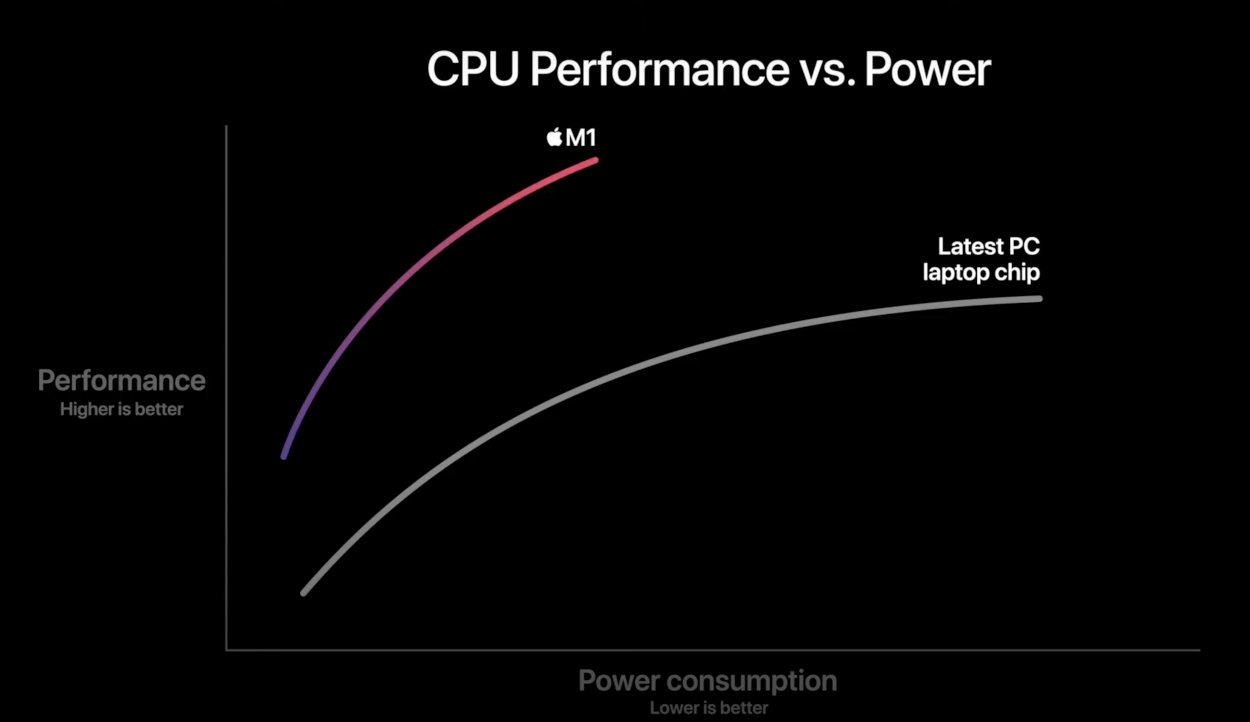
Dramatically greater performance per Watt was a big improvement for Apple Silicon vs. x86, even though Apple was initially shy about putting numbers on it.
Not that performance matters much for this particular guide, as things are about to get retro. We're going to focus on how to emulate the fourth generation of video game consoles, such as the SNES and Sega Genesis/Mega Drive, on Apple Silicon Macs, but most of these instructions also apply to generations 1-3 too.
Thanks to the diligent work of the project developers (and often the code's relatively straightforward portability), the emulators for fourth-gen consoles have been successfully adapted for ARM and are ready for use on Apple Silicon. As you'd expect, the low computational requirements for fourth gen consoles also mean they run with excellent performance.
So, let's get the 16-bit gaming experience set up and running on your Mac.
Important: The legalities of emulation
Before you start, you should make sure that you understand the legality of emulating games. It is usually legal to emulate a console as long as you own the original hardware, so make sure that you do.
You should also own the original game cartridge since downloading or distributing a game without owning it is illegal. However, the legality of using digital copies of physical games depends on copyright laws in your jurisdiction and can vary significantly between regions, so please check this before proceeding.
Set up RetroArch
To emulate fourth generation consoles like the SNES and Sega Genesis/Mega Drive on Apple Silicon Macs, we recommend RetroArch.
Although not an emulator itself, RetroArch is instead a frontend in which you can run emulators, game engines, and media players. This means it can run classic games on a wide range of computers, including Apple Silicon Macs.
RetroArch runs wonderfully on an M2 MacBook.
You can download RetroArch from the official website. RetroArch will create the necessary directories when you first run it, so ensure you do this before modifying any directories.
Once it's installed, you can adjust the interface by going to Settings --> User Interface.
Install the emulation cores
To run a game in RetroArch, you first need to install the emulation core which corresponds to the console. To install a core:
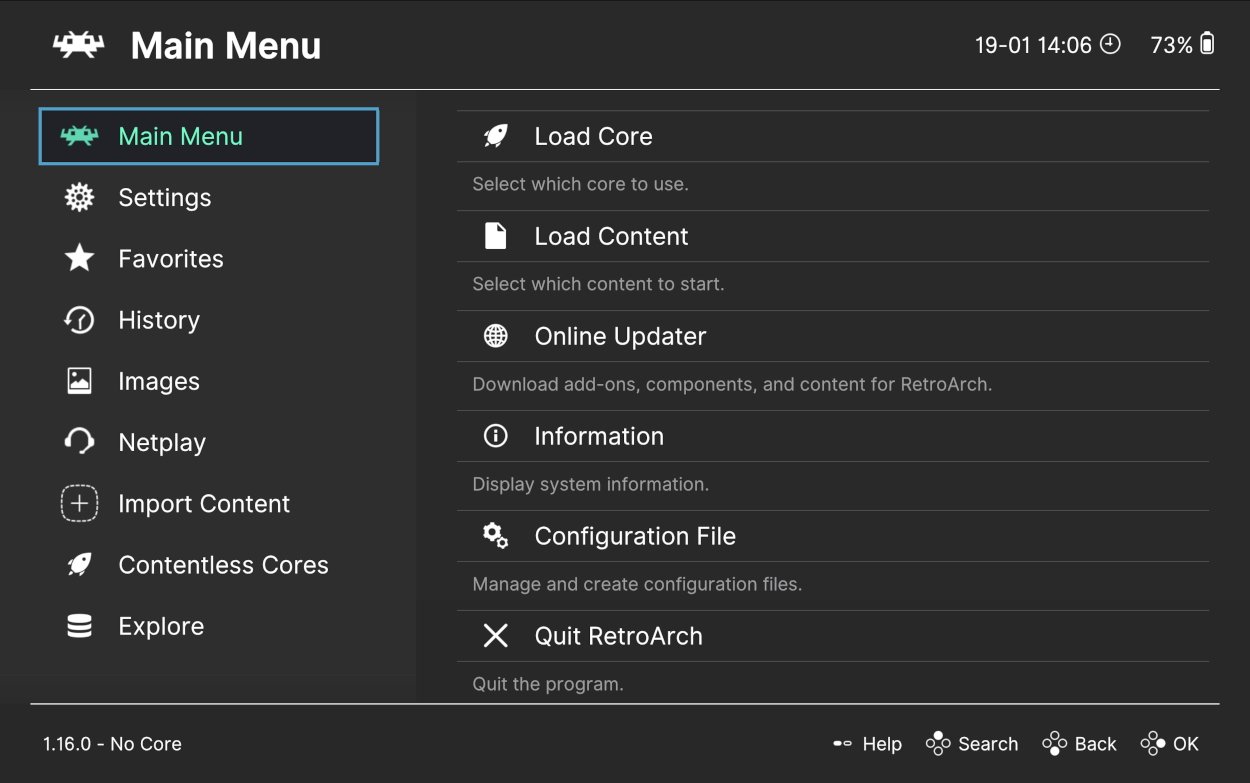
- In RetroArch, go to Main Menu --> Load Core --> Download a Core.
- There are multiple options. For the SNES, select a core like 'Snes9x' or 'bsnes'. For Sega Genesis/Mega Drive, choose 'Genesis Plus GX' or similar.
- After selection, the core will automatically download and install.
Obtain the game ROM files
The digital versions of games are stored in files called 'ROMs.' There are two ways to get the game ROMs you'd like: rip them from physical cartridges or download them from a website.
It's usually legal to rip or download the ROMs of games that you already own. However, it's worth re-emphasizing here that you should check the legality of both approaches in your country and region since it can vary.

The Retrode 2 can be used to rip ROMS, or to play them directly on your Mac.
To rip a ROM from a physical cartridge:
- For the SNES and Genesis/Mega Drive, use a device like Retrode 2.
- Connect it to your Mac and insert the game cartridge.
- In Finder, open the Retrode 2, then simply copy the ROM file onto your Mac. It'll be obvious which file it is, since it'll have the game title in it. The only other files present will be 'RETRODE.cfg' and possibly a save file.
Downloading a ROM from a website is straightforward, but legally we can't tell you where to find these. Google is your friend.
However, we do recommend using trustworthy sites and scanning any downloaded files for malware before decompressing or running them.
Don't fret about ROM file types
ROM files can have different file extensions which often correspond to the name of the console. For example, '.sfc' is usually the case for SNES games (presumably short for "Super FamiCom), and '.gen' for Genesis/Mega Drive ones.
However, extension types can also vary within systems. For example, Genesis/Mega Drive games can also have '.md.' or a simple '.bin.' In all likelihood, though, you won't need to worry about the file type, since the emulator cores can handle any of them, so long as it's valid ROM.
Load and play a game
Now you're ready to play your games. Open RetroArch and go to Main Menu --> Load Content to select a ROM file. You'll then be prompted to choose the corresponding core for the ROM (e.g., SNES or Sega Genesis) to run the game.
But there's something missing. Playing a SNES game using a keyboard is no fun, so let's connect a better human interface device.
Connect a gaming controller
The button configurations on fourth-generation gaming controllers are pretty amenable to most modern ones, so you have plenty of choice.
If you already have a modern Sony PlayStation or Microsoft Xbox, you can connect the existing controllers for these systems to your Mac, although a dedicated joypad like the Logitech F310 will also do. The DualShock (version 4 and onwards) and the Xbox Wireless Controllers (Model 1708 and onwards) can connect directly via Bluetooth for wireless play without any dongles.
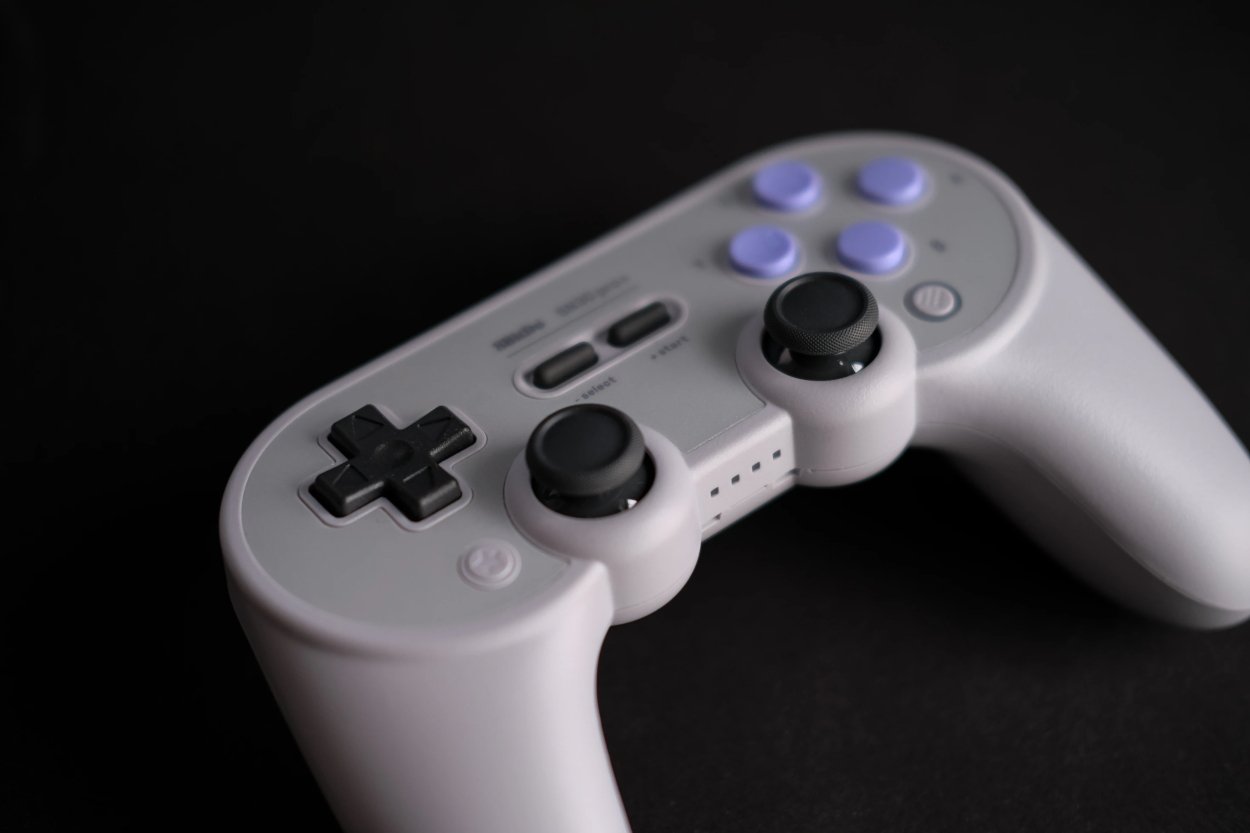
You can get some funky retro-style gaming controllers, such as 8BitDo's SN30pro+. Photo by Ryan Quintal on Unsplash.
If you want the full retro experience, you can instead get a modern version of a classic 16-bit console controller. Vendors like 8BitDo offer a multitude of different configurations and color options.
If you want to minimize input lag (or just enjoy the nostalgic experience of untangling cables every so often) you can even get a wired controller.
To connect a controller to your Mac via Bluetooth:
- Ensure Bluetooth is enabled. Go to System Preferences --> Bluetooth and turn it on.
- Put the controller in pairing mode.
On a DualShock 4, do this by holding the Share and PS buttons together until the light bar starts flashing.
On an Xbox Controller, press the X button to turn on the controller, then hold the Pair button on the back until the X button starts flashing. - On your Mac, the name of the controller will appear in the list of Bluetooth devices. Click Connect next to the controller's name.
- Once connected, open RetroArch, and the controller should be automatically detected.
It's quite handy to be able to open the RetroArch menu directly from your controller without reaching across to press F1 on your keyboard. For example, by pressing down both analog sticks simultaneously.
To do this:
- In RetroArch, navigate to Settings --> Input.
- Select Hotkeys.
- Scroll down to Menu Toggle (Controller Combo) and select it.
- Choose the combination you'd like for opening the RetroArch menu. For example, L3 + R3 means pressing down both analog sticks on a DualShock controller.
If you encounter controller issues, here are some troubleshooting tips:
- If the controller is not detected, check that it's properly paired with your Mac and recognized in System Preferences --> Bluetooth.
- Be aware that DualShock and Xbox controllers can only pair via Bluetooth to one device at a time, so you'll need to forget and re-pair your controller again if you use it on multiple devices.
- If there seems to be excessive input lag, try reducing the number of Bluetooth devices connected to your Mac, as interference can cause this.
- If the button mapping is incorrect, manually configure the buttons in Settings --> Input --> Port 1 Controls in RetroArch.
- If RetroArch does not respond to the controller, restart RetroArch or reconnect the controller.
Video filters: 50 shaders of games
When you loaded the ROM and core, you may have noticed that these emulated games don't quite look the same as you remember them (and not just because you're viewing a 256 x 224 image expanded onto a 5K screen).
But don't despair at the loss of your halcyon gaming days just yet, as there are substantive reasons for this. The good news is that emulation can go beyond simply executing a ROM to modify visuals and restore the glow of a bygone era.
Fourth-generation console games, like those for the SNES and Sega Genesis/Mega Drive, were originally crafted for display on CRT (Cathode Ray Tube) screens. The phosphor-coated screens and electron beam scanning of CRT displays had unique characteristics that significantly influenced game visuals:
- Dots instead of squares, as well as the accompanying scanlines, which give a softer look.
- Phosphor glow and "overshoot," wherein phosphors briefly emit more light than that necessary to achieve the desired color or brightness level before settling down. This creates a warmer image, especially in darker areas of the screen.
- Image persistence and fading leading to a slight motion blur.
These properties are particularly complimentary to pixel art, as they smooth out hard pixel edges and create a cohesive, aesthetically pleasing image, integral to the game's visual design.
However, when these classic games are displayed on modern LCD or LED screens, the original visual intent is often lost. The crisp, pixel-perfect clarity of modern displays can result in a harsher, more pixelated image, exaggerating imperfections in sprite art and tile-based backgrounds.
This stark clarity can detract from the original experience.
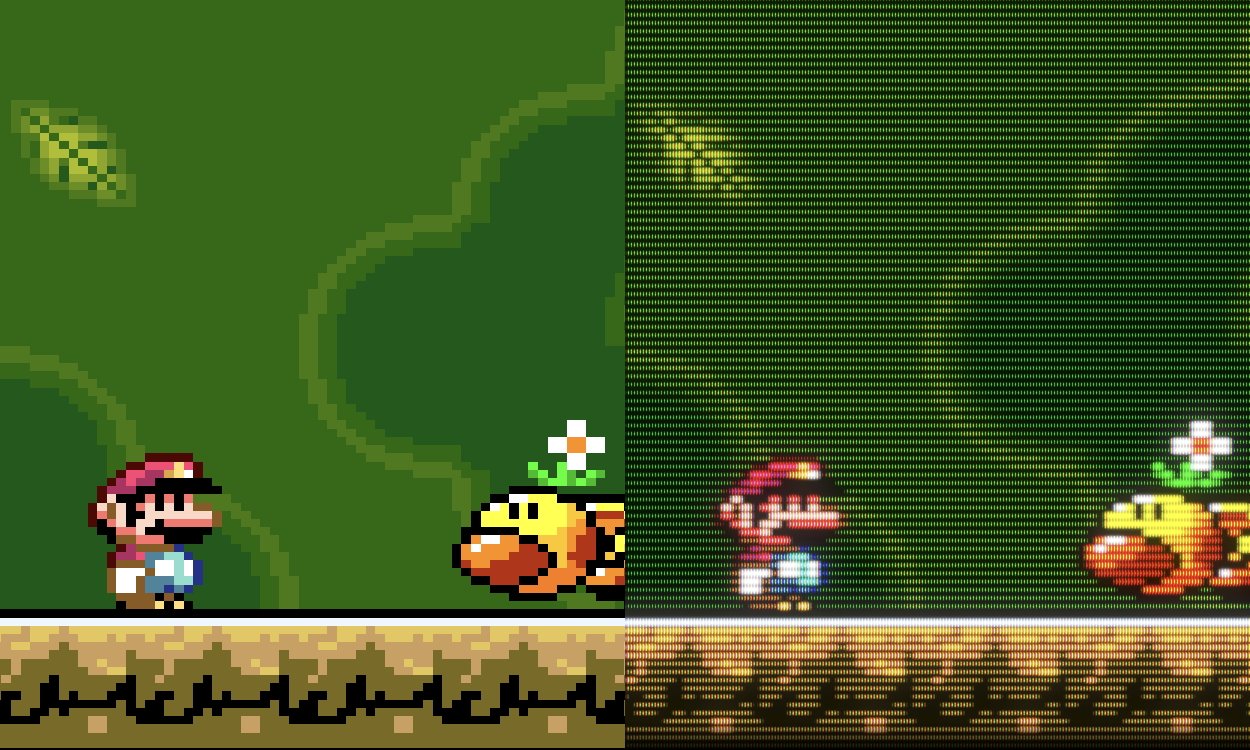
A SNES game running without shaders (left) vs. it running with CRT Royale (right), a shader preset which emulates CRT screens. Notice the smoother pixels, color bleeding, and dark drop-off toward the bottom edge of the screen.
So, unless you're hooking up your Mac to a CRT TV, you may want to replicate these visuals. ''Shaders' are digital techniques that produce a wide array of video effects, including the ability to emulate the CRT TV experience:
- Sub-pixel rendering simulates the arrangement of red, green, and blue phosphor dots.
- Bloom effects and color bleeding enhance the brightness and saturation of pixels, replicating the phosphor "overshoot" and image persistence.
- And, of course, scanlines can be added.
You can also customize shaders to fine-tune the intensity of each of these effects.
CRT shaders may invoke skepticism, as you might wonder why you'd intentionally distort an already perfect image. But try it once and see for yourself. You might find your emulated games as appealing as they were when played on a CRT TV.
Upscaling and smoothing
Aside from CRT shaders, there are other types of shaders such as ScaleFX with reverse anti-aliasing and ScaleHQ, each offering unique enhancements.
ScaleFX is a shader that combines resolution upscaling with reverse anti-aliasing to enhance the appearance of lower-resolution games. Instead of the traditional anti-aliasing approach that smooths out jagged edges, reverse anti-aliasing in ScaleFX works to define and smooth lines, bringing clarity to pixelated images.
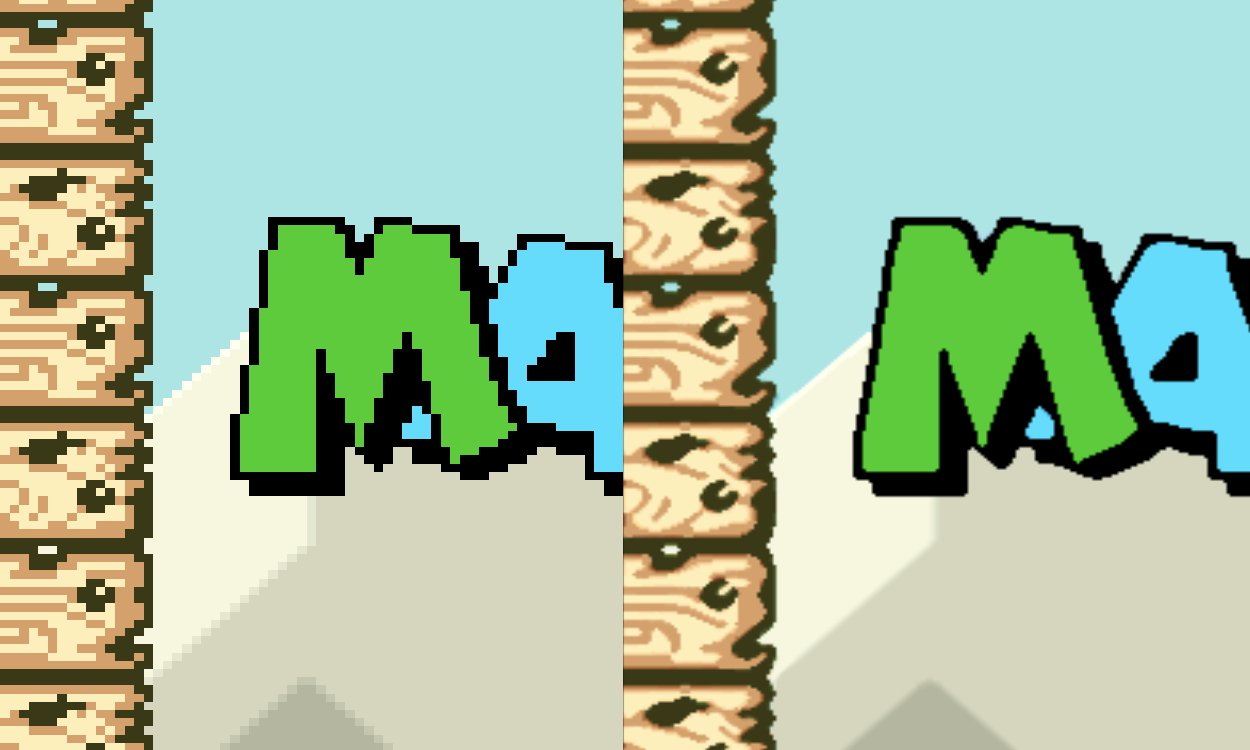
A SNES game running without shaders (left) vs. it running with ScaleFX + rAA (right), a shader preset which smooths out jagged lines. Notice the less-pixelated slopes on the letters.
This approach is especially effective for sprite-based games, making them appear more distinct and detailed on high-resolution displays. However, one potential drawback is that it might introduce a level of harshness to the image or exaggerate certain pixel artifacts, which might not be desirable in all types of games.
ScaleHQ, in contrast, is a family of shaders that focus on upscaling pixel art while preserving detailed textures. ScaleHQ works to enhance the clarity and definition of low-resolution images, but without the blurring that is often associated with standard upscaling methods.
It's particularly effective for games with intricate sprite work, as it brings out finer details and maintains clean lines. However, ScaleHQ may sometimes result in a slightly artificial appearance, especially in games where the original pixel grid is an integral part of the art style.
While CRT shaders aim to replicate the vintage aesthetics of old displays, shaders like ScaleFX with reverse anti-aliasing and ScaleHQ provide aim to refine the visual quality of retro games. They each offer different benefits, and the choice between them simply comes down to trying them out and seeing which one you prefer.
Slang vs. GLSL
There are two main shading languages used in the context of video game graphics and emulation: Slang' and GLSL'.
The difference between Slang and GLSL shaders lies primarily in their compatibility and the graphics APIs for which they are designed. Each caters to different graphical backends and have some distinct characteristics.
GLSL (OpenGL Shading Language) is the shading language for OpenGL. It is older and more established, with a broad range of support across various platforms and devices, including older hardware.
GLSL shaders are often used in applications where compatibility with a wide range of hardware, including older or less powerful devices, is important.
Slang is a relatively newer shading language, designed to be more versatile and compatible with multiple graphics APIs, including Vulkan, DirectX, and OpenGL. It is particularly beneficial for use with the Vulkan API, which is known for its high efficiency and better performance on modern hardware, especially in the context of parallel processing.
Slang shaders are more forward-looking, aiming to provide better compatibility with newer graphics technologies and APIs. They allow for easier maintenance and more uniform code across different graphics APIs, as Slang serves as a sort of intermediary layer that can compile to multiple backend shader languages.
On Apple Silicon, the default choice should almost always be Slang, with GLSL offering a fallback if you run into any issues.
Apply shaders in RetroArch
Normally, when referring to "shaders" in the context of emulation, we're actually talking about shader presets. These consist of individual shaders stacked on top of each other to produce a particular visual effect, such as a type of CRT TV.
In RetroArch, shader presets are denoted by the suffix 'p'. For example, 'scalfx-rAA.slangp.'
To apply a shader preset in RetroArch:
- Launch RetroArch and load a game.
- Press the hotkey for the RetroArch menu (usually F1 on a keyboard).
- Navigate to Quick Menu --> Shaders.
- Ensure that Video Shaders is toggled On.
- Go to Load Shader Preset.
- Browse the list of available shaders. You'll find shaders for various effects arranged into various folders, including CRT, ScaleFX, and ScaleHQ. For example, go to shaders_slang -- > crt -- > crt-royale.slangp.
- Select the shader preset to apply it. The game's visuals will update in real time to reflect the chosen shader.
- Press the backspace key to go back through each menu level. You can select another shader preset to apply multiple ones (for example, we've found that applying 'ScaleFX + rAA' then 'CRT Royale' produces a nice look).
If you'd like, you can adjust the shader's parameters to fine-tune its effects:
- Go to the Shaders menu -- > Shader Parameters.
- Adjust the parameters there such as the intensity of scanlines, level of blur, and color enhancements, based on your preference.
- After making your adjustments, select Save Shader Preset to keep your settings for future sessions.
You can save and apply shaders per core or per game:
- To apply a shader preset across all games, select Save Global Shader Preset after adjusting your settings.
- If you want to apply the shader only to the current game, choose Save Game Preset instead.
- This allows you to have different shader settings for different games, depending on each game's visual requirements.
(Optional) Create an app for each game
While RetroArch can neatly organize your games for you, wouldn't it be cooler if there were standalone apps that you could click to launch straight into specific games? Thankfully, Apple has provided a way to create your own custom apps on macOS.
Although the interface might initially seem complex, creating a custom app in Automator is actually really simple.
To make your game app:
- Go to your Applications folder or use Spotlight to open Automator.
- Create a new document and select Application as the type.
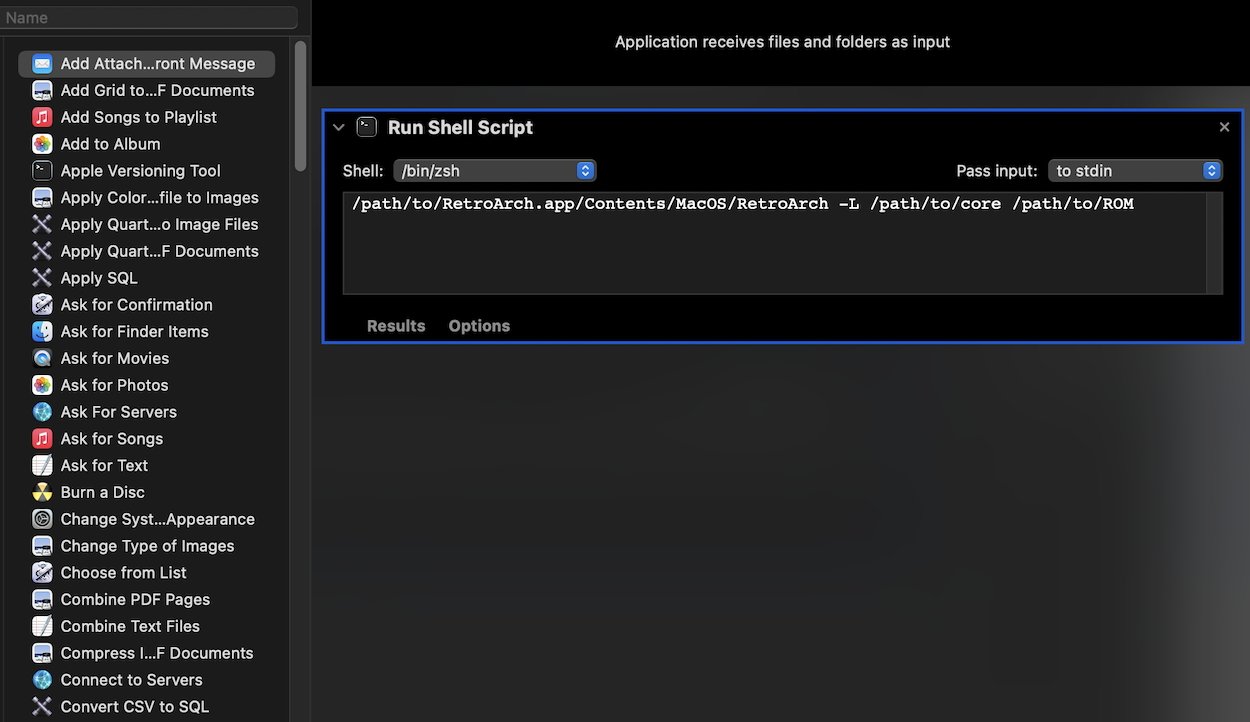
- In Automator, find the Run Shell Script action and drag it to your workflow.
- In the shell script box, enter the command for launching your game in RetroArch.
Use the structure:/path/to/RetroArch.app/Contents/MacOS/RetroArch -L /path/to/core /path/to/ROM
Replace/path/to/RetroArch.appwith the actual path to RetroArch.
Replace/path/to/corewith the path to the specific core for SNES or Sega Genesis. - Click File --> Save, and choose a name and location for your new Automator application.
- Test your new custom app by clicking it. It should launch straight into your chosen game.
(Remember to bookend the path+filename with double quotes ("), or use backslash (\) before any non-alphanumeric characters.)
Now you just need to add a snazzy icon to your custom app. To do this:
- Create or find an icon that represents the specific game, such as a cropped image of the box art. Its resolution should be as high as possible, such as 512x512.
- Open the image in Preview. You'll need to make the image square if it isn't already. To crop a square from the image, go to Tools --> Rectangular Selection. Once you've made the selection, go to Tools --> Crop.
- To scale the image, go to Tools --> Adjust Size...
- When done, go to File --> Export to export the icon image.
- Now locate the custom app file which you made in Automator, then right-click on it and select Get Info.
- Drag and drop your image file onto the icon at the top of the Get Info window to give it that image.
Squircley perfection
You may have noticed that macOS doesn't automatically shape your app icon into the squircle shape used by all of the others. If the harsh corners of a square offend you (and, chances are, if you're on a Mac then they do), then you can reshape the icon if you're willing to put in a little more work.
If you're going to the trouble of creating a custom app for your game, you might as well go the whole way and make its icon a squircle.
To shape your app icon into a squircle:
- Ensure GIMP is installed on your computer. If not, download and install it from the GIMP official website.
- Visit the Apple Design Resources page, where you'll find 'Production Templates.' These are templates for app icons and are available in various formats like Sketch, Photoshop, and Adobe XD. For the purposes of this guide, download the Photoshop (PSD) version.
- Open the DMG file and drag out the folder called 'macOS # - Design Templates - Photoshop.'
- Open the file called 'Template - Icon - App.psd' in GIMP. Then go to File --> Open as Layers and choose your existing game icon image.
- Apple's template should include a squircle-shaped mask or guide layer that matches the size of your existing image. Use the Move Tool (press M) to position your image correctly within the template's boundaries.
- To make things easier, delete any unnecessary layers in the Layer pane (which is usually on the bottom right). Then go to Image --> Crop to Content.
- Select your image's layer and go to Layer --> Transparency --> Add Alpha Channel.
- With the squircle mask visible, use the Fuzzy Select Tool (which looks like a magic wand) and click the squircle shape to select it.
- Invert the selection using Command + I, then select your image layer and press fn + Backspace to remove the parts of the image outside of the squircle. Your icon image should now be in a nice squircely shape.
- Make any necessary adjustments to your icon for clarity, contrast, and visibility. You can add effects like shadows or glows if needed, by going to Filters and choosing the desired effect.
- Once satisfied, go to File --> Export As... and save your new icon in the PNG format.
- Right-click your Automator app and click Get Info, then drag the new icon in to replace the original.
Press Start to begin
If you're a fan of retro gaming and you're using an Apple Silicon Mac, this guide has hopefully equipped you with everything you need to dive back into the classics. Once you've set everything up and fine-tuned the settings, you'll be ready to relive those gaming glory days or maybe discover them for the first time.
While the technology has changed, the fun that these classic games bring is timeless.
Read on AppleInsider