How to revert macOS to the previous version

There are several reasons why you might want to revert to an older version of macOS than the version currently installed on a Mac. Here's how to do it.
A macOS installation can be reverted to an earlier release.
Apple updates macOS, the operating system for Macs, once a year. Each successive year brings a new version of macOS with refinements, new features, and compatibility updates.
For a variety of reasons, you might find the need to revert to an older version of macOS. You might need an older version of macOS for compatibility reasons, such as to open older files. If you are a developer, it could be to test your software with an older version.
From time to time, Apple eliminates support for older versions of macOS and Mac hardware. Older versions are no longer supported by Apple, and online updates for base versions of macOS may no longer be available.
Apple posts several standalone versions of installers for macOS on its support website, and you can use these to reinstall macOS -- if your hardware supports those versions.
How to revert macOS to a previous version -- getting started
Before proceeding, you should make a backup of all your data on your Mac, especially its internal drive since you're going to erase it and reinstall everything. When you do, everything on your internal drive will be gone.
Once you've backed up, make a note of a few important locations on your Startup Disk that contain files you'll want to move back:
- Applications
- Library
- The currently logged in user folder (~)
- Preferences
- Application Support
- Fonts
- Hidden config files
Also, keep a note of the Downloads and Documents folders inside your user folder. You'll also need to backup any files located there before you reinstall.
There is also a Music and Movies folder inside the user folder. If you use Apple Music, by default your music collection is saved in the Music folder so back it up too if need be.
The file structures inside both the /Library and ~/Library folders are similar, but there are more items in the ~/Library folder to be concerned with.
In /Library there is also a Logs folder so if you want to save any current logs from your Mac, back these up too.
In both Library folders, you can determine what has changed by sorting the folders by date.
If you use Apple Photos, by default its library collection lives in ~/Library/Photos/Syndication.photoslibrary.
The Preferences folder in both locations stores most of your app preferences, so be sure to back those up too.
How to revert macOS to a previous version -- Don't forget Contacts
One important gotcha most users overlook when backing up is Apple's Contacts app. If you use locally-stored Contacts, don't forget to export your address book to your backup drive, as if you don't, all your Contacts will be lost.
You can do this in the Contacts app using the File->Export->Contacts Archive... menu item.
This is less of an issue if you have set up iCloud for Contacts, as your contacts will be stored online for later retrieval.
Once you have everything backed up, you can proceed with the next step: erasing the internal Startup Disk.
Be aware that when you reformat your internal Startup Disk, everything on your Mac's Desktop will be erased too.
How to revert macOS to a previous version -- Reboot into Recovery Mode
Apple's Recovery mode is a special application that lives in your Mac's firmware. When you boot into Recovery Mode, the Mac loads this app instead of loading macOS.
Recovery mode features just the bare minimum apps you need to reformat, test, and reinstall macOS - most notably Disk Utility, Restore from Time Machine, and the macOS installer app.
When you update your Mac's firmware with the latest version from Apple it also updates to the latest supported version of the macOS installer - so you may want to check Apple's Support website first to see if there are any new firmware updates for your Mac model.
If you want to revert to a previous version of macOS, see the note below about earlier firmware versions instead of updating.
When you update your Mac's firmware, it usually involves downloading a firmware update app, running it from the Finder, flashing the firmware on your Mac, then Restarting.
Once your firmware is up-to-date, you're ready to start up into recovery mode.
To enter Recovery Mode on an Apple Silicon-based Mac, shut down your Mac, then press and hold the power button until the Options menu appears. When it does, click the Options icon. This boots into Recovery mode.
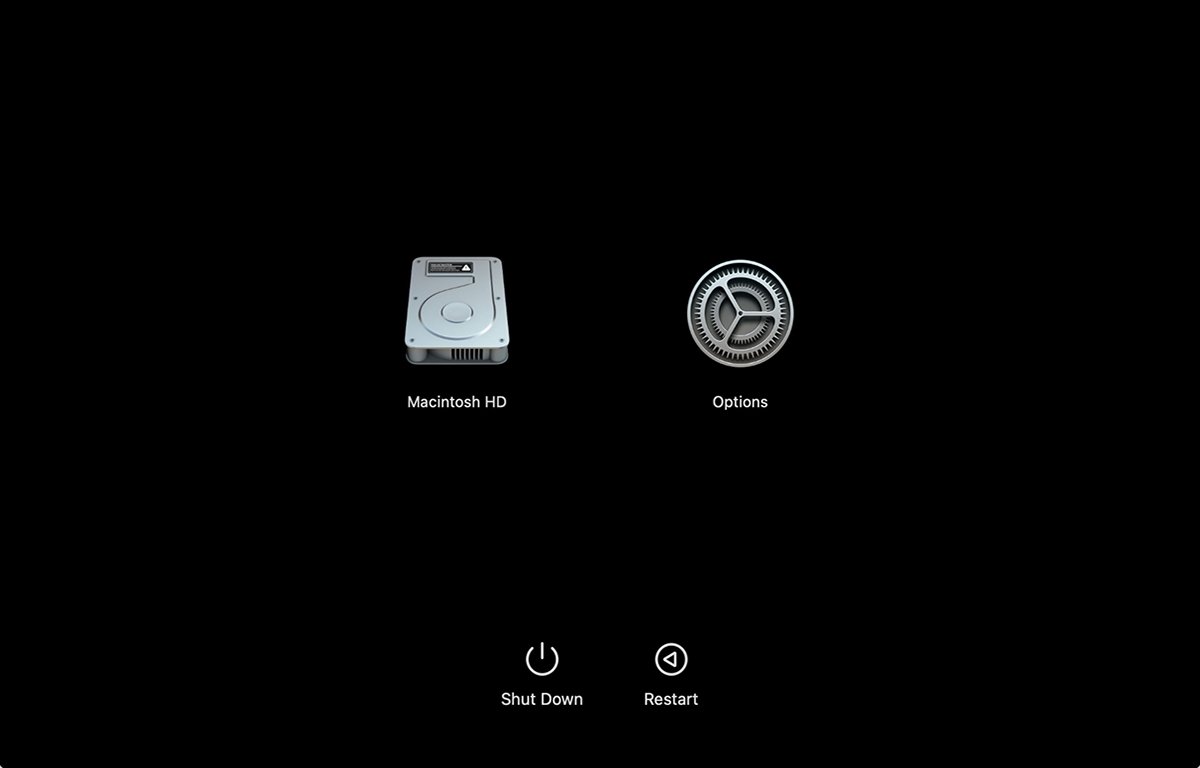
Booting into Recovery mode.
On an Intel-based Mac, reboot and hold down Command-R on your Mac's keyboard. This also boots into Recovery Mode.
If your goal is to revert to a previous version of macOS, then don't update your Mac's firmware yet. Instead, follow the process below, reinstall the current version of macOS that resides in your Mac's firmware, then update the firmware later.
This allows you to use the last version of macOS that is in your Mac's firmware - or if you have never updated the firmware, the version of macOS that shipped with your Mac.
How to revert macOS to a previous version -- Run Disk Utility
Once rebooted in Recovery Mode, on Apple Silicon-based Macs, click the Disk Utility icon to open it. On Intel-based Macs, Disk Utility is usually located in the menu bar at the top of the display.
Once in Disk Utility, you'll want to select the internal drive from the drive list on the left, then click the Erase icon in the toolbar at the top of the window.
When you click Erase, you'll be prompted to select a name and format for your new volume (partition). Enter a name and select APFS as the volume format.
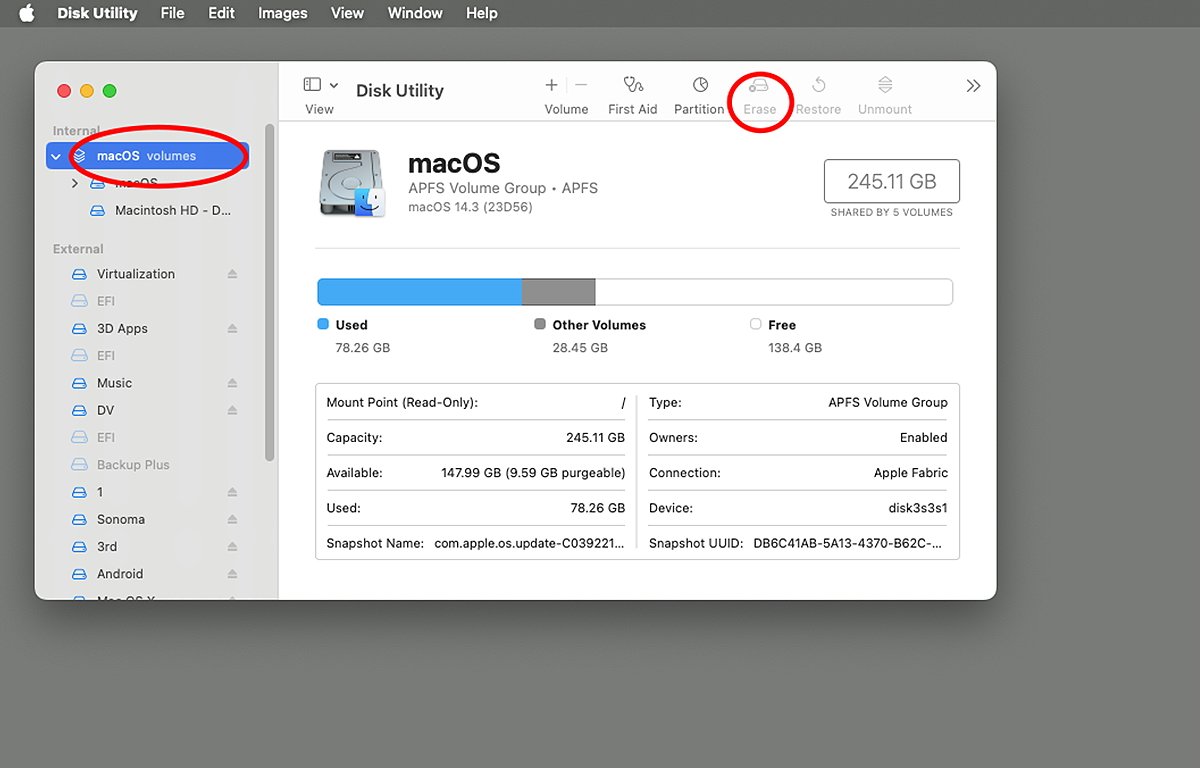
macOS's Disk Utility.
Be sure this is what you want to do because once you click the Erase button, everything on your Mac's internal drive will be gone forever.
Disk Utility will erase your Mac's internal drive and add a new APFS volume to it with the name you specified. You now have a clean Mac with nothing on it.
How to revert macOS to a previous version -- Run macOS installer
Once your Mac is erased, Quit Disk Utility, and you will be taken back to the firmware's main menu. From here you can select the macOS installer which is resident in the firmware, and reinstall macOS onto the volume you just created on your internal drive.
This may take a while, and if you're using a later model Mac and have it connected to the internet, the macOS installer may also download updates and install them too.
Be patient. Once the macOS installer finishes, you'll be prompted to restart your Mac. On later-model Macs, the restart may happen automatically.
Either way, when your Mac restarts it will now start up into the version of macOS you just installed. Step through the macOS setup screens to get into the Finder.
How to revert macOS to a previous version -- Restore important files
Once back in the Finder, you now need to copy all the important files from your last macOS install from your backup to your new installation of macOS.
This involves first showing invisible files in the Finder, then copying the important files back from your backup to your Startup Disk.
If you made a complete in-place backup of your Mac's drive, you may want to try using Apple's Migration Assistant located in the /Applications/Utilities folder instead.
The Migration Assistant attempts to automatically restore user and settings files from your backed-up version to your new installation.
If you don't use the Migration Assistant you'll need to copy any important files back from your backup. Most of these are the files and folders mentioned above - usually mostly contained in the two Library folders.
Don't forget to copy any important invisible files from your original user folder to your new user folder. Not all backed-up system files have to be copied back - just the important ones for your specific settings and files.
Once the files are restored from your backup, you'll want to Restart your Mac again to let the system reload the restored settings.
Finally, run the System Settings app in the /Applications folder and run the General->Software Update again for any final updates.
Note that if you reverted to an earlier version of macOS, you won't want to run the update as it will try to update to the most recent full macOS version your Mac supports.
In this case, you can usually manually download macOS updaters for the older version of macOS and run them from the Finder to update your version of macOS to the last supported minor version for the version you reverted to.
A word about macOS versions and firmware
One thing to note about macOS installers is that Apple's recent installers won't allow you to install an older version of macOS over a newer version. On some Macs, it also won't allow you to restore an older version onto a volume containing a newer version of macOS from Recovery mode.
It's for this reason that it's best to Erase the internal drive on your Mac before attempting to restore any version of macOS. Also note that in the firmware update process above, once you update your Mac's firmware, it's generally not possible to later downgrade it to an earlier version.
So be sure to consider which version of macOS is stored in the firmware you want to use before updating firmware.
Downloadable installers
One other option is to download an older version of a macOS installer from the Mac App Store.
Apple supports several old versions of the macOS installer in the App Store. Be aware that if you use this method, older installers won't allow you to reinstall that version of macOS over an existing newer installation of macOS.
You can find older installers on the Mac App Store by searching for "macOS installer", but the App Store may only show the two most recent versions. For versions earlier than that you'll have to locate specific links to the installers from the web and then navigate to them in the App Store.
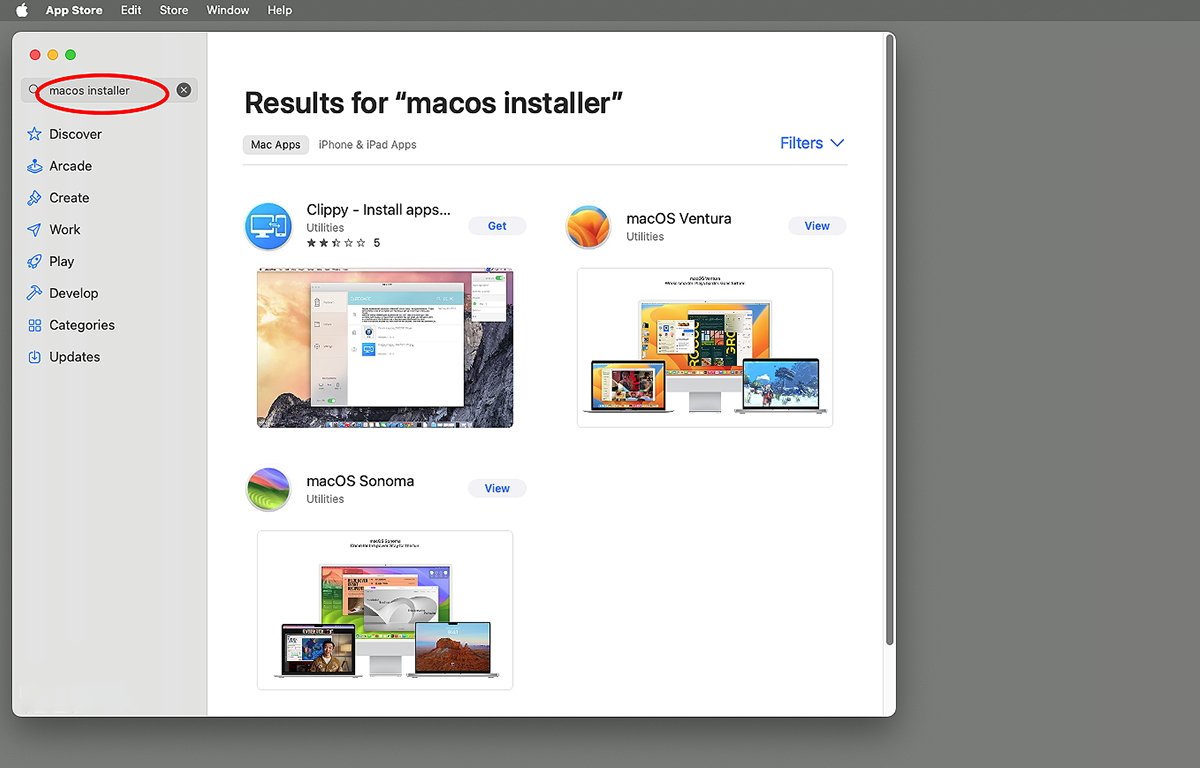
Searching for macOS installers in the App Store.
The reason you might want to use an older downloadable installer is that your Mac's firmware may already be updated beyond the version of macOS you want to restore, or you don't have the ability to use Recovery mode for some reason.
In these cases, you'll need to use a second drive, install the older version of macOS onto it, boot into it, then erase your Mac's internal drive from there and reinstall while booted from the external drive.
It's not possible to erase the Startup Disk you're booted into from macOS. This means you always have to have some other way to boot your Mac to do a reinstall - either from another drive or from Recovery mode.
You may want to keep copies of all the older downloadable macOS installers for future use should the need arise to revert to an older version.
It's also possible to restore your Mac using Apple's Configurator utility, which we'll get to in a future article.
Read on AppleInsider
Comments