How to use Apple's Time Capsule for backups on a modern wireless network

Time Capsule was Apple's discontinued line of network backup products. This is how you could use one on a modern network.

Apple Time Capsules
In 2008 Apple introduced a product called Time Capsule, which combined a wireless AirPort Base Station and an internal hard drive along with the macOS Time Machine backup software.
Time Capsule acted as a Network Attached Storage (NAS) device and allowed users to both manually back up their data by using a Time Capsule as a NAS volume, as well as by using the Time Machine app to automate backups.
Apple still ships Time Machine in the /Applications folder with macOS, but it ended the Time Capsule line of products in 2018 as more generic and cheaper alternatives became available.
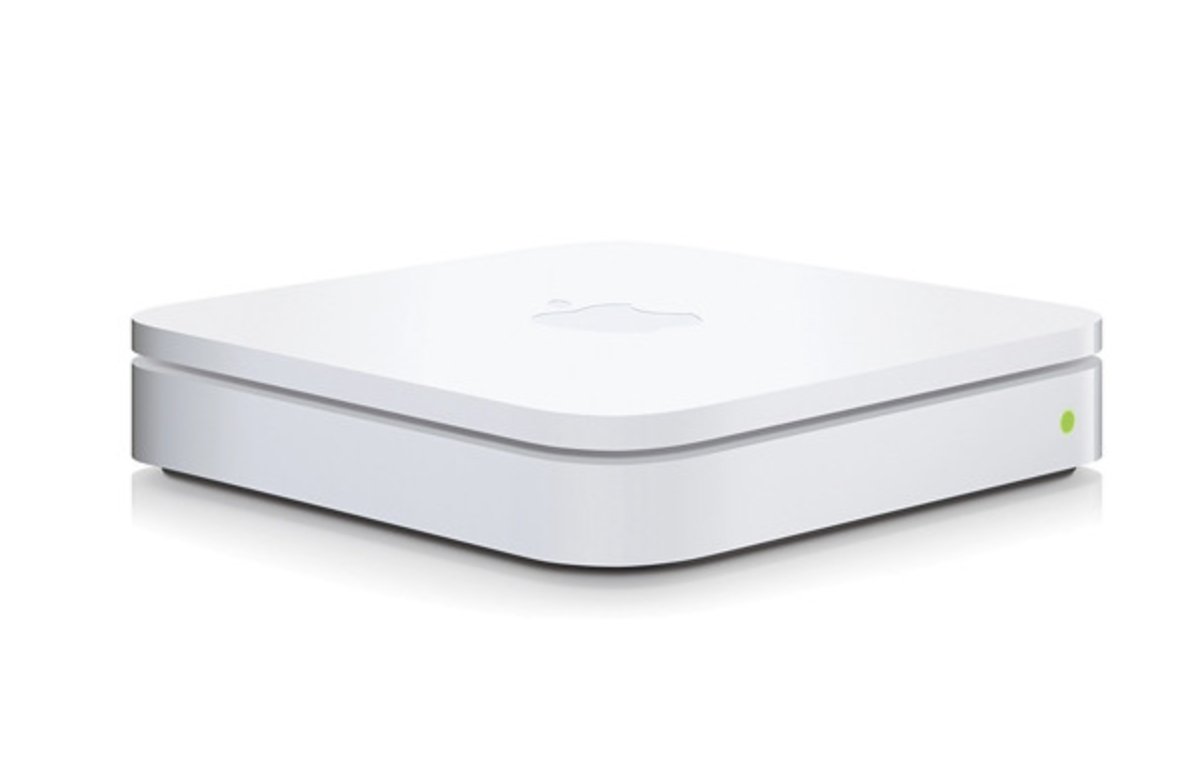
There were five models of Time Capsule originally, all with Wi-Fi and Ethernet connectivity. The first four models had the same form factor as Apple's line of AirPort Extreme Wi-Fi base stations, but the fifth Time Capsule model had a small tower look to it with the hard drive wedged vertically in the center of the device.
The final model included two possible internal storage capacities: 2TB or 3TB.
3rd generation AirPort Extreme.
Time Capsules today
You can still find working Time Capsule devices today on the used market, including on eBay, Amazon, and other online retail sites. If you choose wisely you can find an original model for around $50 or less.
These devices still make good NAS backup devices, as long as the data you want backed up doesn't exceed 2TB or 3TB.
See our other article on how to refurbish a fifth-generation Time Capsule for modern use.
Connecting a Time Capsule to a modern network
To get a vintage Time Capsule device on a modern network you can use either Wi-Fi or Ethernet, but we recommend Ethernet if possible both for performance and reliability.
If you use a cable or DSL modem, you can usually plug the Time Capsule's WAN Ethernet port directly into your modem. Or you can plug an Ethernet switch into your modem and then plug your Time Capsule into the switch.
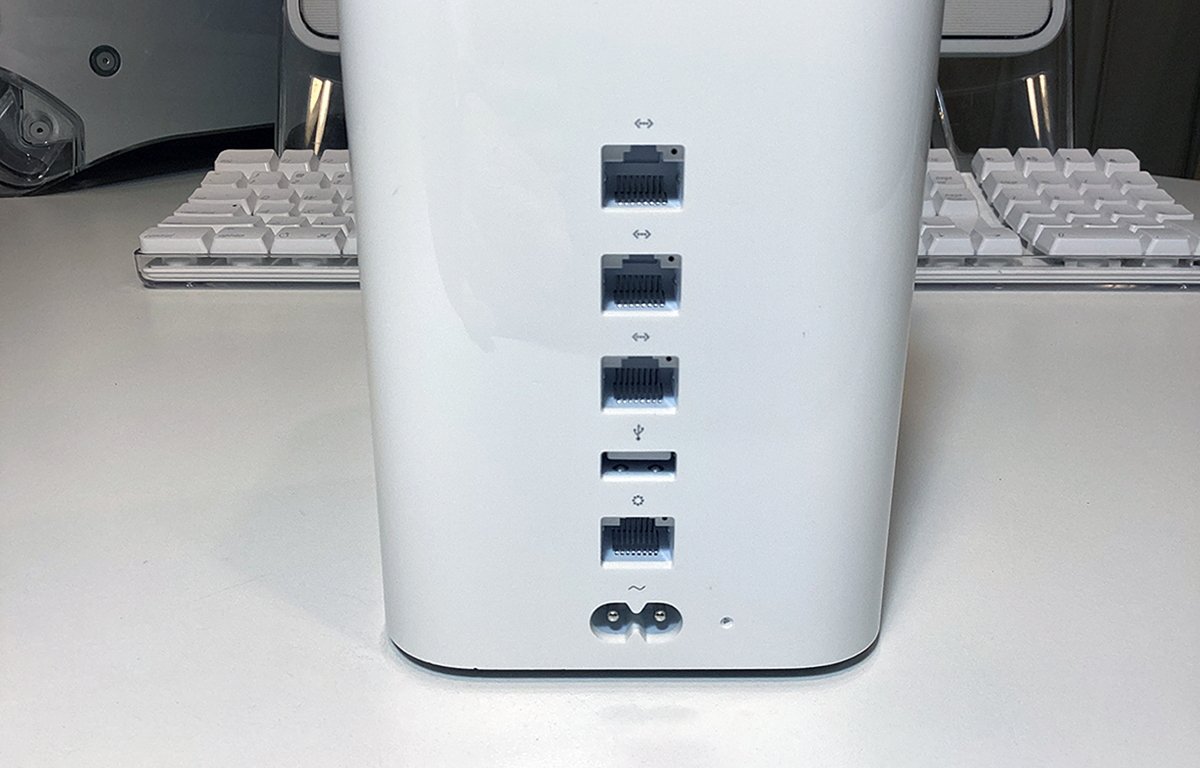
Time capsule rear ports. Note the small reset button on the lower right.
Next, plug in Time Capsule's power cord to an AC power outlet to power it on.
You can also use macOS's AirPort Utility app in the /Applications/Utilities folder to connect your Time Capsule to a network over Wi-Fi or use it as a bridge to another Wi-Fi network.
If you want to restore your Time Capsule or update its firmware it will also need an internet connection.
Resetting and restoring
You can reset your Time Capsule's software to its factory state by depressing the small recessed button on the back near the power port, but we won't go into all the reset details here. We've covered both the reset and restore processes for Time Capsule in a previous article so refer to that discussion for details on how to reset or restore.
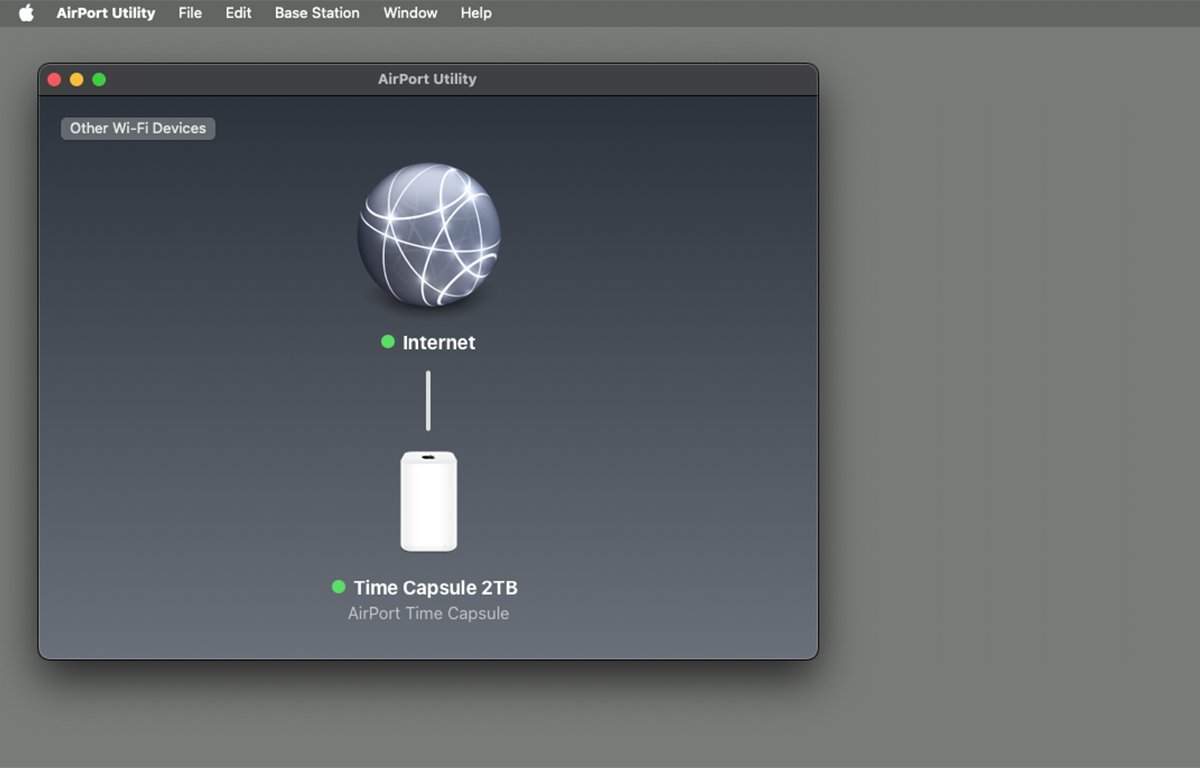
Once your Time Capsule is reset to its factory conditions, run macOS's AirPort Utility, and Control-click on your Time Capsule when it appears in the utility app's window:
Setup complete.
In the popover that appears, you can click Edit and then set the device's network name, base station name, and login password.
You can also use the AirPort Utility to erase and rename the Time Capsule's internal hard drive.
If your Time Capsule is connected to the internet, AirPort Utility will also check for a firmware update from Apple, and if one is available prompt you to update.
Go ahead and update the firmware, and the Time Capsule will restart after the firmware is updated.
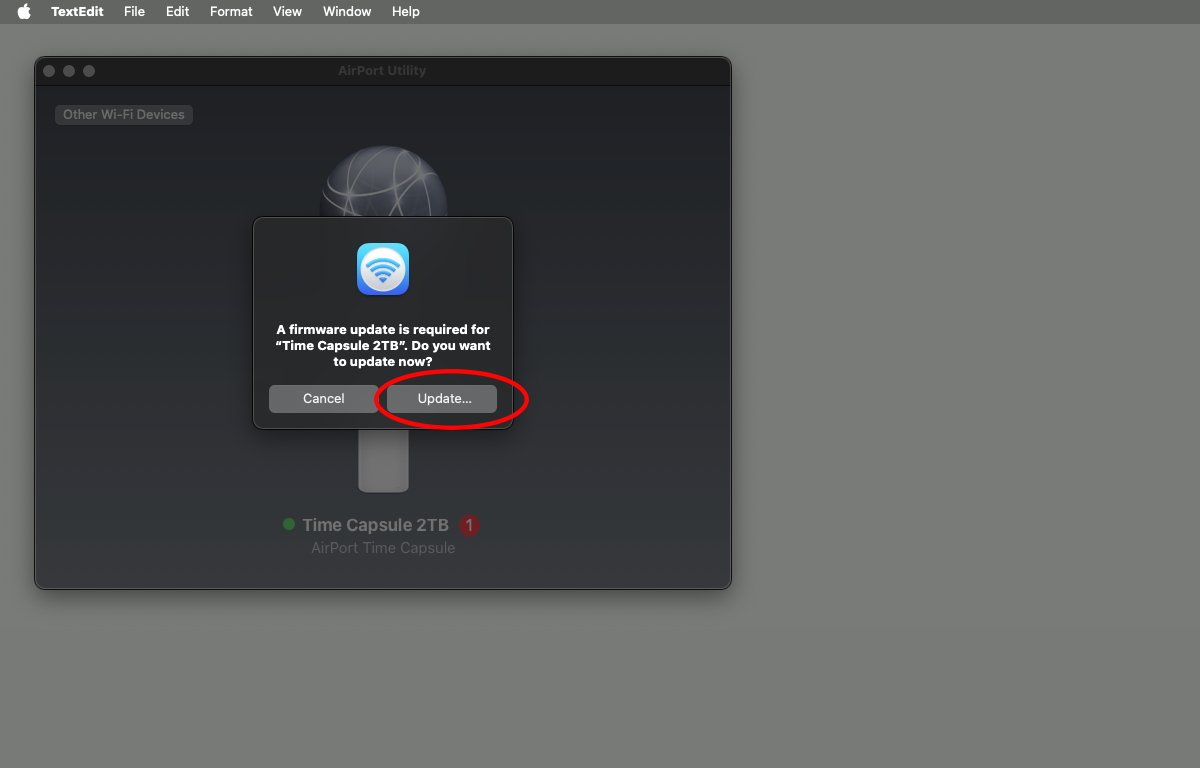
Update the firmware, if needed.
Backing up in Finder
To do a manual file backup from your Mac to your Time Capsule in macOS's Finder, you'll first need to mount your Time Capsule's hard drive on the Finder's Desktop.
To do so, select Go->Connect to Server from the Finder's menu bar at the top of the screen. Click the Browse button in the Connect window and you'll see your Time Capsule in the list of networked devices:
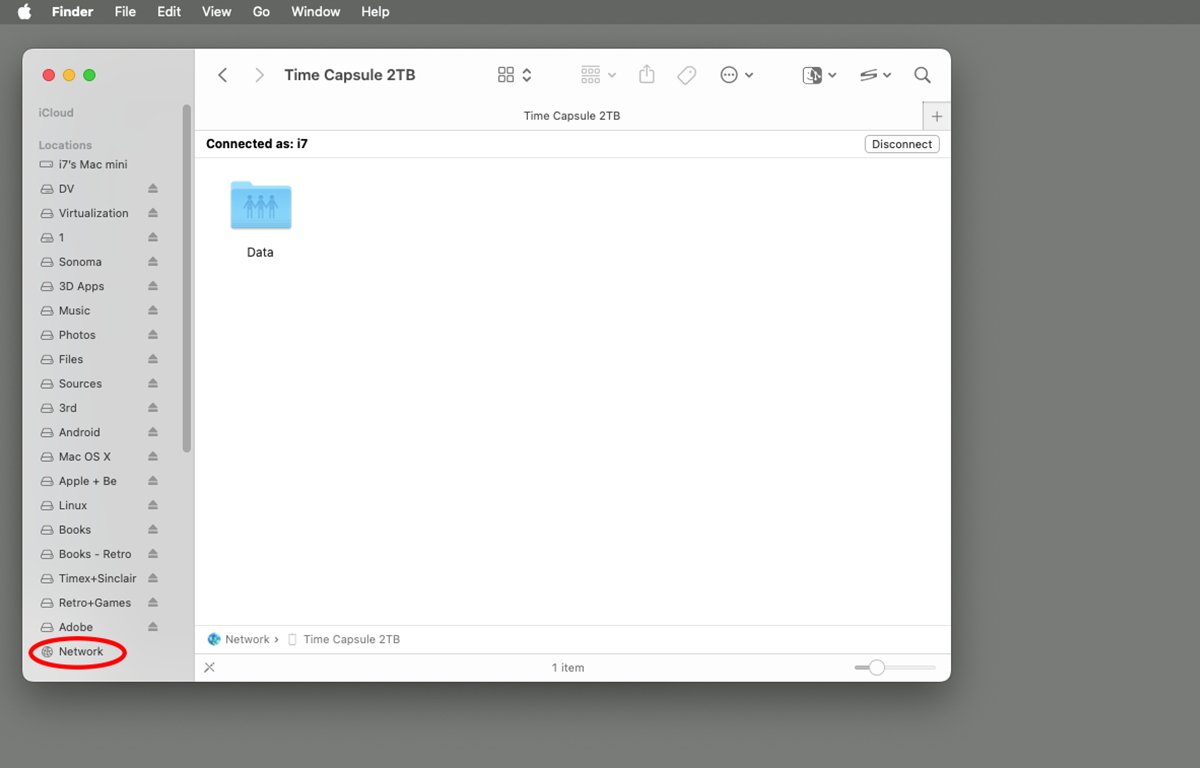
Connecting to your new Time Capsule.
Double-click the Time Capsule's icon and you'll be prompted to log in. Enter your name and password for the Time Capsule.
Once logged in, the Time Capsule's hard drive will mount on the Finder's Desktop on your Mac just as if it were a local drive. You can now double-click it on the Desktop and drag files and folders into and out of it just as you would with any other drive.
As files and folders copy to or from the Time Capsule's hard drive you'll see a Finder copy progress window just as you would with any other disk copy.
Once finished you can unmount the Time Capsule's drive from your Desktop on the Mac by Control-clicking or Right-clicking it. Select Eject from the popup menu to unmount the Time Capsule's drive.
Add Time Capsule as a Time Machine disk
Alternatively, you can use macOS's Time Machine app to back up your data to your Time Capsule.
Time Machine lives in the /Applications folder on your Mac's Startup Disk.
But before you use Time Machine you'll need to add your Time Capsule as a Time Machine backup disk.
To do so select System Settings from the Apple menu on your Mac, then scroll down and select the General tab in System Settings. Scroll down on the right and select Time Machine to get to the Time Machine setup pane:

Select Time Machine from the "General" tab.
On the right, click the button Add Backup Disk. You'll be prompted for a volume to set as a Time Machine backup disk. Scroll to select your Time Capsule disk, then click the Set Up Disk button.
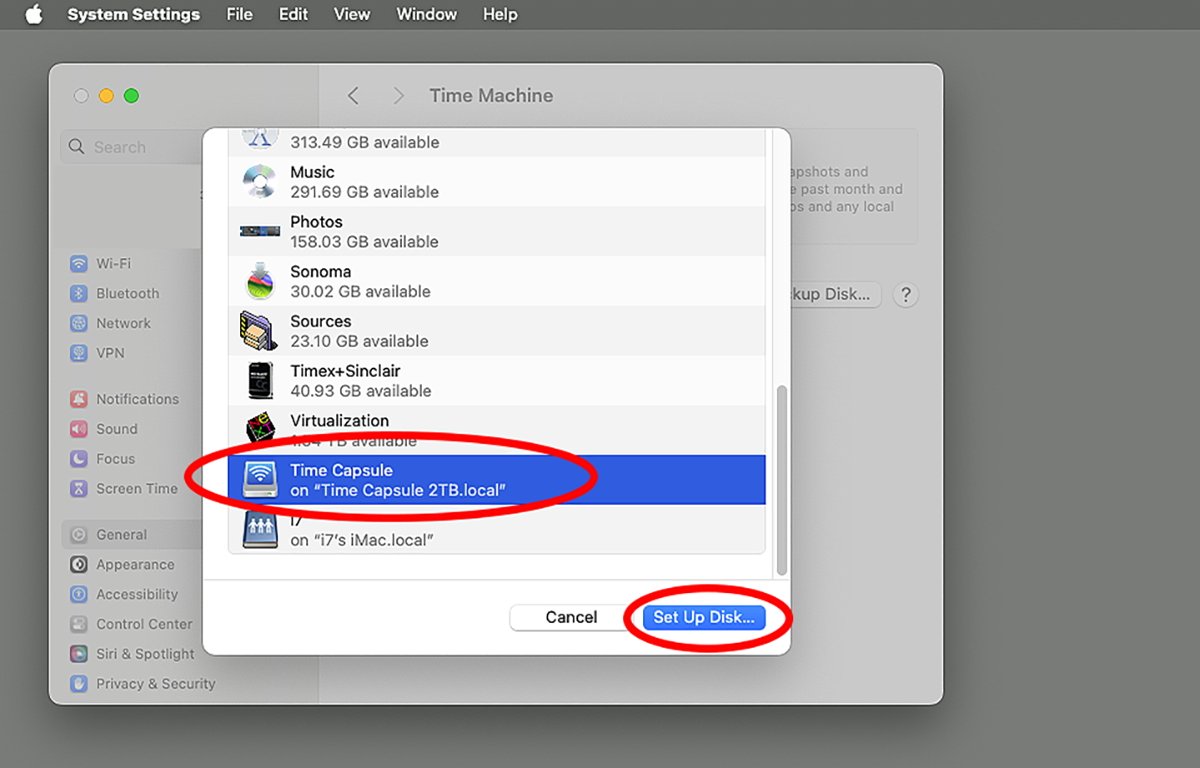
Add a Time Capsule disk.
You'll get an alert asking if you want to connect to the Time Capsule device. Click Connect.
If your Time Capsule disk isn't already mounted on the Finder's Desktop you'll be prompted for its login password. Enter the password and click Connect.
Once you do the Time Capsule's disk volume will mount on the Desktop in the Finder.
Apple has a support page titled Choose a backup disk and set encryption options on Mac in the macOS User Guide which details complete setup steps.
If a new window appears, you can select the maximum space used for backups and choose whether to encrypt backups. Click Done after selecting Settings.
You may or may not also be asked to Erase the Time Capsule disk. Do so only if it doesn't contain any data you need to preserve.
If you had any previous Time Machine backups set, you may be asked whether you want to claim those backups as part of the new backup. If so, claim the backups to merge them into the new backup.
If you choose encryption for the new backup, you'll be asked to enter a password for the encryption. Be sure to make a note of the new password.
Once you've set the Time Capsule volume as the new backup target, macOS will begin making backups immediately.
Backing up with Time Machine
Time Machine offers an optional icon the macOS menu bar which you can use to start and stop backups.
To enable it, open System Settings->Control Center and scroll down to Time Machine. Click the popup menu next to Time Machine and set it to Show in Menu Bar.
The Time Machine icon will appear macOS's menu bar as a small clock icon with arrows around it.
Clicking the Time Machine icon in the menu bar allows you to monitor any backup in progress, skip the current backup, browse existing backups, or open the Time Machine settings pane again.
Apple has a page detailing how to add and setup a Time Machine backup including how to automate backups, and how to use the Time Machine icon in the menu bar.
There's a Time Machine settings on Mac section in the macOS User Guide which details how to make Time Machine settings on the Mac, as well as how to tell macOS which files and folders to backup. You can choose to back everything up, or only a subset of files and folders.
You can also still download the Time Capsule User Guides for third, fourth, and fifth-generation Time Capsules from the Apple Support site on the Manuals page.
Time Capsules are still a viable NAS backup solution and there are still many of the devices in good working order today. They're an easy way to do a quick network backup on your network without too much trouble or expense.
Read on AppleInsider
Comments
But I have its Wi-Fi turned off as I have replaced my AirPorts with Omaga hardware.
I also still have two AirPorts Expresses also with their WiFi turned off, as I use them to stream music to two of my rooms.
1. Use Airport Utility to connect to the Time Capsule.
2. Under Network change Router Mode to Off (Bridge Mode).
3. Optionally under Internet change the Connect Using to DHCP. If you know what you are doing you can optionally selection Static and enter the IP Address you want to use. It is not a necessary step and I doubt has any advantages at all.
turning of the routing functions on the Time Capsule effectively makes it a network attached storage. For stationary devices (desktops) I recommend an external hard drive.
4. Under Wireless change Network Mode to Off.
You now have a Time Capsule without any visibility other than your network.
https://wpguru.co.uk/2023/11/how-to-use-your-apple-airport-time-capsule-as-nas-without-being-a-router/
Of course there are other options that are better solutions, but if you have one and like the way it works get a new drive and keep using it. No reason to junk something when there are uses for it and you like tinkering with electronics. I ditched mine long ago and use a hard drive attached to my docking station. I did upgrade it a few years prior with a new high capacity hard drive and sold it to the next person after I switched to an external drive.