How to make boot media for PowerPC Macs on modern hardware

It's easy to make boot disks on old Macs for older hardware, but as the years have gone on, it's gotten a little more difficult. Here's how to make classic Mac OS 9 and early Mac OS X boot media on your modern Mac.
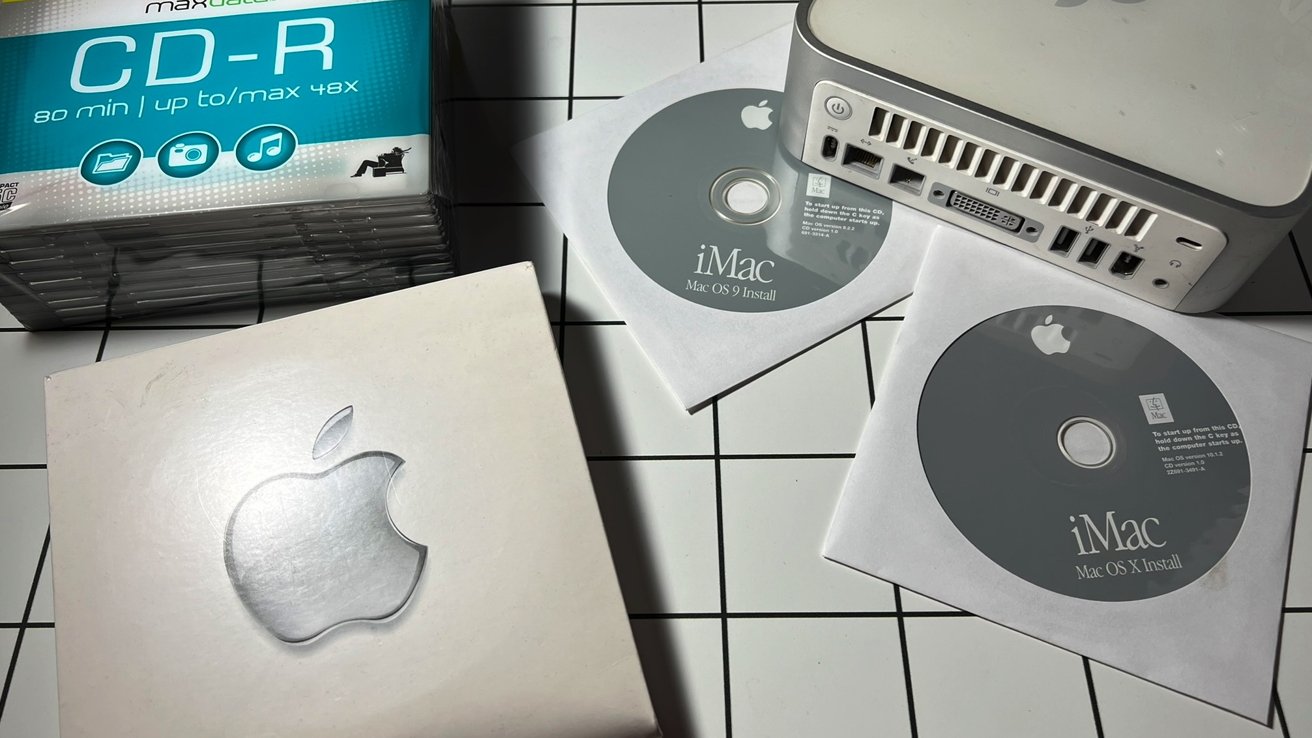
Yes, the iMac OS9 9.2.2 boot disk works on this Mac mini
In certain circumstances you may want to create bootable macOS media on modern Macs to use for installation on older Mac computers. While DVD drives are no longer included on most Macs, you can still use an external USB DVD drive today to access these disks.
Mac OS 9
Before the Mac OS X era, Apple shipped an earlier version of Mac OS called Mac OS 9.
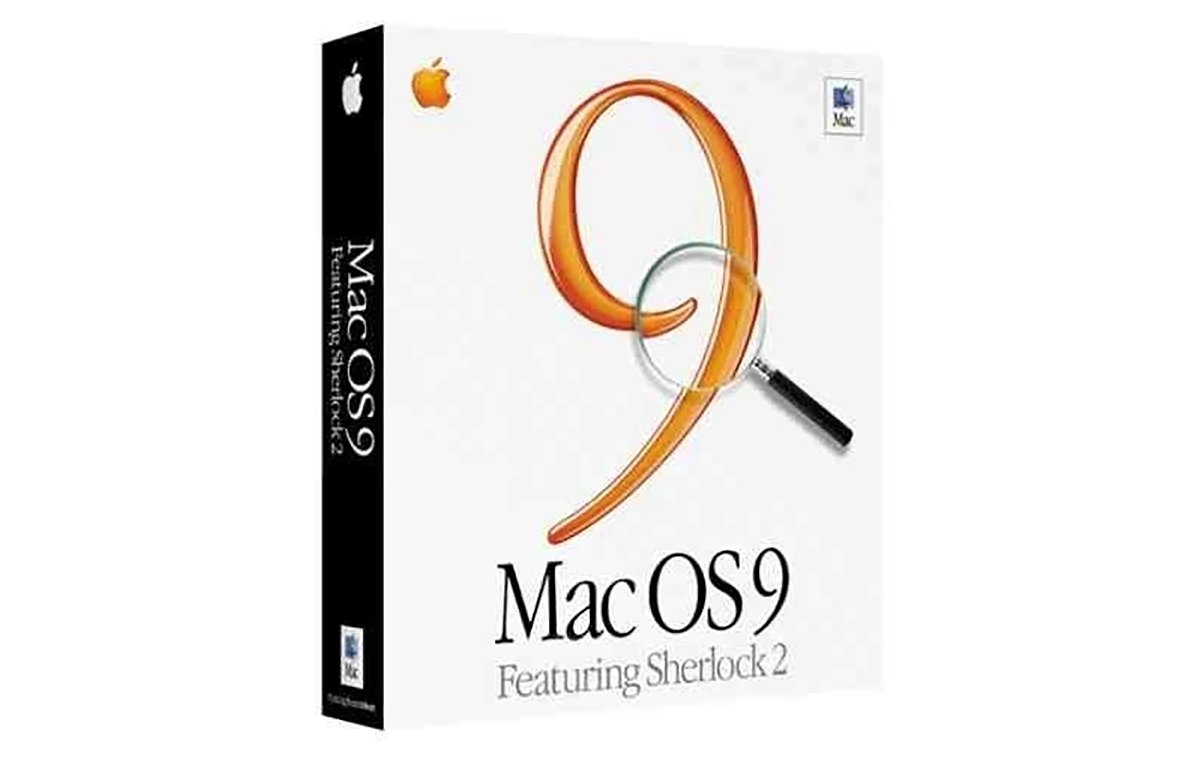
Mac OS 9 was the final incarnation of Apple's original Mac operating system. The final version of Mac OS 9 was 9.2.2. which shipped in late 1999. All Mac OS 9 computers used PowerPC CPUs, which were a result of a collaboration between Apple, IBM, and Motorola.
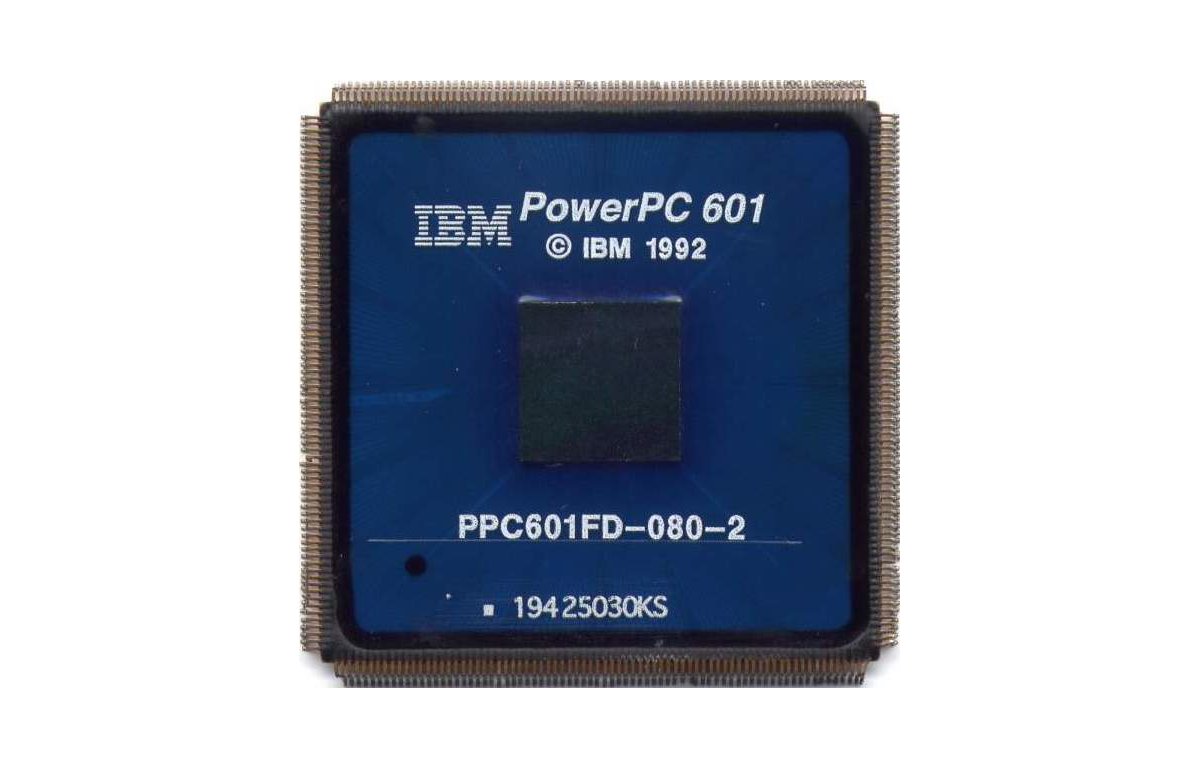
IBM's PowerPC 601 CPU - the first PowerPC CPU used in Macs.
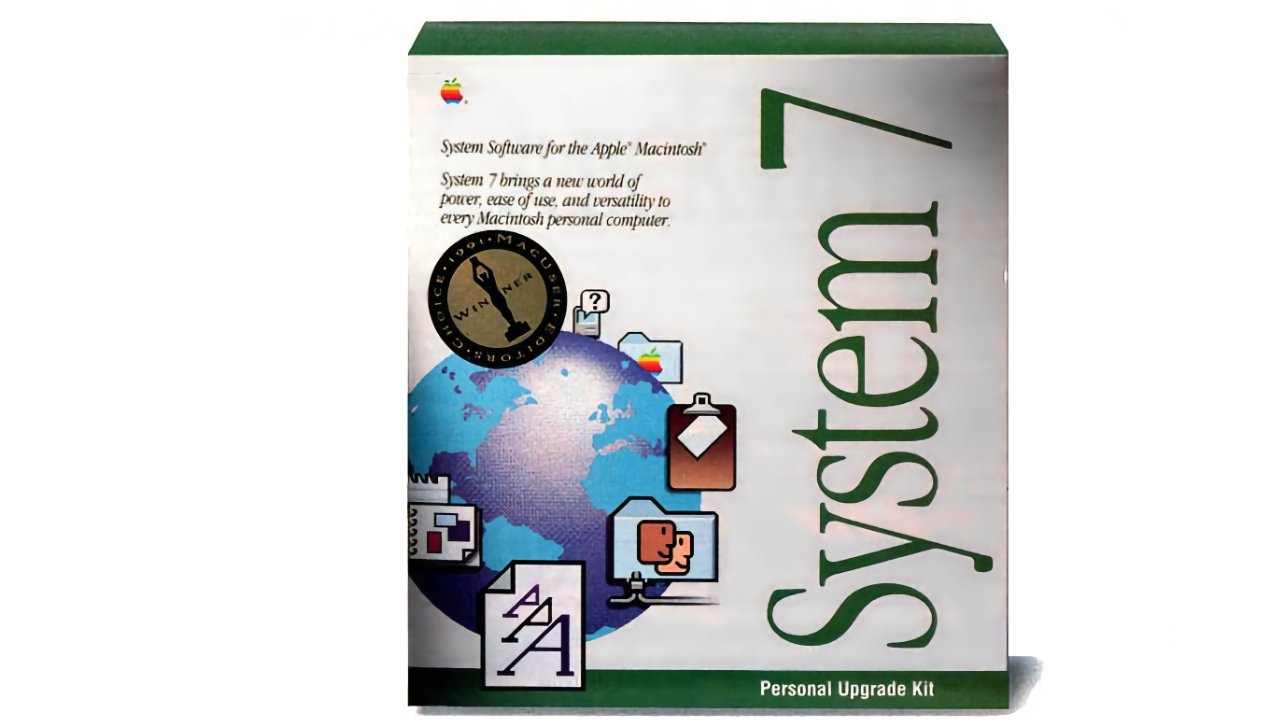
Before Mac OS 9 there was Mac OS 8, and before that, System 7 - the first color version of the Mac's original black and white Mac OS.
The version of the Mac OS before System 7 was simply called System 6. In fact, the original Macintosh OS didn't have an official name - having shipped on 3.5-inch floppy disks in sets included with each Mac:
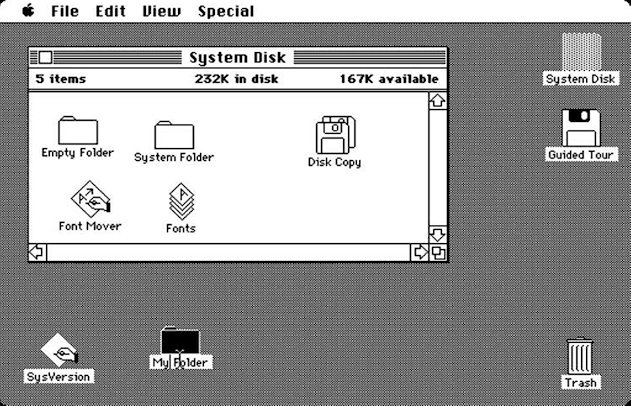
The original Mac OS wasn't a real operating system in today's terms, or as we might think of a UNIX or Linux-based OS. Instead it was a simple single user, non-multitasking OS which was simpler and more limited in what it could do
System 7 shipped on a multi-floppy disk set in which users had to insert several disks in order as the installer program prompted. Mac OS 8 and 9 were released on CD-ROM installer media.
Mac OS X's retail box usually included two DVD-ROM discs, and in early versions a single retail copy of Mac OS 9 on CD - since the early versions of Mac OS X also included a Mac OS 9 emulation compatibility layer called Classic.
Some late 1990's Macs such as the original iMac, eMac, iBook laptops, and desktop G3 and G4 models included Mac OS X plus a number of additional Apple apps as well as third-party DVDs.
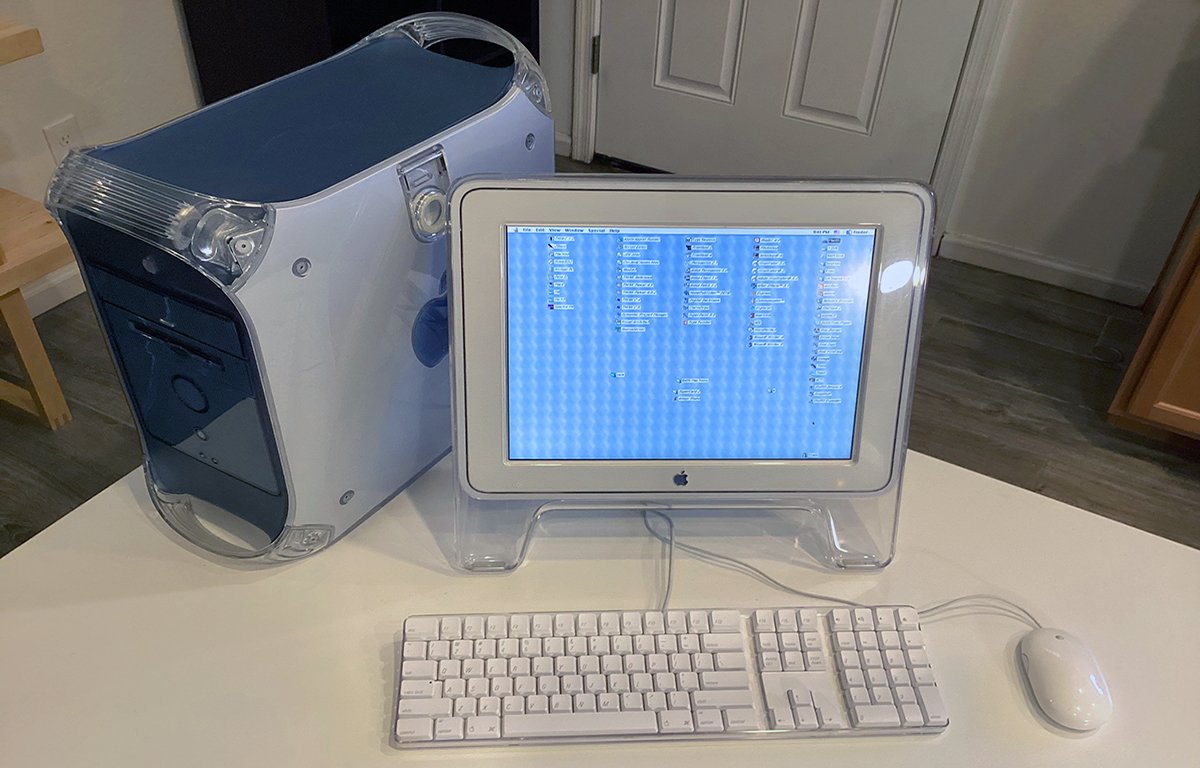
A fully restored PowerPC-based G4 Macintosh from 1999 today booted into Mac OS 9.2.2.
Most of these DVD or CD-ROM installer disks contained bootable versions of Mac OS. In order to boot from an external Mac OS installer disk, a few conditions must first be met.
Merely copying a Mac OS installer files to new blank media won't work in every case as a bootable installer.
Thirty years ago, software came in boxes
How to make boot media
You can still make Mac OS installer boot media on a CD, DVD, or on a USB thumb drive today if certain conditions are first met:
- Mac OS 9: Media must contain a System Folder and a "blessed" System file plus an installer
- Early Mac OS X: Media must contain the correct version of Mac OS X for the computer you want to install to
- Later Mac OS X: Media must contain a version of Mac OS X which matches the architecture of the machine, plus correct version
There are several tools you can use to make bootable media for Mac OS 9 and Mac OS X. You can use a third-party app such as Roxio's Toast ($69), or you can use a free tool such as Balena Etcher, if it supports the version of Mac OS you want to create.
There are numerous additional tools available for making bootable Mac OS X disks such as Install Disk Creator from MacDaddy, or if you are using macOS 10.10 Catalina, DiskMaker X Pro., which is donationware.
If you are using macOS El Capitan through Sonoma, you can also use a command-line tool found inside the macOS installer app called createinstallmedia.
To do so, you'll need to be booted into one of those versions of macOS, download the corresponding macOS installer from Apple, then run the following command in the macOS Terminal to create a bootable installer on another drive:sudo /Applications/Install\ macOS\ Catalina.app/Contents/Resources/createinstallmedia --volume /Volumes/Untitled
The above command assumes you have a macOS Extended (HFS+) volume mounted on your Desktop named "Untitled".createinstallmedia will copy over all the files need to boot the macOS installer from the volume you're copying to, as well as a recovery partition in case anything goes wrong.
Apple has a tech note (101578) on how to do this.
If you have Toast or one of the other popular third-partyMac DVD-ROM burning software packages, you can first make an .iso disk image of a physical Mac OS installer DVD or CD, save the file as a Toast file, then open the Toast file and burn it to a new blank DVD or CD using a DVD-ROM burner drive.
Toast has special options in its user interface which allow you to mark the burned disk as bootable.
Toast also has the advantage of going all the way back to Mac OS 8 - and version 5.x from the late 1990's runs on Mac OS 9. It's also widely compatible with most third-party external DVD burner drives out there.
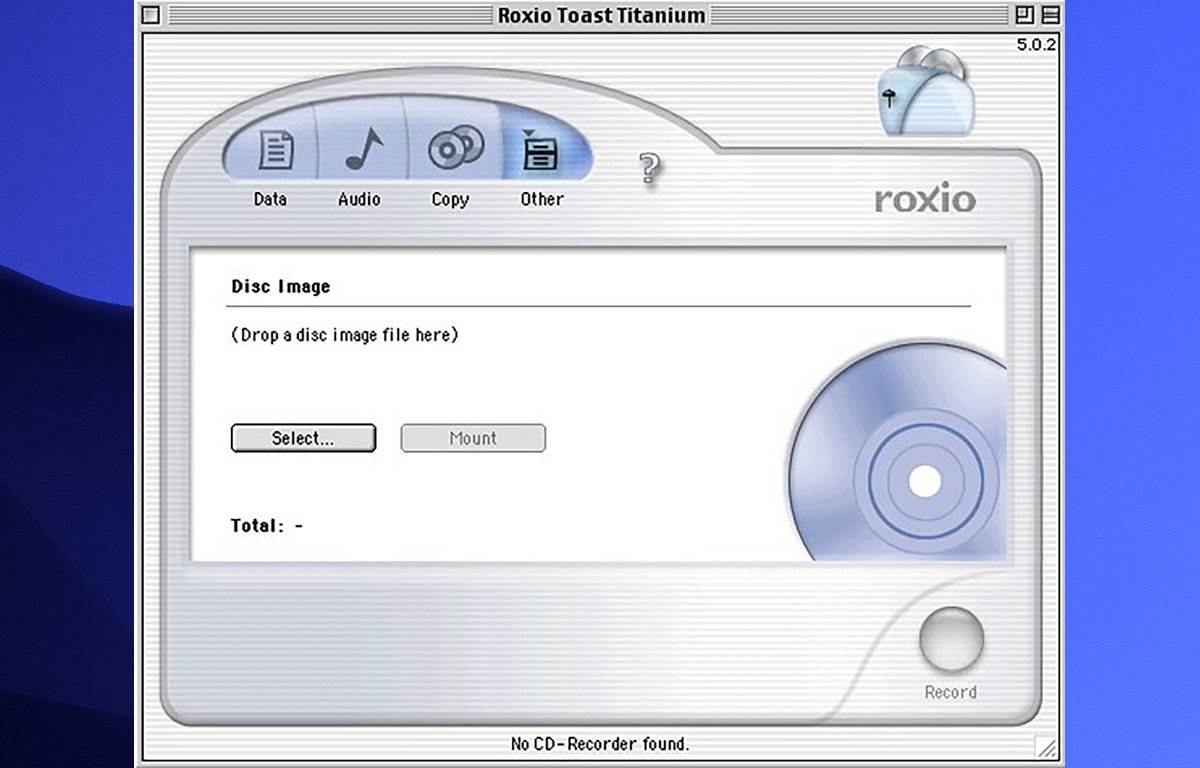
Toast Titanium 5 from Roxio.
You can also make .iso files from Mac OS DVD or CDs using macOS's Disk Utility, then import them into Toast and burn them. However, in some cases, not all the information required for booting from the burned disk will be preserved.
There are also a variety of installer builder scripts available online such as gibMacOS which allow you to build Internet Recovery USB installers.
If you want to burn a DVD or CD boot disk but your Mac doesn't have an internal DVD drive, there are many external USB DVD-R drives available on the market at reasonable prices. Apple still sells their own Apple USB SuperDrive ($79) online at the Apple Store.
How to make boot media using an older Mac
If you have an older Mac which runs the version of Mac OS X which you want to make a boot disk for, there is one easy way to make bootable media: create a new disk partition or .iso file, install the version of Mac OS X onto it you want, then copy that version's Mac OS X installer onto the new partition.
You can then make an .iso CD/DVD image from that volume using Disk Utility, then use Disk Utility to make a new bootable installer disk from the original installation.
This works for both USB thumb drives, and CD's/DVD's as Disk Utility's target disk when copying. If you're using a USB thumb drive as the copy target, the Mac you plan to install onto must be able to boot from USB.
When you boot from the newly copied Mac OS X volume, you can run the installer from there and target the volume you want for installation.
Note that in general Apple only supports older machines up to certain versions of Mac OS X or macOS. After the cutoff version of the OS, newer machines can't run older versions of macOS without use of special third-party tools, which modify macOS in memory at boot time.
Check to make sure that the Mac you are targeting for installation supports the version of macOS or Mac OS X you are creating the bootable installer disk for.
Mac OS 9's retail packaging.
A word about volume formats
Be aware that Apple still supports two disk formats for native macOS volumes: APFS, and macOS Extended (HFS+). For modern Macs, Apple dropped support for installing onto and booting from HFS+ volumes.
So if your Mac or version of macOS doesn't support HFS+ booting, you can't boot those machines using an HFS+ installer disk.
Before you make your installer media, verify that the Macs you want to target for installation support the format you're going to build the installer media disk onto.
Newer versions of macOS only allow bootable installation onto APFS volumes.
How to make boot media for Mac OS 9
If you want to make bootable media for Mac OS 9 you have several options:
- Burn a direct copy of the Mac OS 9 install CD using a utility such as Toast
- Image the Mac OS 9 install CD to a disk image file, then burn it to disk using a DVD-R burner drive
- Burn a copy of the Mac OS 9 install CD in the Finder from a disk image
- Image an existing Mac OS 9 installation including the installer files onto a USB thumb drive
- Boot an older Mac into a NetBoot server, run the OS 9 Installer in Classic, then install OS 9 onto an external partition
The fourth and fifth options are a bit trickier than the first three, but they will work if you employ a little voodoo.
How to burn a copy of the Mac OS 9 install CD to another CD
Using this method, you'll first obtain a copy of the original Mac OS 9 retail CD, or one of the bundled Mac OS 9 installer disks that came with a Mac which could boot OS 9.
The final version of Mac OS 9 Apple shipped was 9.2.2, although 9.0.x or 9.1 may work depending on your hardware since updaters are still available. Older machines like the eMac and the last of the native OS9 G4 towers required 9.2.2.
So, do your homework before you start blowing through disks.
Once you have the installer CD and a DVD-R drive, insert the installer CD and run the app you will use to make a CD copy.
In most CD/DVD duplication software you can select the original CD as the source, and a second drive which will contain a blank CD-R or DVD-R disk as the destination. In this case you'll need two drives - one for each physical disk.
There are several reasons you may not want to use this method -- namely direct optical disk-to-disk copies are slow and unreliable. Most CD-R/DVD-R burners rely on a constant stream of data from the source to burn the destination disk.
If your source drive can't keep up or is slower than the required transfer rate for the destination burner, the copy will likely fail and you'll have an unreadable destination disk.
In general CD-R/DVD-R disk burning is slow and prone to errors, so you don't want to attempt anything which might make it more difficult.
A much better way is to image the source disk first to a disk file (.iso, .toast, etc), save that file on a fast solid state or RAID drive, then burn the image from there to the destination disk.
This makes data throughput much faster and reliable and takes most of the chance for errors on the read side out of the equation.
Burn a copy of the Mac OS 9 install CD in the Finder from a disk image
You can also burn a copy of a Mac OS 9 installer CD from an image file in the macOS Finder. To do so, copy an image file of the Mac OS 9 installer CD to your Desktop on your Mac.
Next, Control-click on the image file and select Burn to Disc from the popup menu. This will bring up Finder's disc burning window.
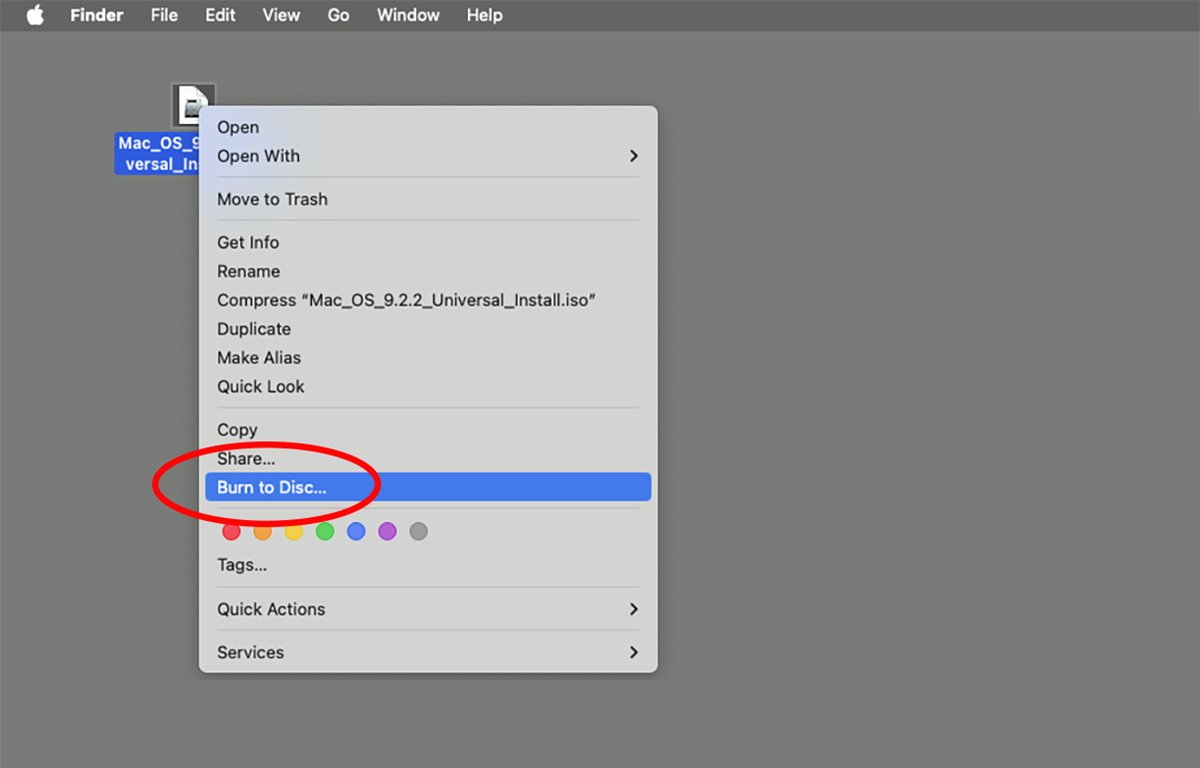
Select "Burn to Disc..." in the Finder.
Insert a blank CD-R disk into your DVD-R drive, select the burn settings, then click the Burn button.
Recording will start, as the Finder copies the contents of the Mac OS 9 image file onto the CD-R disk.
Verification will commence after burning completed, at which point Finder will eject the disk (unless an error happened). You can also turn off verification in the settings window before burning if you like.
Some users have reported booting problems using the Finder to burn bootable OS 9 disks, but in most cases it should work.
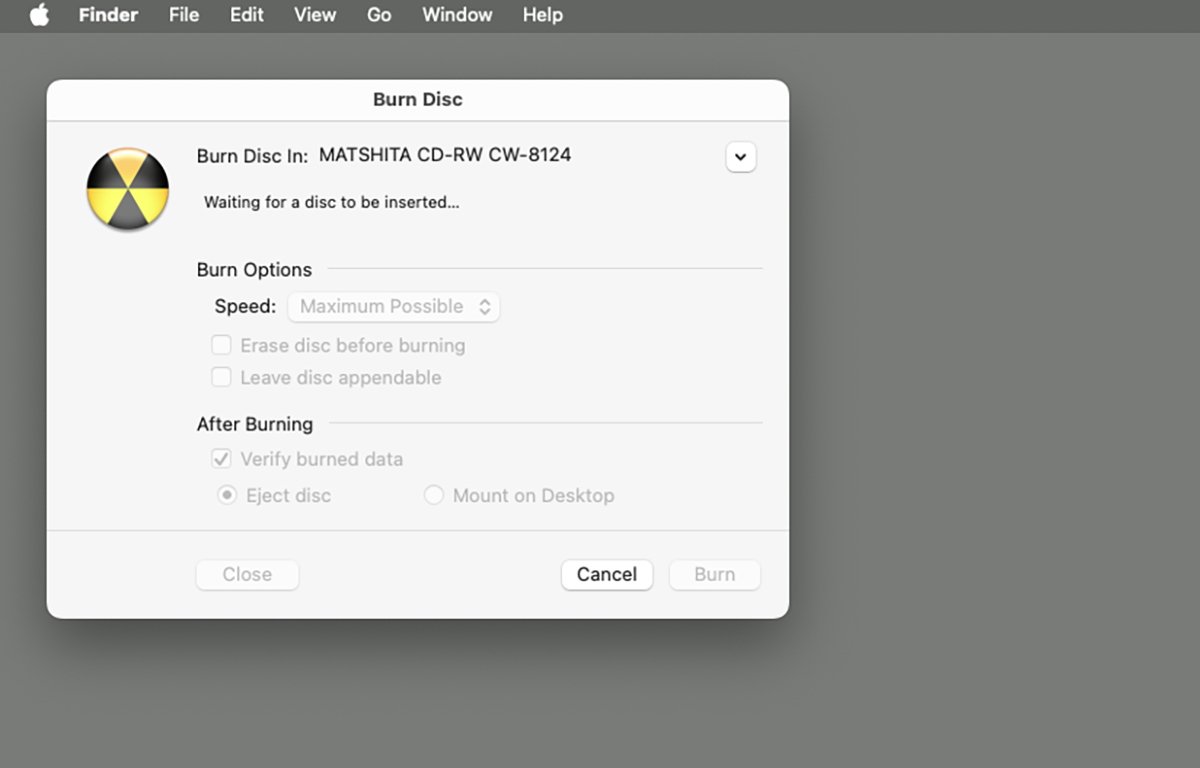
The Finder's burn options window.
Resource forks and booting from a USB installer
Note that in Mac OS 9 and earlier many files used special forks called resource forks. The burning/copying software you use must either be able to make copies at the bit-level, or else be aware of how to read and write resource forks to and from disk volumes.
Resource (.rsrc) files are used as input files when building classic Mac OS software. These files get copied at build time along with compiled code and data into a single app file containing two forks - a resource fork and a data fork.
Resources have both a type and a numerical ID so they can be located and run by the app at runtime.
All entirely lowercase resource types are reserved for Apple's use.
Compiled is usually stored in a resource fork as a resource of type 'CODE' (all resources in Mac OS 9 and earlier have a four-character code to denote their type).
If, during copy some of the Mac OS 9 files have their resource forks removed or damaged, the OS won't boot. The installer files can also become damaged.
Resource fork damage or removal can occur during file copy if the software doing the copy doesn't know about resource forks.
In theory, once you have a correct disk image file of a bootable Mac OS 9 disk or installer disk, you can then image that volume to a USB thumb drive if certain conditions are met (see below).
This makes an exact copy of the original disk onto the thumb drive, where all its contents are preserved intact.
In this scenario, the target Mac must be able to boot from USB for the USB thumb drive to work.

Apple's original resource fork editor - ResEdit.
Using the bless command
Going all the way back to early versions of Mac OS, Apple included certain special settings on the System Folder and System file in the System Folder which marked a System Folder as bootable.
This was added because in some cases users would copy System Folders, or System files, mixing and matching files, and the Finder or System wouldn't recognize the System file as a bootable file.
When this happened it would render any built installer disk un-bootable.
To solve this problem, Apple added the concept of a blessed System Folder and System file. In order for any given System Folder and System file to be used for booting, it has to be marked as blessed or else the system won't boot.
For example, in some cases in Mac OS 8 or Mac OS 9, if you drag the System file out of the System Folder, then back in, or into another System Folder, it won't be marked as blessed and the system won't boot.
To remedy this problem, you can use the bless command to reset the blessed state of a System Folder or file.
The Bless command is also used by the Startup Disk pane of macOS's System Settings app to change the Startup Disk. Bless can only be run as the root user.
Bless can also tell the Mac's firmware to look for a NetBoot remote server to boot from on power-on. You can use the Info Mode of Bless to print the currently blessed System Folder or device to boot from.
To read more about the bless command and how to use it, in macOS's Terminal type:man bless
And press Return.
In Mac OS 9 and earlier, one of the most common reasons that a newly built Mac OS 9 installer disk won't boot is because the System file or folder doesn't have the correct Bless settings.
Some CD/DVD burning software such as Toast will make sure the correct Bless settings are made before burning the destination volume.
Once you have your newly built Mac OS 9 install disk, attach or insert it into your classic Mac, reboot, and hold down the Option key on the keyboard. This will display a volume selection menu from which you can select your newly built installer disk.
If your installer disk doesn't appear in the boot selection screen, it most likely means the System Folder didn't get blessed properly, or that one or more files in the System Folder are damaged.
Once you boot into your Mac OS 9 installer disk, you can run the Mac OS 9 installer from there.
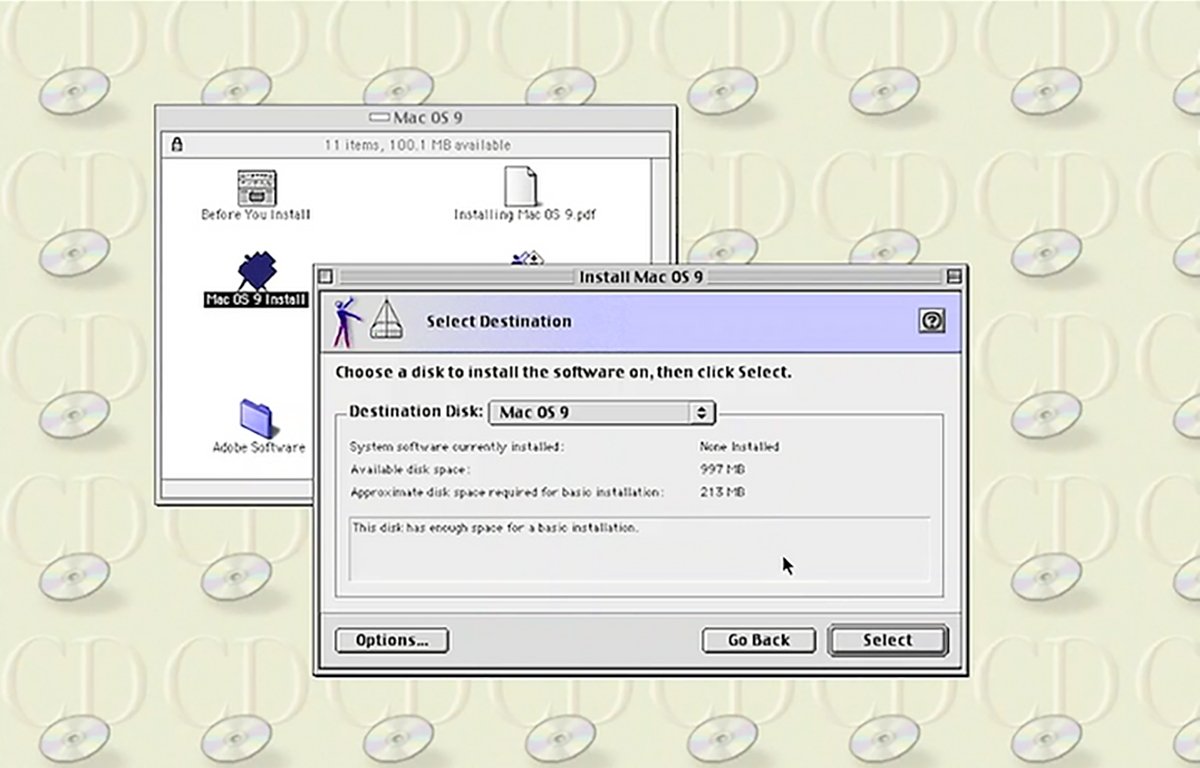
The Mac OS 9 installer runing from a Mac OS 9 boot CD.
If you have the Mac OS 9 emulator SheepShaver installed, you can test your new Mac OS 9 installer disk by using it as a Startup Disk in SheepShaver.
SheepShaver was updated in January 2024 to work with macOS Sonoma. There's also a version of SheepShaver for Windows.
See our previous article on classic Mac emulators for modern Macs.
You can also run every version of the classic Mac OS in your browser. We've talked about that before.
The original Mac OS 9 retail CD is fairly simple. It contains a blessed System folder, an installer folder, a few Read Me's, and few additional installer tome files.
By imaging and copying the original CD, you are making sure you have all the original files needed to both boot into OS 9, and run its installer from there.
NetBoot and the soul of a new (World ROM) machine
If you have an older Mac which runs both Mac OS X, includes the Classic Mac OS 9 emulator, and can remote boot into a NetBoot server, you can use Classic to build a Mac OS 9 installer disk. This approach is not for the faint of heart and it isn't performant. But it works.
To use NetBoot your Mac must have a New World ROM in it. NetBoot isn't supported on any Mac which contains a T2 security chip, or an Apple Silicon CPU.
To use this method, first you'll need to boot into an available NetBoot server over a network.
NetBoot works by serving a standardized disk image version of Mac OS from a server over a network to a local Mac capable of booting the same version of the OS.
To boot into a NetBoot server, Restart your Mac and hold down the Option key on the keyboard. When the boot selection menu appears, wait a few seconds for the computer to scan for NetBoot servers.
If any appear, click the one you want, then click the right arrow to boot into that server.
Booting may take a while as the OS is transferred over the network. In general any Mac booted from NetBoot will be slower than a local boot. So be patient.
Also note that the Classic environment must already be preinstalled onto the version of Mac OS you're booting into over the network.
And if performance wasn't already a problem it might be now because you're now also going to run the Classic environment from the System Preferences pane in the remote-booted copy of Mac OS you booted into!
This might turn out to be incredibly slow, unless you have an extremely fast network (faster than most residential fiber connections these days).
Using Classic from a NetBoot server means you're booting the OS over the network, then running a Mac OS 9 emulator on top of it.
Assuming you have the time to spare, however, once you have Mac OS 9 running in the Classic environment, you can build a Mac OS 9 installer disk just as if Mac OS 9 was running on the local machine.
NetBoot also supports Mac OS 9 directly so if your old Mac can boot Mac OS 9 locally, it can also NetBoot directly into Mac OS 9 from a NetBoot server. Doing this would speed things up a bit versus running Classic in Mac OS X from a NetBoot server.
If you have an older version of Mac OS X Server (which is now discontinued), you can use Server's System Image Utility to make NetBoot images.
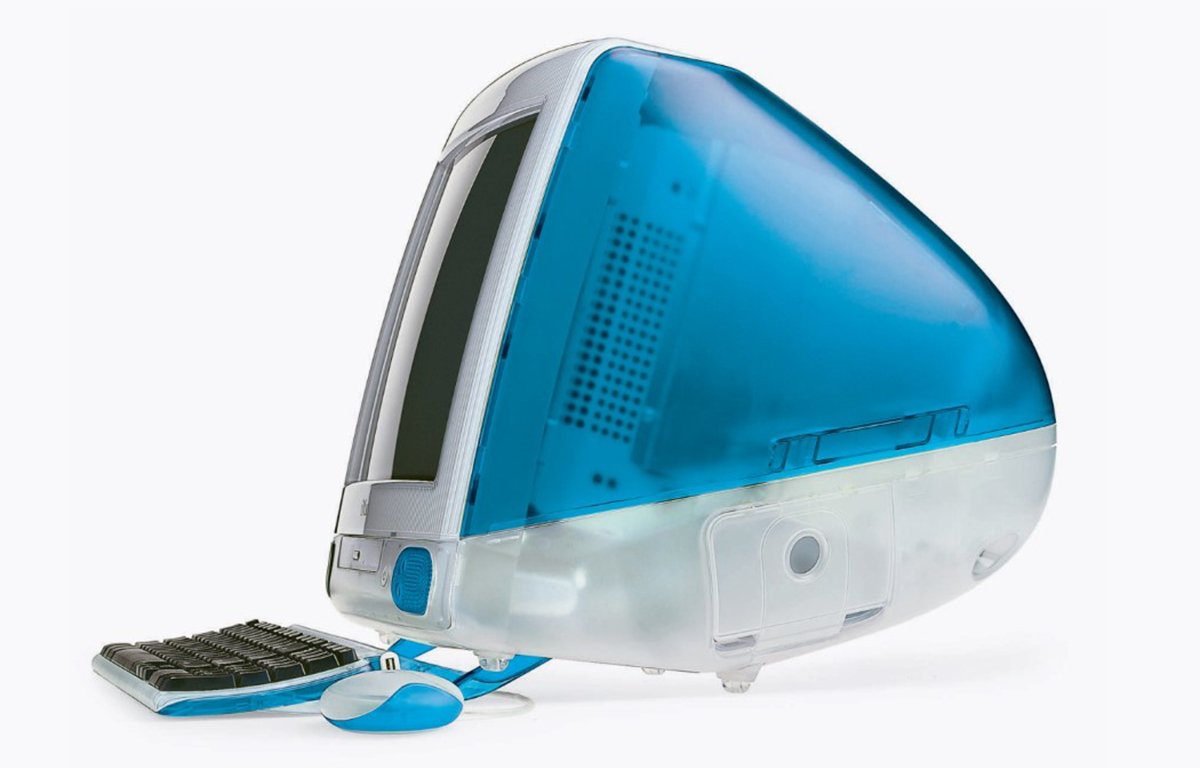
Apple's original iMac released in 1998. The second of the New World ROM machines.
What if my new Mac OS 9 installer disk won't boot?
If you find your newly created Mac OS 9 installer disk won't boot there are a few easy ways you can still run the Mac OS 9 installer. First, and most obviously, you can boot your Mac OS 9 machine directly into the Mac OS 9 retail CD from its CD/DVD drive.
Once booted into the CD drive, you can copy the installer parts of the CD to an external USB thumb drive formatted as HFS+.
While this USB drive won't be bootable it will allow you to run the Mac OS 9 installer from any Mac OS 9 machine simply by inserting it into a USB port.
There's nothing that says the Mac OS 9 installer has to be run from the boot drive. This scenario is useful for cases where you already have a working Mac OS 9 machine and only need the installer to install onto a third disk.
In fact, assuming all the installer files are present and in their correct locations, the Mac OS 9 installer will run quite well from a non-boot drive.
Another way to run the Mac OS 9 installer is to create two new HFS+ partitions on a USB external drive, install a clean copy of Mac OS 9 onto one volume from the OS 9 install CD, then run a disk copy program to image the OS 9 CD onto the second volume.
By doing this you end up with a pristine new copy of OS 9 you can boot into, but you can still run the installer from the second partition to install onto another disk.
It's highly unlikely the newly installed external copy of OS 9 won't boot unless the target machine doesn't support that version of Mac OS 9. This is because during installation the Mac OS 9 installer knows how to bless the newly installed System Folder so it will boot.
You can then transfer this external USB drive to another Mac capable of booting OS 9 and boot into it. Once booted, you can run the installer from the second external partition, erase the target Mac's internal drive and install onto it.
There are many ways to build a modern installer disk for older Macs, and we've only touched on a few of the most straightforward ways here.
In a future article we'll also explore more advanced ways to build older installer disks on modern Macs including the use of the Terminal commands dd and ditto.
Read on AppleInsider
Comments
I miss the days when I could simply select the StartUp Drive from system preferences. I'm sure IT departments are pleased that it isn't so easy anymore. But that was always the philosophical conundrum. In its early days, it unshackled the user from the IT department. Perhaps that's one reason, besides cost, companies opted Intel/Windows computers. The Mac gave users too much freedom.
It can be difficult installing an earlier version of OS X on a vintage Mac because you have to backdate the Mac using the Terminal in order for the OS X installer to run.