Video: How to password protect your data using disk images in macOS

Practically everyone has files or a folder that they keep on their Mac that they don't want anyone else to access. Today, AppleInsider walks you through the steps to keep your files secure by turning a folder into an encrypted, password-protected disk image.
People are generally OK with the idea of having various important documents stored on their Mac, and are quite happy with existing protection built into macOS, including using FileVault to encrypt drives and even just having a password to access the user account in the first place.
However, some users may feel some items are too important or private to not apply some extra level of security. This can range from needing to secure work-related folders that need to be sent to another user, to adding extra protection to birth certificate and passport scans, to keeping embarrassing childhood photos out of view from other members of the family who may sometimes borrow the same user account.
A solution to this is to use Disk Utility to create a disk image, that is encrypted and password protected.

In the Disk Utility menu, select File, New Image, then Image from Folder..., or use the keyboard shortcut Shift-Command-N. In the dialog box, select the folder you wish to protect, and click Open.
A new dialog box will appear with a number of options available for creating the disk image. At the top, you can change the name of the disk image to something more appropriate to its contents instead of using the folder name by default, and where you want it to be initially saved.
Under Encryption, select either 128-bit or 256-bit AES encryption. As indicated in the dropdown box, selecting 256-bit is more secure but will be slower to access than 128-bit.
Under the Image Format dropdown box, select Read/Write to be able to change files held within the image once it is created. If you don't want any changes made to the files in the folder at all, or new files to be added, select Read-Only.
Now, enter your desired password twice. Once the settings are entered, click Save, then Done.
At the location defined in the settings, you will find a new DMG file with the name entered during the process.
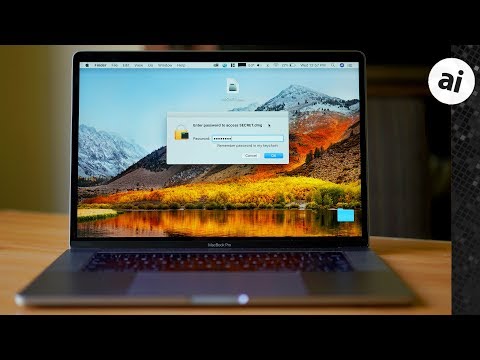
Double click the image to mount it. A dialog box will appear asking for the password, which needs to be filled out followed by clicking OK.
A tickbox below the password entry textbox offers to save the password to the Keychain. If anyone else has access to the same Keychain it is probably not a good idea to tick this box.
Once the right password is entered, the image will mount, and the files will be accessible. The folder will not need the password again while the image is mounted, but will require it when the image is unmounted.
To unmount, right-click the mounted image and select Eject.
After creating the image, it is tempting to delete the source folder and its contents. Before doing so, it is suggested to make sure the image functions as planned, and if necessary, checking there is a securely-held backup of the files.

People are generally OK with the idea of having various important documents stored on their Mac, and are quite happy with existing protection built into macOS, including using FileVault to encrypt drives and even just having a password to access the user account in the first place.
However, some users may feel some items are too important or private to not apply some extra level of security. This can range from needing to secure work-related folders that need to be sent to another user, to adding extra protection to birth certificate and passport scans, to keeping embarrassing childhood photos out of view from other members of the family who may sometimes borrow the same user account.
A solution to this is to use Disk Utility to create a disk image, that is encrypted and password protected.
Creating the Image
Open up Disk Utility, which can be found in the Applications folder, under Utilities. Alternately, use Spotlight to search for Disk Utility.In the Disk Utility menu, select File, New Image, then Image from Folder..., or use the keyboard shortcut Shift-Command-N. In the dialog box, select the folder you wish to protect, and click Open.
A new dialog box will appear with a number of options available for creating the disk image. At the top, you can change the name of the disk image to something more appropriate to its contents instead of using the folder name by default, and where you want it to be initially saved.
Under Encryption, select either 128-bit or 256-bit AES encryption. As indicated in the dropdown box, selecting 256-bit is more secure but will be slower to access than 128-bit.
Under the Image Format dropdown box, select Read/Write to be able to change files held within the image once it is created. If you don't want any changes made to the files in the folder at all, or new files to be added, select Read-Only.
Now, enter your desired password twice. Once the settings are entered, click Save, then Done.
At the location defined in the settings, you will find a new DMG file with the name entered during the process.
Accessing the Image
Your new secure image is used in a similar way to other images. To access the files within, the image needs to be mounted.Double click the image to mount it. A dialog box will appear asking for the password, which needs to be filled out followed by clicking OK.
A tickbox below the password entry textbox offers to save the password to the Keychain. If anyone else has access to the same Keychain it is probably not a good idea to tick this box.
Once the right password is entered, the image will mount, and the files will be accessible. The folder will not need the password again while the image is mounted, but will require it when the image is unmounted.
To unmount, right-click the mounted image and select Eject.
After creating the image, it is tempting to delete the source folder and its contents. Before doing so, it is suggested to make sure the image functions as planned, and if necessary, checking there is a securely-held backup of the files.
Comments
hdiutil chpass drag_disk_image_in
It will ask for the old and new passwords. It's also easy to make new images and copy the contents of old ones over and delete the old one. One thing to be aware of with the newer systems is they've switched to the APFS filesystem format without mentioning it and don't provide an option to use HFS so dmgs created in Disk Utility in High Sierra or newer don't mount on older systems.
Am I correct in assuming that dragging the old DMG to the trash can and then emptying the trash will get rid of that DMG? And not knowing exactly how a DMG works (thus again emphasizing "dumb" in "dumb user"), am I correct in assuming that deleting the old DMG won't leave a portion of the hard drive partitioned and unusable?
FYI, I'm running macOS High Sierra (version 10.13.6).
Because you can't see the password you are typing, doing it by making a new disk image is a bit safer as you can verify the new one mounts ok before you delete the old one. Plus you can resize it if you need more space.
Deleting it will free it up and password protected images remain protected when deleted. A DMG is just a file like any other file, it's just been made to behave like a filesystem. It's essentially a whole bunch of files joined together into one with a portion of it that's a map that tells the system where the individual files start and end. It's much like if you opened a bunch of photos in Photoshop and positioned them side by side and saved them in a single image. When you open it, you can see all the individual photos but on disk it's a single file and deleting it takes the contents with it.