How to edit, publish, and submit a podcast to iTunes on your Mac
You've got the hardware to record your new podcast but now you need software to do the actual recording and then especially to do the editing. AppleInsider details what you need.
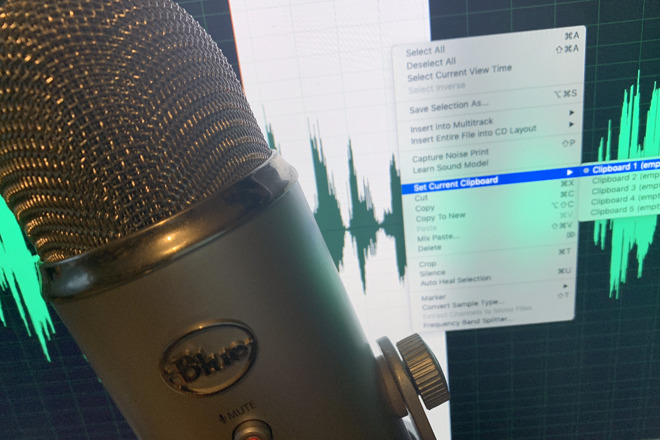
Blue Yeti microphone in front of Adobe Audition during an editing session
We covered this in part one -- you've got the microphone, headphones, a Mac and most of all you've got a clue what you're going to talk about. You've got yourself the makings of a podcast, now you simply need to record and edit it.
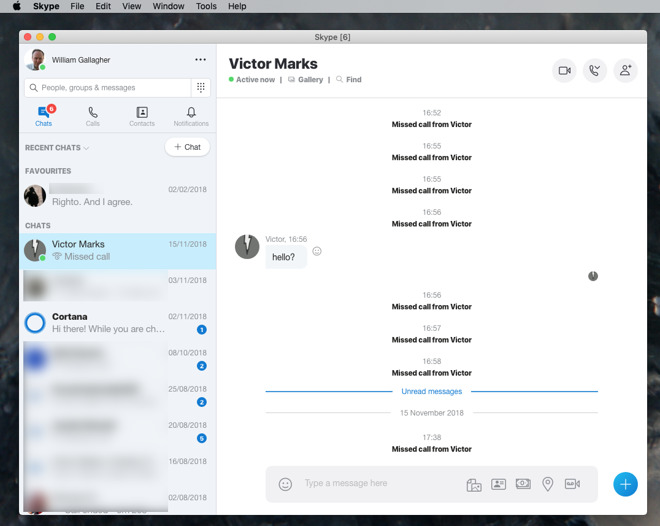
Skype. We didn't fake this. What can you do?
So as well as recording the Skype audio, you should separately record yourself and your colleague does the same from their side. You record yourselves at your Macs and then later take these two tracks, known as clean recordings, and combine them into one show.
Skype has enabled this type of podcast yet it's not really a friend -- the fact that you can make these calls is brilliant but the audio quality of them is not. Plus you both have different mics set up in different ways and invariably one of you will sound louder than the other. That's still the case with the clean recordings but when they're two separate ones, you can adjust the levels of both until they sound right.
To record that Skype audio or any other type of call, we recommend the Audio Hijack software by Rogue Amoeba. We recommend it for all audio work and may not shut up about it until you've bought a copy. It is that good and that useful for that many things.
However, even while it's recording our Skype calls for us, we tend to fall back on QuickTime Player for our clean tracks. This is software that comes with your Mac and so long as you check one setting, it is perfect for podcast recording.
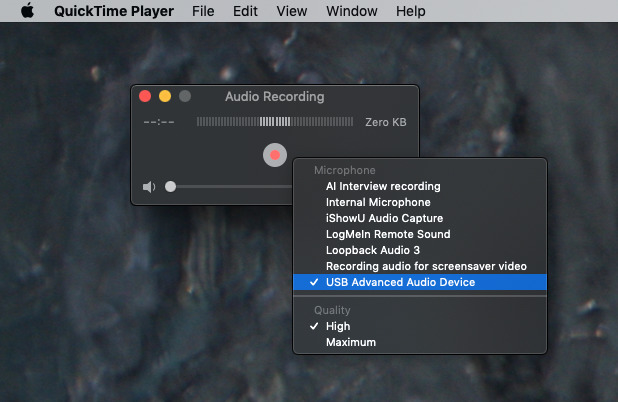
Setting up QuickTime Player to record audio from our best microphone
That one setting is where you specify which microphone QuickTime Player records. For even if you do have a Blue Yeti mic plugged in, QuickTime Player needs to be told to use it. Otherwise it records only the audio from your Mac's built-in microphone.
Regardless of the topic or how you want to make your podcast, you need to make the audio interesting. And the best, fastest way to do that is to include other audio elements such as clips or interviews.
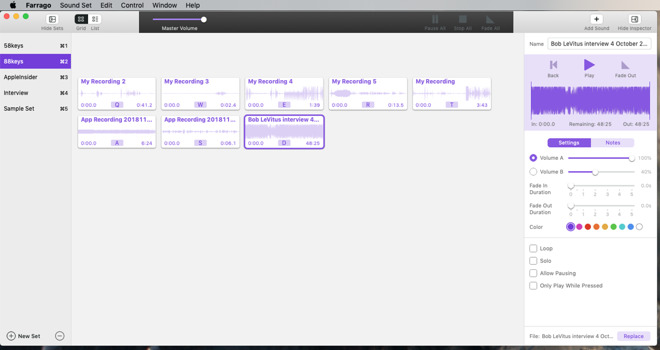
Rogue Amoeba's Farrago
You've heard radio shows where the main presenter introduces something that then sounds like a four-minute documentary. It has its own reporter, he or she is talking to many people and often on location, often with relevant music or other sounds too.
This is called a package and it will take you longer to make then the rest of the show. It's worth it if you can do it well and you have the time, but there are faster ways to vary the audio on a podcast.
Whether you make packages, buy music tracks or record adverts, you can then play them into your podcast recording via Rogue Amoeba's Farrago. It's a soundboard app and AppleInsider staff with radio or theater backgrounds rushed to use Farrago when it came out early this year.
That article was written back in February and we have launched Loopback exactly once since then -- but since configuration, it has been working for us every day and on every podcast recording.
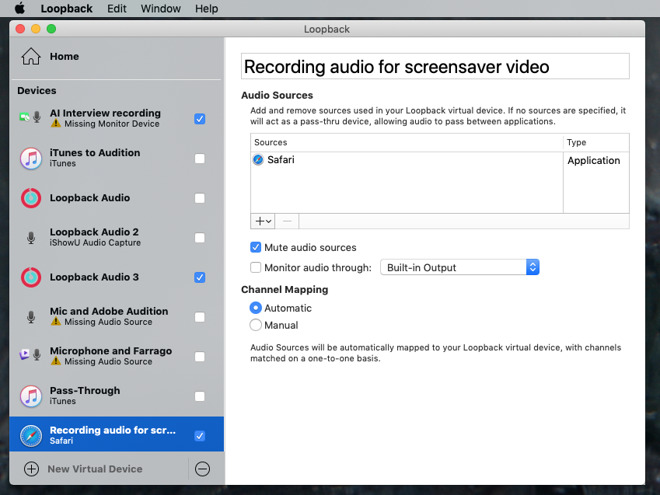
And Rogue Amoeba's Loopback
Loopback takes audio from anywhere on your Mac or an instrument plugged into it, and routes that to anywhere else you want. So if we're recording a Skype call with a co-host and we want to include a clip from an interview, we can play it so that both hosts hear it.
Skype only allows you one microphone and has no options to pass any other audio through it at the same time. So Loopback creates one audio source which is a combination of your microphone and, say, Adobe Audition. Then it routes that through Skype so that Microsoft's product is still only getting one audio source.
More likely, though, is that the recording will not be good enough to broadcast. What would be good enough is your local recording of your voice and your co-host's local recording of his or hers.
One of you is going to be lumbered with editing. Get both audio recordings together and in theory you just drag them both into an editor and you're done.
In practice, you will undoubtedly need to make edits. Maybe one of you left the recording running after the show and the audio track includes them complaining about something. You need to cut that out.
Similarly, you can have false starts or mistakes and you probably have to fix some sound problem on either or both tracks. Take them into an editor, line up the two so that they're in sync.
You'll hear gaps that seem oddly long or you'll have one person apparently speaking over the other. Neither is acceptable and you need to fix them. You can do that by slowly going through the entire audio and cutting out moments or pasting in silences to keep everything nudged into sync.
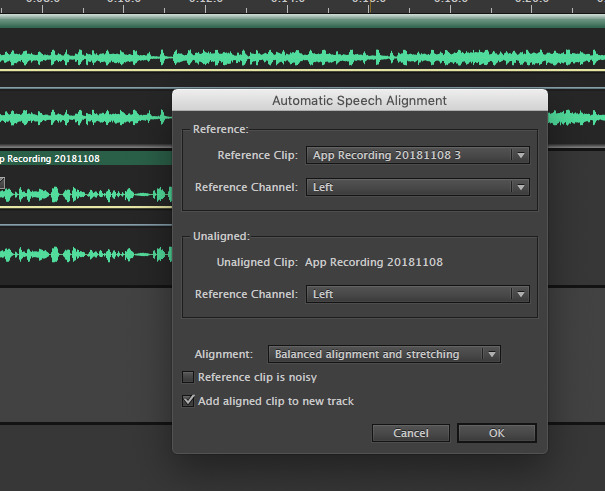
Automatic Speech Alignment feature in Adobe Audition
That's obviously excruciatingly time consuming but your audio editor may be able to help considerably. Adobe Audition, for instance, has an Automatic Speech Alignment feature in its Clip menu. When your two tracks are aligned, then you can listen out for whether they're the same volume and adjust the levels to match. Next you can apply noise reduction or other filters. What you use depends both on what you need and what your audio editor can do.
Audio firm iZotope, for instance, sells a series of filters starting with Nectar Elements which is currently $30. It includes a Vocal Assistant feature which applies filters to make your voice stand out.
If you're not recording in an ideal place, though, look for what's called a high-pass filter. This will keep your voice clear while reducing the amount of hum and hiss from your location.
Nothing beats being in a great studio space but filters and software help.
If you don't know Logic and have yet to do any audio editing at all, though, take a look first at Audacity. Where Logic Pro X costs $200 and Adobe Audition is a subscription starting at $20.99 per month, Audacity is free.
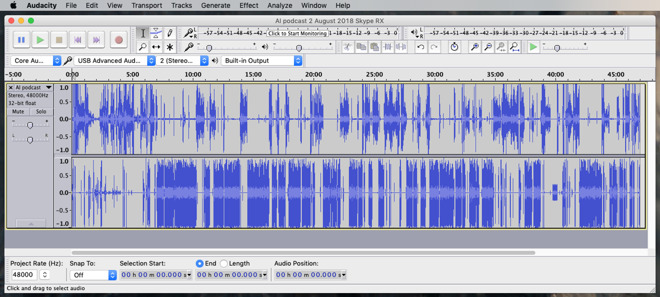
Audacity
We have absolutely no problem at all with paying for apps and most especially not when they're software that will be essential to our work. So we don't recommend Audacity because it's free. Instead, we recommend it because for what you need as a podcaster, it's excellent.
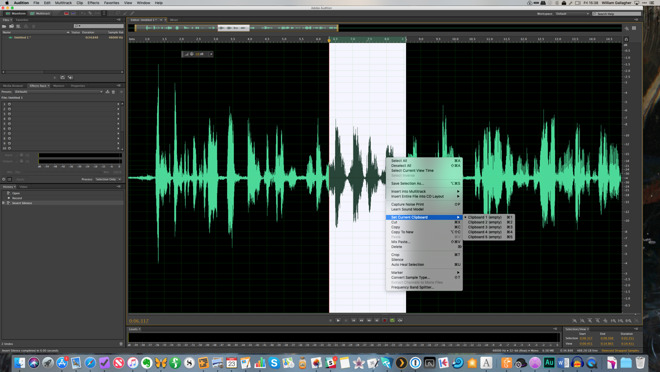
All of these apps let you cut out sections of audio, move them around, replace them and so on. It might take you a time to learn how to do it, but you will be able to edit out individual syllables from a voice recording. Although if you ever find yourself doing that kind of surgery on a track, just re-record it.
So, your audio file has to physically go somewhere such as on your website. It's not always practical to have them hosted on your website's storage space, though, as you're likely to have a limitation on how much you can store there and how much data can be served from your site to your audience. Podcasts are going to hit both those limitations quickly.
So instead you can use a hosting service such as SoundCloud or many others. These are still going to have some limitations when you use their free versions but the paid tiers are still better than paying your own website host.
SoundCloud, for instance, has a Basic account which is free and lets you have up to three hours of audio material. Once it's there, you get an RSS feed address for it and you can submit that to other services such as iTunes. To get as many hours of podcast as you need, use SoundCloud Pro Unlimited instead. That costs $16 per month or $144 per year.
There are other dedicated podcast host companies such as Podiant, which currently costs $12.99 per month, or blubrry which is a similar $12 per month.
Whichever you use, you get space to save your podcast audio and also an RSS address. Take that address to Apple's iTunes and the firm's http://podcastsconnect.apple.com. With iTunes and alternatives such as Stitcher or TuneIn you give them that URL address and they list your podcast in their directory.
In every podcasting hosting service, there are similar avenues to point services beyond iTunes like Spotify and Google Podcasts at your RSS feed, but we leave those as an exercise for the reader.
Podcasts grow slowly and they need a lot of promotion. However, the best promotion in the world will only get you attention for a while. You need to have created a podcast worth listening to if you're to stand out.

Blue Yeti microphone in front of Adobe Audition during an editing session
We covered this in part one -- you've got the microphone, headphones, a Mac and most of all you've got a clue what you're going to talk about. You've got yourself the makings of a podcast, now you simply need to record and edit it.
Recording
What routinely happens is that you and a friend or colleague sit at your Macs wherever you are and you speak over Skype. Or FaceTime or Slack. Whichever it is, you have your conversation and you need to record it. Whichever you've used, there will be something wrong with the recording of the call.
Skype. We didn't fake this. What can you do?
So as well as recording the Skype audio, you should separately record yourself and your colleague does the same from their side. You record yourselves at your Macs and then later take these two tracks, known as clean recordings, and combine them into one show.
Skype has enabled this type of podcast yet it's not really a friend -- the fact that you can make these calls is brilliant but the audio quality of them is not. Plus you both have different mics set up in different ways and invariably one of you will sound louder than the other. That's still the case with the clean recordings but when they're two separate ones, you can adjust the levels of both until they sound right.
To record that Skype audio or any other type of call, we recommend the Audio Hijack software by Rogue Amoeba. We recommend it for all audio work and may not shut up about it until you've bought a copy. It is that good and that useful for that many things.
However, even while it's recording our Skype calls for us, we tend to fall back on QuickTime Player for our clean tracks. This is software that comes with your Mac and so long as you check one setting, it is perfect for podcast recording.

Setting up QuickTime Player to record audio from our best microphone
That one setting is where you specify which microphone QuickTime Player records. For even if you do have a Blue Yeti mic plugged in, QuickTime Player needs to be told to use it. Otherwise it records only the audio from your Mac's built-in microphone.
Speaking of Rogue Amoeba
You would hope that podcasts which consist of two presenters do so because the pair have different opinions and experience on a shared topic. It may just be, though, that neither of them is good enough to carry a show by themselves.Regardless of the topic or how you want to make your podcast, you need to make the audio interesting. And the best, fastest way to do that is to include other audio elements such as clips or interviews.

Rogue Amoeba's Farrago
You've heard radio shows where the main presenter introduces something that then sounds like a four-minute documentary. It has its own reporter, he or she is talking to many people and often on location, often with relevant music or other sounds too.
This is called a package and it will take you longer to make then the rest of the show. It's worth it if you can do it well and you have the time, but there are faster ways to vary the audio on a podcast.
Whether you make packages, buy music tracks or record adverts, you can then play them into your podcast recording via Rogue Amoeba's Farrago. It's a soundboard app and AppleInsider staff with radio or theater backgrounds rushed to use Farrago when it came out early this year.
Enough about Rogue Amoeba
After many years of all kinds of audio work, we're at the stage where we will just buy anything that Rogue Amoeba brings out. One that we bought and only afterwards asked why is Loopback. And it turned out that there is a big reason why you should buy it.That article was written back in February and we have launched Loopback exactly once since then -- but since configuration, it has been working for us every day and on every podcast recording.

And Rogue Amoeba's Loopback
Loopback takes audio from anywhere on your Mac or an instrument plugged into it, and routes that to anywhere else you want. So if we're recording a Skype call with a co-host and we want to include a clip from an interview, we can play it so that both hosts hear it.
Skype only allows you one microphone and has no options to pass any other audio through it at the same time. So Loopback creates one audio source which is a combination of your microphone and, say, Adobe Audition. Then it routes that through Skype so that Microsoft's product is still only getting one audio source.
Editing
If your Skype call is good then this could even mean that your job is done. You've got both people, hopefully without too much of a difference in the volume of their voices, and you've also inserted clips with Loopback and Farrago.More likely, though, is that the recording will not be good enough to broadcast. What would be good enough is your local recording of your voice and your co-host's local recording of his or hers.
One of you is going to be lumbered with editing. Get both audio recordings together and in theory you just drag them both into an editor and you're done.
In practice, you will undoubtedly need to make edits. Maybe one of you left the recording running after the show and the audio track includes them complaining about something. You need to cut that out.
Similarly, you can have false starts or mistakes and you probably have to fix some sound problem on either or both tracks. Take them into an editor, line up the two so that they're in sync.
Syncing feeling
Don't assume that the audio will stay in sync, however. For an assortment of technological reasons, two parallel digital recordings can slowly go out of sync in what's called drifting. You may not notice it at first but after some time, the two audio tracks can be very clearly out of step with each other.You'll hear gaps that seem oddly long or you'll have one person apparently speaking over the other. Neither is acceptable and you need to fix them. You can do that by slowly going through the entire audio and cutting out moments or pasting in silences to keep everything nudged into sync.

Automatic Speech Alignment feature in Adobe Audition
That's obviously excruciatingly time consuming but your audio editor may be able to help considerably. Adobe Audition, for instance, has an Automatic Speech Alignment feature in its Clip menu. When your two tracks are aligned, then you can listen out for whether they're the same volume and adjust the levels to match. Next you can apply noise reduction or other filters. What you use depends both on what you need and what your audio editor can do.
Audio firm iZotope, for instance, sells a series of filters starting with Nectar Elements which is currently $30. It includes a Vocal Assistant feature which applies filters to make your voice stand out.
If you're not recording in an ideal place, though, look for what's called a high-pass filter. This will keep your voice clear while reducing the amount of hum and hiss from your location.
Nothing beats being in a great studio space but filters and software help.
Audition and other stories
You've gathered that we like Adobe Audition. It's available through the Creative Cloud program and we would recommend it even as we would also admit that it might be a bit of overkill for making podcasts. So is Logic Pro X and if you work with that extraordinarily powerful audio tool, of course you'd use it for this because you know it.If you don't know Logic and have yet to do any audio editing at all, though, take a look first at Audacity. Where Logic Pro X costs $200 and Adobe Audition is a subscription starting at $20.99 per month, Audacity is free.

Audacity
We have absolutely no problem at all with paying for apps and most especially not when they're software that will be essential to our work. So we don't recommend Audacity because it's free. Instead, we recommend it because for what you need as a podcaster, it's excellent.
All of these apps let you cut out sections of audio, move them around, replace them and so on. It might take you a time to learn how to do it, but you will be able to edit out individual syllables from a voice recording. Although if you ever find yourself doing that kind of surgery on a track, just re-record it.
And on to the world
Eventually, though, the production is over, and you're going to have to stop and get the finished audio out to the world. Apple's iTunes doesn't host podcasts, it just points people to where they are stored.So, your audio file has to physically go somewhere such as on your website. It's not always practical to have them hosted on your website's storage space, though, as you're likely to have a limitation on how much you can store there and how much data can be served from your site to your audience. Podcasts are going to hit both those limitations quickly.
So instead you can use a hosting service such as SoundCloud or many others. These are still going to have some limitations when you use their free versions but the paid tiers are still better than paying your own website host.
SoundCloud, for instance, has a Basic account which is free and lets you have up to three hours of audio material. Once it's there, you get an RSS feed address for it and you can submit that to other services such as iTunes. To get as many hours of podcast as you need, use SoundCloud Pro Unlimited instead. That costs $16 per month or $144 per year.
There are other dedicated podcast host companies such as Podiant, which currently costs $12.99 per month, or blubrry which is a similar $12 per month.
Whichever you use, you get space to save your podcast audio and also an RSS address. Take that address to Apple's iTunes and the firm's http://podcastsconnect.apple.com. With iTunes and alternatives such as Stitcher or TuneIn you give them that URL address and they list your podcast in their directory.
In every podcasting hosting service, there are similar avenues to point services beyond iTunes like Spotify and Google Podcasts at your RSS feed, but we leave those as an exercise for the reader.
Spread the word
The final step in every episode of every podcast is telling people about it. Write a blog post for your website every time you release an episode, for instance, and Tweet about it, put it on Facebook, and figure out an image to use for it on Instagram.Podcasts grow slowly and they need a lot of promotion. However, the best promotion in the world will only get you attention for a while. You need to have created a podcast worth listening to if you're to stand out.

Comments
Any chance AppleInsider could team up with them to offer a software discount?
Most of the times I'm left to let others use zoom, skype, hangouts, fb messenger to make the phone calls. I'll definitely look into getting these Rogue Ameoba apps, should've checked on black Friday for discounts
Further, one in a great while you’ve already edited your podcast and converted to MP3 only to notice a mistake at that stage. The Fission app from Rogue Amoeba can deal with that quick edit without having to wait around re-compressing (and thus losing sound quality).
Honestly, I wish Fission would handle multiple tracks like Audacity does - then I'd go all in on Fission.
Also, check out a service/tool for levels, noise reduction, etc. called Auphonic. I'm not sure how it stacks up against the combo of tools in the high end apps, but for the price (free up to a certain amount of monthly audio), it is hard to beat.
https://auphonic.com
And, as for hosting services, you failed to mention arguably the top (and oldest) service, Libsyn. Blubrry is also excellent, but I'd probably pick Libsyn for a few reasons I could elaborate on if anyone is interested. In fact, while I might get disagreed with by the AI staff, I'd argue one should have a pretty good reason not to go with either Libsyn or Blubrry.