How to make an external bootable drive in macOS Sequoia

Apple makes it harder to make an external boot drive for your Mac than it has in the past, but sometimes you still need to do it. Here's how to do it in macOS Sequoia.
All of these drives can get Sequoia. Here's how.
and macOS may be excellent, but when a Mac won't start up, having the option to boot from an external drive is key. It will help with diagnosing the problem, and at worst it can mean your being able to carry on working after just a few minutes.
Being able to boot up any Mac from an external drive you happen to have with you is a potential security risk, though, and Apple is not having that. You now have to make a deliberate, positive choice to disable an element of macOS security in order to even start.
Take extreme care
Not only will you be actively turning off a security feature, you'll also have to erase the external drive you want to boot from. You know that accidentally erasing your Mac's own internal drive would be disastrous, you know you wouldn't do that deliberately.
Yet despite that and despite the Mac double-checking you mean what you're doing, it is still possible to make a mistake.
Consequently, the short answer to how you make a bootable external working drive is very, very carefully -- and only after you've backed up everything.
You've simply got to make a backup of anything on the external drive that you want, because that's all going away. It isn't strictly necessary to back up your Mac's internal drive, but do it anyway.
Use Apple's Disk Utility to format the external drive
Maybe you'll just have a spare copy of your data, but maybe that spare copy will be what you need to get back to work.
Then the job entails two steps:
- Allowing your Mac to boot from external drives at all
- Preparing a bootable external drive
That first part is crucial, and it is crucial that you do it before you have any problems. If you need to boot from an external drive because your Mac won't start up, you've got to have already done this step because there's no way to do it later.
So while your Mac is fine, take a few minutes to do this enabling of external drives. If you're still on an Intel Mac, the process is different, but for all Apple Silicon Macs you have to go through these same steps.
How to allow external startup drives on Apple Silicon Macs
- Shut down the Mac
- Press the power button and keep it pressed
- Let go when you see one or more drives and an Options section
- Select Options and click Continue
- When the Mac boots into Recovery Mode, select a Mac user you know the password for
- Log in as that user
- Ignore all of the options in the pop-up list and instead choose Startup Security Utility from the Utilities menu
- Click to select the Mac's internal drive and then click Unlock
- Follow the prompts concerning passwords, and select Security Policy
- In the Security Policy window that appears, click to select Reduced Security
- Then click OK
- Under the Startup Disk menu at top left of your screen, choose Shut Down
Now your Mac is ready. You can plug in an external drive to start up from it -- except you now need to prepare that drive.
How to create an external, bootable work disk with macOS Sequoia
Not every external drive will do, but most will. The ones to ignore are the cheapest flash drives, though, as this works even with many USB sticks.
The external drive should preferably be a fast one. It definitely has to be a single drive -- you can't start up your Mac by plugging in any kind of RAID array of drives.
You can use a spinning hard drive, and those are available cheaply. But this is something where you need reliability, so go for one of the current best external SSDs.

Be so careful to choose the right drive
And of course the drive has to have macOS Sequoia on it.
So next you format the drive, then you put the macOS installer onto it.
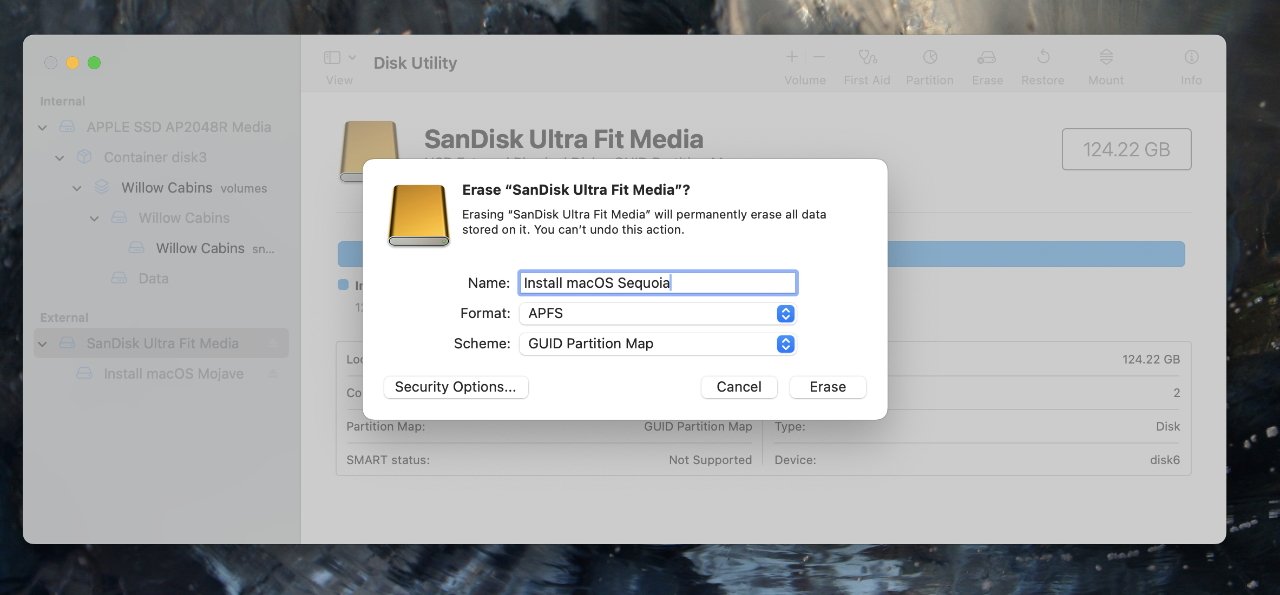
How to format an external drive on macOS Sequoia
- Connect your external drive to your Mac
- Open Disk Utility in Applications, Utilities on your Mac
- Carefully select the external drive from the list that appears
- Click on Erase
- Give the drive a name
- From the dropdown menus that appear, choose APFS
- Click on Erase
Under Apple Silicon, this is likely to take only moments. When it's done, the drive is ready, and you can go get macOS Sequoia from the Mac App Store -- but you need to look in the right place.
Even as Apple promotes a new macOS on the App Store, it may not give you a link to a downloadable installer. Instead, search the Mac App Store for "macOS Sequoia," and you'll find it.
From the list of search results that appears, click on View, then when you see it, Get. Important -- it's going to look exactly as if you're about to install macOS Sequoia on your Mac's internal drive, but you are not.
It looks like that because you are bounced from the App Store to the Settings app, and its Software Update section. After a few moments, however, a popup asks whether you want to download the OS. Click on the Download button to say yes.
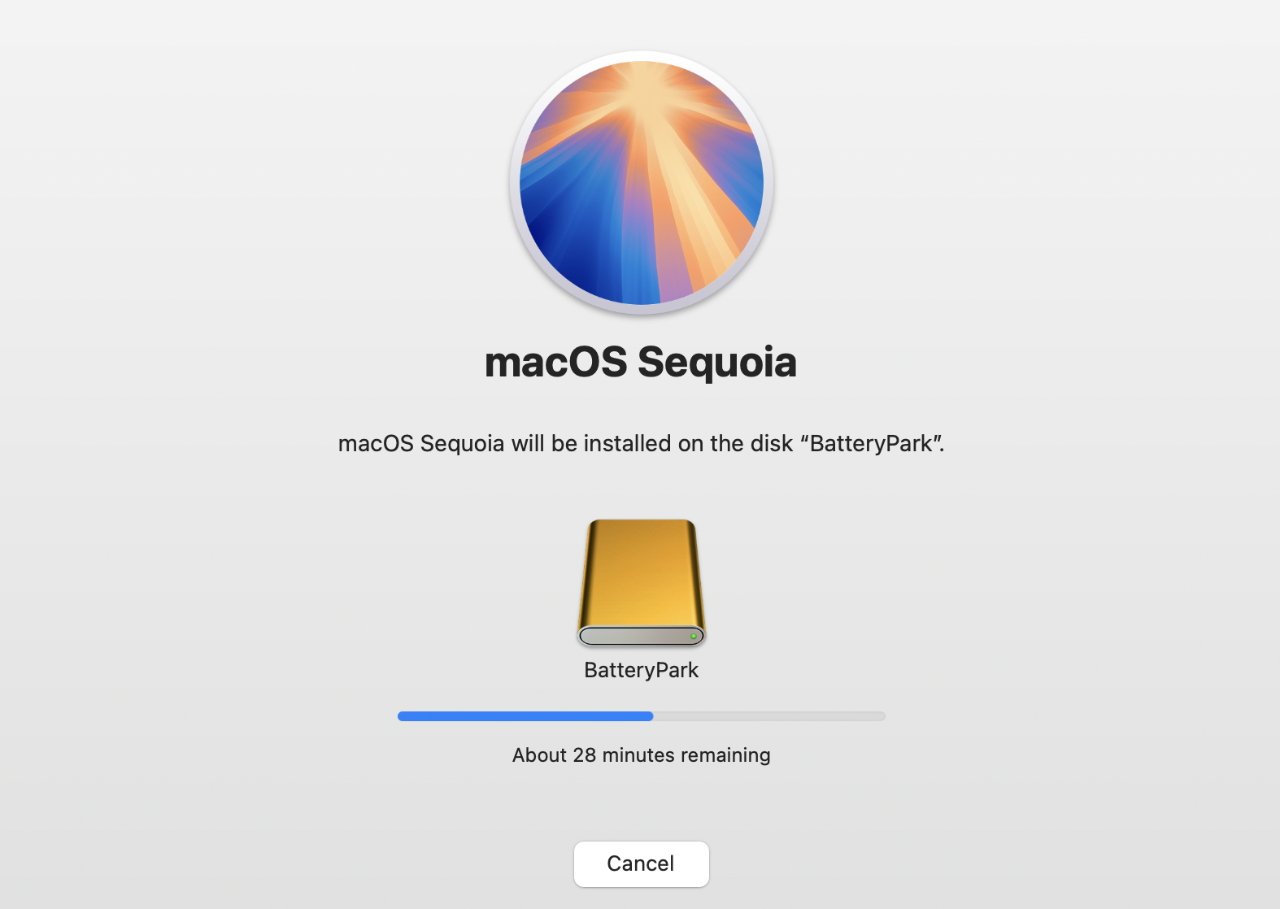
Don't think you can go make coffee and lunch, the time remaining is an estimate that tends to be overly cautious
Once it is downloaded, then you are prompted to install. While that is what you want, take a moment first to find the installer in the Finder. It will be called "Install macOS Sequoia" and is about 14.5GB is size.
Find it and make a copy somewhere. If you later want to install macOS Sequoia on different Macs, or if you just need to start again with your current one, it's handy to have that file available.
Nonetheless, you downloaded it to install it on your external drive and assuming that drive is now formatted, you can just follow the prompts. Be certain, though, be absolutely certain, that you have selected that external drive first.
The next step takes several minutes, although you have nothing to do during that time but wait. When it's ready, the Mac will ask you to restart it and will also caution that it may then restart itself several times.
You now have an external startup disk with macOS Sequoia on it
In theory, you're finished now, but in practice installing a copy of macOS anywhere sets the Mac off asking you questions. It will try to prompt you through questions about location, Siri, and so on.
It will try very hard, but you don't need to answer everything. While Apple seems to have made this deliberately hard to spot, there will always be a "Set Up Later" or similar button somewhere on the screen.
You may find that your fresh, new installation of macOS Sequoia on the external drive abruptly launches the same macOS Sequoia installer. Just quit it.
What to do next
You made this drive bootable for a reason, and whether that's because you suspect a particular problem, or you just want to be careful, you need to do one thing next. You need to startup the Mac from this drive, just to be certain that it works.
It almost certainly will. The only possibility where it might not is if there is an issue with the external drive.
Typically that means there's a fault or that the drive isn't fast enough. What you'll almost certainly find is that even when it works, though, the external drive will not be as fast as your internal one.
The result is that you'll feel your Mac is slower. It's possibly Apple's way of saying you need to get that internal drive fixed sharpish.
Assuming that you can put up with a slower Mac if it means you can carry on working, you do also need to make sure that you have the tools you need to do that work. So while it's probably not worth copying everything over from your Mac to this drive, at least make sure that the major applications you use are there.
With a slower Mac and perhaps not all of your applications available, booting from an external drive is a compromise. But it's a compromise we need in order to fix problems or work around them.
So it's good that Apple has made it so that by default, random strangers can't boot your Mac from their drive. But it's a relief that Apple hasn't made it impossible for us to -- as long as we prepare in advance.
Read on AppleInsider
Comments
The super-crucial part of this, as emphasised in the article is for there to be existing backup(s) of the user’s data. Time Machine is the preferred “set it and forget it” method for most people, as they have to pay no attention to it for the next few years once it is in place.
That said, it’s worth checking the Time Machine drive health every few weeks/months and verifying that it is still doing the job. A quick check to see when the most recent backup was done should quickly let you know if everything’s all right.
For example, buy mac mini and open the box and connect external ssd and then start the mini with power button hold to install macos without initial set up on mini.