Hands on: Pixelmator Photo is king of the iPad photo editing apps

Since Pixelmator Photo is now available for iPad, AppleInsider takes you on a deep dive of the features and performance you can expect from the latest tablet-bound image editor.
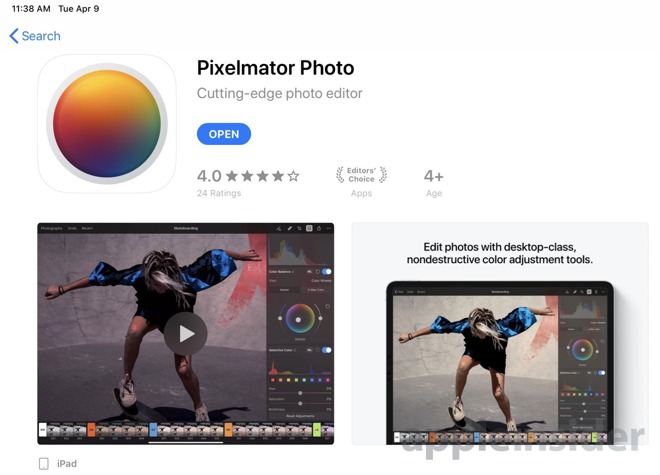
Pixelmator Photo on iPad App Store
We've spent quite a bit of time using the original Pixelmator on our Mac, as well as the more powerful Pixelmator Pro. On iOS, we've utilized the original Pixelmator app but wanted more dedicated to photos -- and with Pixelmator Photo, that's just what we got.
Pixelmator Photo is a fast, capable photo editor that could easily handle anything we threw at it. Compared to other editors we're fond of -- such as Darkroom -- Pixelmator Photo didn't go from the iPhone to the iPad. It was designed from the beginning for Apple's tablets.
We first saw Pixelmator Photo at Apple's iPad Pro event last fall and have been eagerly awaiting the release ever since. For the past month or so we've been editing our best shots using the beta of Pixelmator Photo and were overwhelmingly impressed with its abilities.

Pixelmator Photo
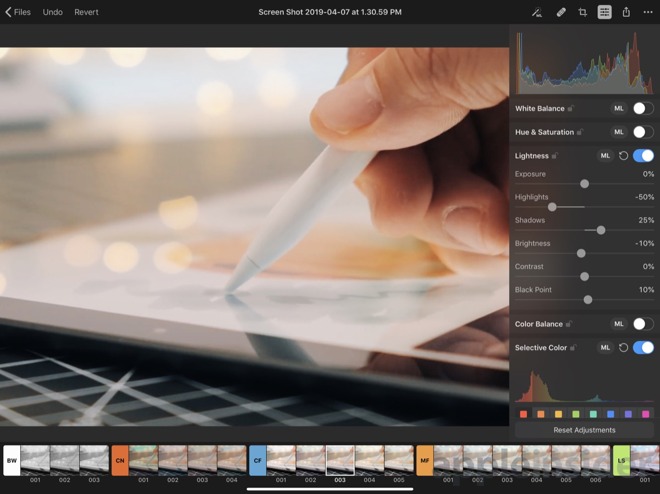
From the top left, you can head back to the file selector, undo, or revert. This is important because everything in Pixelmator Photo is non-destructive so no matter how much editing you do, you can always go back to the original.
On the top right, the auto button, repair control, crop function, adjustments, export, and more are placed.
As you open different controls, they elegantly slide over the image without being burdensome. They even make use of popover so multiple elements could be open at the same time such as the adjustments panel and the "more" menu. It all feels very natural and fluid.
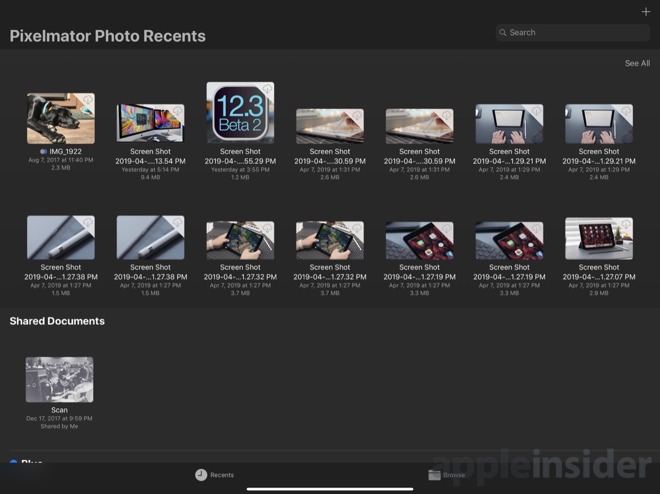
Pixelmator Photo iCoud-based file picker
When you launch the app, it will automatically have any recent images ready to go. That doesn't necessarily mean recent images you've opened with Pixelmator, but rather any stored on iCloud Drive. As an example, as we prepared our iMac 5K review, we had screenshots and other images littered across our desktop. Those images were then instantly available the second we opened the Pixelmator Photo app. Saying this is handy is an understatement.
A proper image workflow has been a bit of a rough point for iOS users and Pixelmator has done a great job simplifying this. It is painless to manage images on our Mac, and as long as they are in iCloud, it is just as easy to edit them on our tablet. This has made our iPad Pro our preferred device for image editing. At least the bulk of the time.
Pixelmator Photo
One of the biggest, flagship features of Pixelmator Photo is machine learning. Pixelmator has leaned on Core ML to automatically improve photos. In our time with Pixelmator Photo, this has been spot on more often than not. It really does an amazing job adjusting the image. Frequently we'd just hit that and be on our way. If there was a particular look or effect we were trying to achieve however, we went manual.
This even applies to crop, where ML will automatically crop it so the subject is perfectly framed.
As you dig into the manual adjustments, each section can be toggled on/off, adjusted, or automatically set with the Machine Learning button that does its best to make it look as it should. We appreciated the ability to not just automate the entire photo using ML, but each individual adjustment type.
All of the tools were designed for touch, rather than a desktop UI. A few of the most intuitive controls include the Color Balance, Selective Color, and the Curves. Color Balance has a color wheel you can drag the selector in as well as adjustments on either side to tint your image. Curves shows a live histogram as you move the line around and add inflection points.
When adjusting, there are several pre-designed filters along the bottom that were "inspired by pro photography" as well as your own that you create. The list is quite extensive, but it isn't the most filters we've seen in an editing app. They all are pretty solid and of course, you can tweak them once applied to dial in your look.
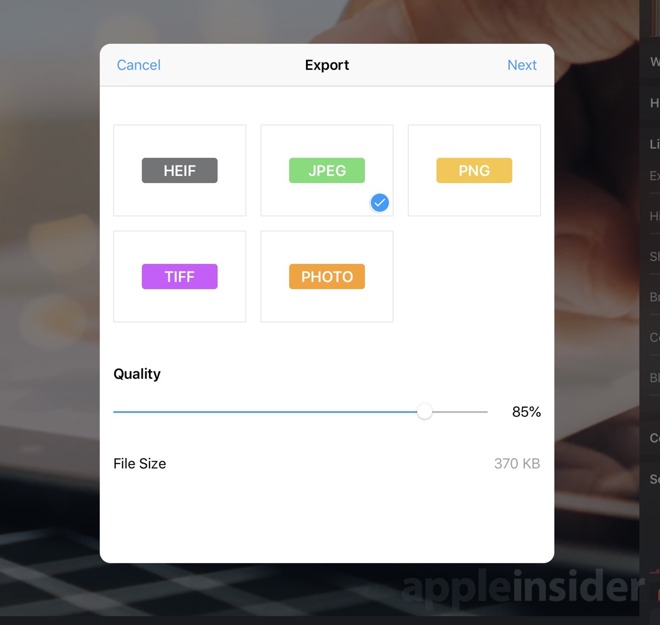
Pixelmator Photo export interface
When you're finished editing an image, you have three options -- modify the original in the Photos app, save the image to photos, or export it via the Share Sheet. Using the first option is unavailable if you didn't open the original from the Photos app, which was usually the case for us as we opened from iCloud Drive. When using the export option, you first get an export screen that allows you to choose the format (HEIF, JPEG, PNG, TIFF) and the quality. It even gives you a prediction of file size before you proceed. Then the Share Sheet appears with all the common destinations.
We love the layout, the abilities, and the amazing performance for such a low price. Editing on our tablet is much more convenient than always sitting down at our computer. In iOS 12, Apple really improved the camera import flow which makes getting photos from your shooter to your tablet all the easier.
If you want to try out Pixelmator Photo for yourself it is available now on the App Store.
Pixelmator Photo on iPad App Store
We've spent quite a bit of time using the original Pixelmator on our Mac, as well as the more powerful Pixelmator Pro. On iOS, we've utilized the original Pixelmator app but wanted more dedicated to photos -- and with Pixelmator Photo, that's just what we got.
Pixelmator Photo is a fast, capable photo editor that could easily handle anything we threw at it. Compared to other editors we're fond of -- such as Darkroom -- Pixelmator Photo didn't go from the iPhone to the iPad. It was designed from the beginning for Apple's tablets.
We first saw Pixelmator Photo at Apple's iPad Pro event last fall and have been eagerly awaiting the release ever since. For the past month or so we've been editing our best shots using the beta of Pixelmator Photo and were overwhelmingly impressed with its abilities.
UI and layout
The app itself is very well arranged. Most controls appear on the right side, with occasional sliders and filters available along the bottom. This leaves the bulk of the display dedicated to content.Pixelmator Photo
From the top left, you can head back to the file selector, undo, or revert. This is important because everything in Pixelmator Photo is non-destructive so no matter how much editing you do, you can always go back to the original.
On the top right, the auto button, repair control, crop function, adjustments, export, and more are placed.
As you open different controls, they elegantly slide over the image without being burdensome. They even make use of popover so multiple elements could be open at the same time such as the adjustments panel and the "more" menu. It all feels very natural and fluid.
Pixelmator Photo iCoud-based file picker
When you launch the app, it will automatically have any recent images ready to go. That doesn't necessarily mean recent images you've opened with Pixelmator, but rather any stored on iCloud Drive. As an example, as we prepared our iMac 5K review, we had screenshots and other images littered across our desktop. Those images were then instantly available the second we opened the Pixelmator Photo app. Saying this is handy is an understatement.
A proper image workflow has been a bit of a rough point for iOS users and Pixelmator has done a great job simplifying this. It is painless to manage images on our Mac, and as long as they are in iCloud, it is just as easy to edit them on our tablet. This has made our iPad Pro our preferred device for image editing. At least the bulk of the time.
Editing imagery
Pixelmator Photo supports over 500 RAW formats which means even our newer Nikon Z 7 was supported.Pixelmator Photo
One of the biggest, flagship features of Pixelmator Photo is machine learning. Pixelmator has leaned on Core ML to automatically improve photos. In our time with Pixelmator Photo, this has been spot on more often than not. It really does an amazing job adjusting the image. Frequently we'd just hit that and be on our way. If there was a particular look or effect we were trying to achieve however, we went manual.
This even applies to crop, where ML will automatically crop it so the subject is perfectly framed.
As you dig into the manual adjustments, each section can be toggled on/off, adjusted, or automatically set with the Machine Learning button that does its best to make it look as it should. We appreciated the ability to not just automate the entire photo using ML, but each individual adjustment type.
All of the tools were designed for touch, rather than a desktop UI. A few of the most intuitive controls include the Color Balance, Selective Color, and the Curves. Color Balance has a color wheel you can drag the selector in as well as adjustments on either side to tint your image. Curves shows a live histogram as you move the line around and add inflection points.
When adjusting, there are several pre-designed filters along the bottom that were "inspired by pro photography" as well as your own that you create. The list is quite extensive, but it isn't the most filters we've seen in an editing app. They all are pretty solid and of course, you can tweak them once applied to dial in your look.
Pixelmator Photo export interface
When you're finished editing an image, you have three options -- modify the original in the Photos app, save the image to photos, or export it via the Share Sheet. Using the first option is unavailable if you didn't open the original from the Photos app, which was usually the case for us as we opened from iCloud Drive. When using the export option, you first get an export screen that allows you to choose the format (HEIF, JPEG, PNG, TIFF) and the quality. It even gives you a prediction of file size before you proceed. Then the Share Sheet appears with all the common destinations.
Should you buy it?
Yes. That is the easy, simple answer here. We consider the app to be cheap at only $4.99. That is also a one-time purchase, unlike Photoshop that requires the monthly subscription.We love the layout, the abilities, and the amazing performance for such a low price. Editing on our tablet is much more convenient than always sitting down at our computer. In iOS 12, Apple really improved the camera import flow which makes getting photos from your shooter to your tablet all the easier.
If you want to try out Pixelmator Photo for yourself it is available now on the App Store.
Comments
when Photoshop arrives, we’ll see if it provides what all these apps are missing.
Also, I tend to be disappointed in the Repair Tool. It does a decent job when touching up tiny spots, but anything larger tends to look poor with even minimally complex backgrounds. For instance, in the same photo there is a chain from a swing I wanted to remove. In the background it’s mostly grass, trees and sky. But there is a sidewalk that crosses almost the entire shot. The chain covered part of the sidewalk and when I attempted to remove the chain with the Repair Tool the sidewalk behind the chain became noticeably offset vertically from the rest of the sidewalk. It clearly looks wrong. The grass, trees and sky looked decent but a careful examination would reveal the repair. I usually get better results using a clone tool, but that isn’t available in Pixelmator Photo.
Hopefully these types of things will be addressed in a future update or as the ML gets better.
This is exactly the sort of thing I use Pixelmator on the Mac for, so shifting to the iPad for it sounds delightful and the price is definitely worth "blowing" even if you only use it rarely.
That said, for those of us who still prefer to edit on Macs for the bigger screens -- Luminar is pretty damn great and also very affordably (one-time) priced, so be sure to give that a look as well.
Kudos to Pixelmator!
On that note, I was wondering if it is possible to import filters into Pixelmator Pro. I remember that option when I used Photoshop ages ago (v7, I think).
Also their "repair" function is a removal tool It try's to remove a selection. While cool its not really repairing.
whatever these apps are, and some are pretty good, we still have to wait for the full Photoshop. It may be great, and define the market, as it’s done for pro users all over, or it may be a dud. There’s no way to know. Otherwise, everything else is out there, and hoping to be the next PS. So far, none have been. They all have a major flaw of some kind, and minor operational annoyances or lack. I find I need to go from one app to the next to get things done too often. Fortunately, I’m not doing Pro work anymore with this.
if PS can centralize the feature sets, as they do on the desktop now, then a lot of these apps will fall by the wayside, or struggle to keep up.
For the Mac, I combine Skylum Luminar as the darkroom and Pixelmator Pro, just as I earlier used Lightroom as my darkroom and Photoshop. Skylum and Pixelmator are stars on the creative sky!